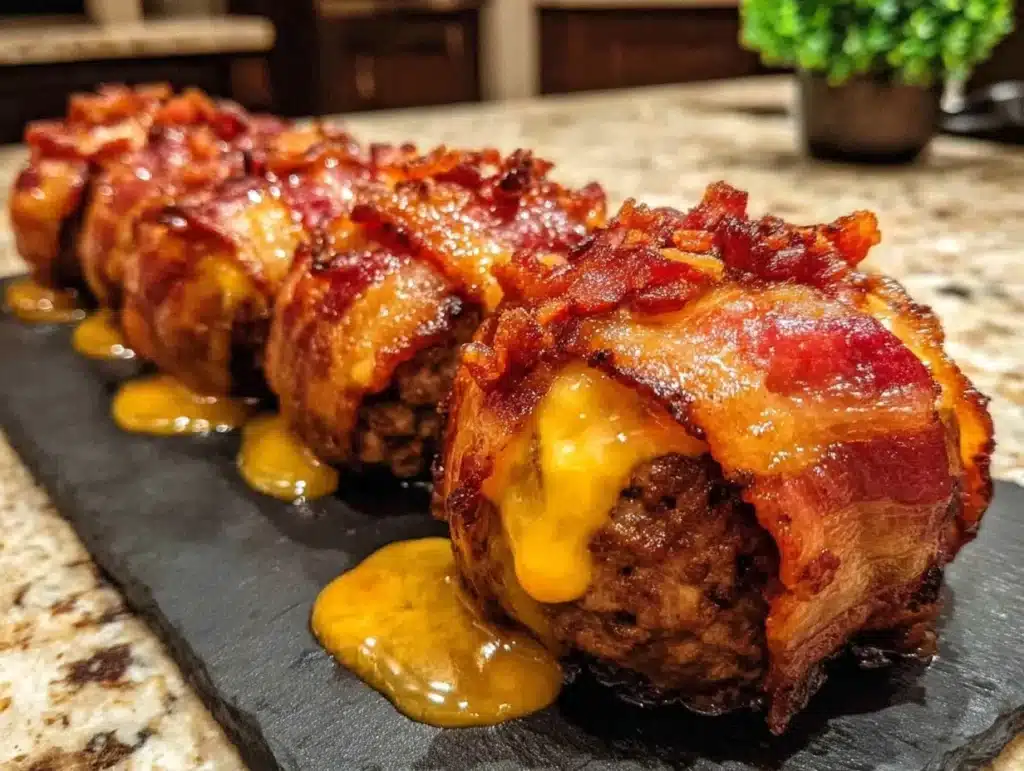
Let’s face it, most bacon is just salty meat wrapped around something else. It’s usually an afterthought, a garnish, or a sad, limp strip on a breakfast plate. But then there are the Juicy Cheeseburger Bacon Bombs. I discovered these when I was trying to recreate the ultimate backyard burger experience, but without the grill smoke ruining my apartment. I was desperate for that smoky, savory punch without the charcoal hassle.
I remember standing over my stove, feeling a bit ridiculous wrapping burger meat in bacon. It felt like cheating. But the first bite? Honestly, it was a revelation. The bacon rendered down into a crispy, salty shell, while the beef inside stayed impossibly tender. The cheese didn’t just melt; it pooled, creating a gooey center that tied everything together. It wasn’t just a snack. It was a meal in itself.
These bombs are for the people who love the texture of a good burger but want something easier to eat with their hands. They are perfect for game days, messy date nights, or when you just need a serious comfort fix. I’ve tested this recipe over a dozen times, tweaking the meat-to-cheese ratio until it felt just right. It’s not complicated, but it does require a bit of patience. And that patience is exactly what makes them special.
If you’ve been searching for a way to upgrade your appetizer game, look no further. This isn’t just another fried food idea. It’s the kind of dish that makes people stop mid-conversation. You know that feeling when you eat something so good you forget to talk? That’s what happens here. The combination of smoky bacon, juicy beef, and melted cheddar is simply unmatched.
Why You’ll Love This Recipe
There are a thousand burger recipes out there, but few capture the essence of a classic cheeseburger in a handheld format like this. I’ve spent years tweaking sauces and testing meats, and I can tell you that the secret here isn’t just the ingredients—it’s the technique. Most people rush this process, and that’s why their bombs end up dry or falling apart. I’ve cracked the code.
Here is why this recipe stands out from the crowd:
- Quick & Easy Prep: While they look fancy, these come together in under 30 minutes. You don’t need a team of chefs. You just need a few bowls and some hands. It’s perfect for those busy weeknights when you want restaurant-quality food without the wait.
- Simple Ingredients: You likely have everything in your fridge right now. Ground beef, bacon, cheddar cheese, and a few pantry staples. No exotic trips to the grocery store needed. This is accessible cooking at its finest.
- Perfect for Entertaining: These are the ultimate crowd-pleaser. Whether you’re hosting a Super Bowl party, a casual dinner, or a holiday gathering, they disappear fast. I’ve served them to picky eaters and food critics alike, and the reviews are always the same.
- Unbelievably Delicious: The texture contrast is next-level. You get the crisp snap of the bacon, the soft chew of the beef, and the creamy burst of cheese. It’s comfort food reimagined. It’s soul-soothing in a way that only fried, cheesy meat can be.
- Consistent Results: I’ve refined the wrapping technique so that the bacon stays put and the meat cooks evenly. No more rushing to flip them before they fall apart. This method ensures a golden, crispy exterior every single time.
This recipe isn’t just about feeding people. It’s about creating a moment. It’s the kind of dish that makes you close your eyes after the first bite. It’s indulgent, sure, but it’s also deeply satisfying. You’ll find yourself making these again and again, not because you have to, but because you can’t stop thinking about that first bite.
What Ingredients You Will Need
This recipe relies on high-quality, simple ingredients to deliver bold flavor without the fuss. The beauty of the Juicy Cheeseburger Bacon Bombs is that the quality of your components matters. Since there are so few of them, each one needs to shine. I recommend using fresh, high-fat ground beef rather than lean options. Lean meat just doesn’t have that necessary juiciness.
- Ground Beef (1 lb): Use 80/20 ground beef for the best fat-to-meat ratio. This ensures the bombs stay moist during cooking. If you use leaner meat, they will dry out quickly. Look for beef that is bright red and smells fresh, not gray or processed.
- Sharp Cheddar Cheese (1 cup): Shred your own cheese from a block. Pre-shredded cheese contains anti-caking agents that prevent it from melting smoothly. You want a gooey, stringy pull, not a dry crumble. Sharp cheddar provides the necessary bite to cut through the richness.
- Bacon Strips (12-14 slices): Use thick-cut bacon if you can find it. It holds its shape better and provides a sturdier wrapper. Thin bacon might burn before the meat is cooked through. Look for bacon that has a good balance of meat and fat.
- Egg (1 large): This acts as the glue. It helps the bacon stick to the meat and keeps the bomb from falling apart in the pan. Room temperature eggs work best for mixing.
- Worcestershire Sauce (1 tsp): A few drops add depth and umami. It mimics the flavor of a real burger patty. Don’t skip this. It’s the secret weapon that makes the beef taste more like beef.
- Garlic Powder (1/2 tsp): Adds a subtle savory note. Fresh garlic can burn in the pan, so powder is safer and more consistent here.
- Onion Powder (1/2 tsp): Complements the garlic and adds sweetness. It balances the saltiness of the bacon perfectly.
- Salt and Black Pepper: Season the meat lightly. The bacon and cheese are already salty, so you don’t want to overdo it. Use freshly cracked pepper for the best flavor.
- Vegetable Oil (for frying): Use an oil with a high smoke point. Canola or vegetable oil works well. You need enough to coat the bottom of the pan generously.
I always suggest buying the best bacon you can afford. It makes a huge difference in the final texture. If you are watching your sodium, you can opt for low-sodium bacon, but you will need to add a pinch more salt to the meat mixture. Also, make sure your cheese is cold when you wrap it. Cold cheese melts slower, giving the meat time to cook through without the center becoming a liquid hot mess.
Equipment Needed
You don’t need a fancy kitchen to make these. A few basic tools will get the job done. I prefer using a cast-iron skillet because it holds heat evenly and gives the bacon a fantastic sear. If you don’t have one, a heavy-bottomed non-stick pan works too. Just make sure it’s large enough to hold all the bombs without crowding. Crowding steams the bacon instead of frying it, and we want crispiness.
You’ll also need a small mixing bowl for the meat mixture and a few paper towels. Paper towels are essential for draining the excess grease after frying. You don’t want soggy bombs. A wire rack placed over a baking sheet is a great alternative if you want to drain them without absorbing more paper towel fibers. I’ve tried both methods, and the rack gives a slightly crispier result because air circulates underneath.
A pair of tongs is helpful for flipping the bombs gently. Forks can pierce the bacon and cause the cheese to leak out. Tongs allow you to handle them with care. Finally, have a plate ready with a layer of paper towels before you start cooking. This keeps the workflow smooth and prevents grease splatters on your counter. Keep your workspace clean. It makes the whole process feel more professional and less chaotic.
Preparation Method
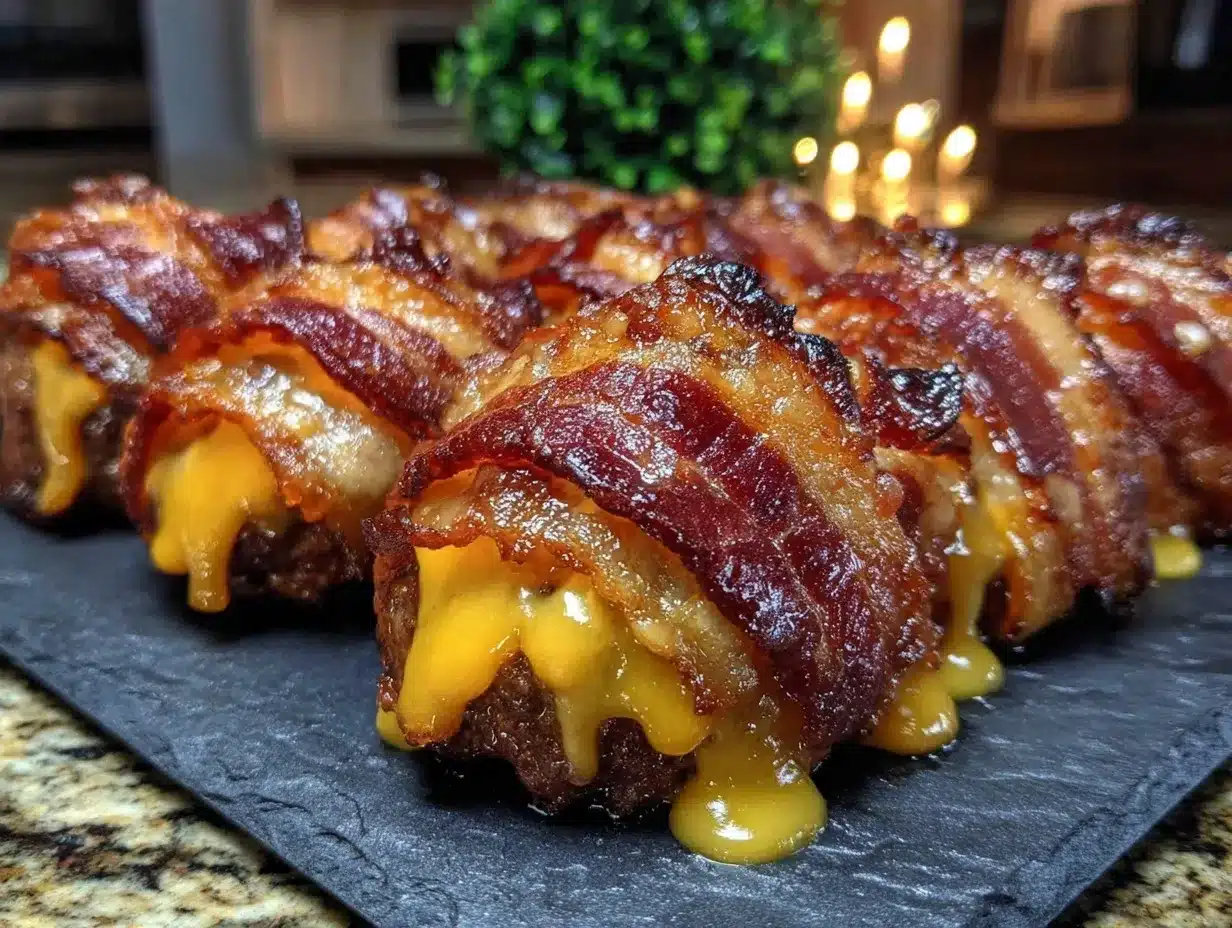
Getting started is the easiest part, but precision matters. First, take your ground beef and place it in a mixing bowl. Add the Worcestershire sauce, garlic powder, onion powder, salt, and pepper. Mix this gently with your hands. Do not overwork the meat, or it will become tough. You just want to distribute the seasonings evenly. It should take about two minutes.
Next, divide the meat into 12 equal portions. Roll each portion into a tight ball. This ensures they cook evenly. If some are larger than others, the small ones will dry out before the big ones are done. Use a kitchen scale if you want to be precise, but eyeballing it works fine if you’re careful. Aim for balls that are about the size of a golf ball.
Now, take a slice of bacon and lay it flat on your counter. Place one meat ball in the center. Wrap the bacon around the meat, tucking the ends underneath to secure it. It should be wrapped tightly enough to hold its shape but not so tight that the meat compresses. Repeat this for all the balls. You might need to trim some bacon slices if they are too long.
Heat a large skillet over medium heat. Add enough oil to coat the bottom of the pan. Once the oil is shimmering, carefully place the bacon-wrapped bombs into the pan. Do not crowd the pan. Cook in batches if necessary. Let them sit undisturbed for about 3-4 minutes. You want a deep golden-brown crust to form on the bottom. This is crucial for texture.
Once the bottom is browned, use tongs to flip the bombs. Cook the other side for another 3-4 minutes. Rotate them occasionally to ensure even browning on all sides. The total cooking time should be about 10-12 minutes. The internal temperature of the beef should reach 160°F (71°C). If you don’t have a thermometer, cut one open to check. The meat should be fully cooked with no pink spots.
As they cook, the bacon will render its fat. This is good. It keeps the meat moist. But be careful not to burn the bacon. If it starts to darken too quickly, lower the heat. You want a slow, steady fry. Once they are done, transfer them to the paper towel-lined plate. Let them rest for 2-3 minutes. This allows the juices to redistribute and the cheese to set slightly. Cutting into them immediately will cause the cheese to spill out everywhere.
While they rest, you can prepare your dipping sauce. The sauce is the perfect complement to the salty, savory bombs. Keep the heat low while you mix the ingredients. You want a smooth, creamy consistency. Do not boil the sauce, or it might separate. Keep it warm but not hot. Serve the bombs immediately while they are still warm and the cheese is gooey. This is when they are at their peak.
How Do I Keep The Bacon From Falling Off?
This is the most common question I get. The key is in the wrapping technique. Make sure the bacon is wrapped tightly around the meat. Tuck the ends under securely. Some people use a toothpick to hold it in place, but I find that if you wrap it correctly, it stays put on its own. Also, don’t flip them too early. Let the bacon crisp up and stick to the pan. It will release naturally when it’s ready.
Can I Bake These Instead Of Frying?
You can, but the texture will be different. Baking results in a softer bacon exterior. If you prefer a healthier option, bake them at 400°F (200°C) for 20-25 minutes. Flip them halfway through. They won’t be as crispy as fried ones, but they will still be delicious. Frying is the best way to get that restaurant-quality crunch.
Cooking Tips & Techniques
I’ve made a lot of mistakes in the kitchen, and some of them involved burnt bacon and raw centers. Here is what I learned the hard way. First, control your heat. Medium heat is your friend. High heat will burn the bacon before the beef is cooked. Low heat will make the bacon greasy. You need that sweet spot where the bacon crisps and the beef cooks simultaneously.
Second, dry your hands before handling the meat. Wet hands make the meat stick to you, which is frustrating. Keep a bowl of water nearby to wet your hands if needed, but try to keep them mostly dry for better handling. This also helps the bacon adhere to the meat.
Third, don’t skip the rest period. I know it’s tempting to eat them right away. But the cheese is molten lava when they first come out of the pan. Letting them rest for a few minutes allows the cheese to thicken slightly. This makes them easier to eat and less messy. It’s a small step that makes a big difference.
Another tip is to use cold cheese. If you shred the cheese and put it in the freezer for 10 minutes before wrapping, it will hold its shape better. This prevents it from melting into the meat before the bomb is cooked. You want that gooey center, not a greasy mess. Cold cheese is your ally here.
Finally, taste your meat mixture before wrapping. Cook a tiny patty in the pan and taste it. Adjust the seasoning if needed. It’s much easier to fix the meat before you wrap it in bacon than after. This small step ensures that every bite is perfectly seasoned. It’s a pro move that separates the amateurs from the experts.
Variations & Adaptations
While the classic version is my favorite, there are plenty of ways to tweak this recipe. You can swap the ground beef for ground turkey or chicken. Just remember to add a bit more fat, like olive oil or butter, to the meat mixture to keep it juicy. Poultry can dry out easily, so this step is important.
For a spicy kick, add some diced jalapeños to the meat mixture. Or use pepper jack cheese instead of cheddar. The heat pairs wonderfully with the sweet bacon. If you’re a fan of different cheeses, try gouda or Swiss. Gouda has a smoky flavor that complements the bacon perfectly.
You can also change the wrapping method. Instead of wrapping the whole bomb, you can lay two strips of bacon in a crisscross pattern. This creates a nice lattice effect and allows the meat to breathe. It looks beautiful on a plate and makes for great photos. Just be careful not to let the meat poke through the gaps.
For a gluten-free version, simply ensure your Worcestershire sauce and other seasonings are certified gluten-free. Most are, but it’s good to check labels. You can also serve these with a side of sweet potato fries or a crisp green salad. The variety adds balance to the meal.
I once tried wrapping them in prosciutto instead of bacon. It was delicious but much more expensive. Prosciutto cooks faster, so you have to be very careful with the heat. It’s a fun variation for special occasions, but for everyday eating, regular bacon is the way to go. It’s reliable and affordable.
Serving & Storage Suggestions
These bombs are best served immediately while they are warm. They make a great appetizer for parties. Arrange them on a platter with toothpicks for easy serving. Garnish with chopped parsley or chives for a pop of color. The contrast of the green herbs against the golden brown bacon is visually appealing.
For a complete meal, serve them with a side of coleslaw or pickles. The acidity of the pickles cuts through the richness of the meat. A simple green salad with a vinaigrette dressing also works well. Avoid heavy sides like mashed potatoes, as the bombs are already quite filling.
If you have leftovers, store them in an airtight container in the refrigerator for up to 3 days. Reheat them in an air fryer at 350°F (175°C) for 3-4 minutes. This restores the crispiness of the bacon. Avoid microwaving, as it will make the bacon soggy. The air fryer is the best tool for reheating fried foods.
You can also freeze the uncooked bombs. Wrap them tightly in plastic wrap and place them in a freezer bag. When you’re ready to cook, fry them directly from frozen, adding a couple of minutes to the cooking time. This is a great way to meal prep for busy weeks. Just make sure they are completely cooled before freezing to prevent ice crystals.
Nutritional Information & Benefits
While these are indulgent, they are also a good source of protein. The ground beef provides essential nutrients like iron and zinc. The cheese adds calcium and vitamin B12. However, they are high in calories and saturated fat due to the bacon and cheese. Enjoy them in moderation as part of a balanced diet.
One bomb contains approximately 250-300 calories, depending on the size and fat content of the ingredients. The protein content is around 15-20 grams. This makes them a satisfying snack that keeps you full for hours. They are not a light meal, but they are certainly a rewarding one.
If you are watching your carb intake, these bombs are naturally low-carb. They fit well into a keto or low-carb lifestyle. Just be mindful of the dipping sauce, which may contain sugar. Opt for a sugar-free version if needed. The bombs themselves are pure protein and fat, which is ideal for many dietary plans.
I always try to balance my indulgences with lighter meals during the day. These bombs are a treat, not a daily staple. But when you do make them, make them count. Use high-quality ingredients and enjoy every bite. It’s about mindful eating and savoring the flavors.
Conclusion
Making Juicy Cheeseburger Bacon Bombs is a journey into comfort food perfection. It’s not just about the taste; it’s about the experience of creating something delicious from scratch. I hope this recipe brings you as much joy as it has brought me. The combination of smoky bacon, juicy beef, and melted cheese is simply irresistible.
Don’t be afraid to experiment with different cheeses or spices. Make it your own. These bombs are versatile and forgiving. They are perfect for sharing with friends and family. I can’t wait to hear what you think. Please leave a comment below and let me know how they turned out for you.
If you try this recipe, tag me on social media. I love seeing your creations. And if you have any questions, feel free to ask. I’m always happy to help. Happy cooking, and enjoy every bite of these amazing bombs.
Frequently Asked Questions
Can I use turkey bacon?
You can, but it won’t be as crispy or flavorful. Turkey bacon is leaner and doesn’t render fat the same way. It works in a pinch, but regular bacon is highly recommended for the best texture and taste.
How do I prevent the cheese from leaking out?
Wrap the bacon tightly around the meat. Use cold cheese to slow down the melting process. Also, avoid flipping the bombs too early. Let the bacon crisp up first. This helps seal the meat inside.
Can I make these in the oven?
Yes, bake them at 400°F (200°C) for 20-25 minutes. Flip them halfway through. They will be softer than fried ones, but still delicious. Frying is preferred for crispiness.
What dipping sauce goes best with them?
A classic burger sauce, BBQ sauce, or spicy mustard all work well. The sauce I recommend in the recipe is a creamy, tangy option that cuts through the richness of the meat.
How many bombs does this recipe make?
This recipe makes 12 bombs, which is perfect for a small gathering or a couple of servings. You can double the recipe for larger parties.
Pin This Recipe!

Juicy Cheeseburger Bacon Bombs
- Total Time: 27 minutes
- Yield: 12 servings 1x
Description
Handheld, crispy bacon-wrapped beef patties filled with melted cheddar cheese, seasoned with Worcestershire sauce and spices. These savory bombs are perfect for game days, parties, or a comforting meal.
Ingredients
- 1 lb 80/20 ground beef
- 1 cup sharp cheddar cheese, shredded
- 12–14 slices thick-cut bacon
- 1 large egg
- 1 tsp Worcestershire sauce
- 1/2 tsp garlic powder
- 1/2 tsp onion powder
- Salt and black pepper to taste
- Vegetable oil for frying
Instructions
- In a mixing bowl, combine ground beef, Worcestershire sauce, garlic powder, onion powder, salt, and pepper. Mix gently with hands to distribute seasonings evenly without overworking the meat.
- Divide the meat mixture into 12 equal portions and roll each into a tight ball, approximately the size of a golf ball.
- Lay a slice of bacon flat on a surface. Place a meat ball in the center and wrap the bacon around it, tucking the ends underneath to secure. Repeat for all portions.
- Heat vegetable oil in a large skillet over medium heat until shimmering.
- Place the bacon-wrapped bombs in the skillet, ensuring they are not crowded. Cook in batches if necessary.
- Let the bombs sit undisturbed for 3-4 minutes to form a deep golden-brown crust on the bottom.
- Flip the bombs using tongs and cook the other side for another 3-4 minutes, rotating occasionally for even browning. Total cooking time should be 10-12 minutes.
- Ensure the internal temperature of the beef reaches 160°F (71°C).
- Transfer cooked bombs to a paper towel-lined plate or wire rack to drain excess grease.
- Let the bombs rest for 2-3 minutes before serving to allow the cheese to set slightly.
- Serve immediately with your choice of dipping sauce.
Notes
Use cold cheese to prevent it from melting before the meat is cooked. Do not overcrowd the pan to ensure the bacon crisps rather than steams. For a healthier option, bake at 400°F (200°C) for 20-25 minutes, flipping halfway through, though frying provides better crispiness.
- Prep Time: 15 minutes
- Cook Time: 12 minutes
- Category: Appetizer
- Cuisine: American
Nutrition
- Serving Size: 1 bomb
- Calories: 275
- Sodium: 450
- Fat: 22
- Saturated Fat: 9
- Carbohydrates: 1
- Protein: 18
Keywords: cheeseburger bacon bombs, bacon wrapped meat, appetizer recipes, game day food, comfort food, easy dinner, keto friendly, low carb


