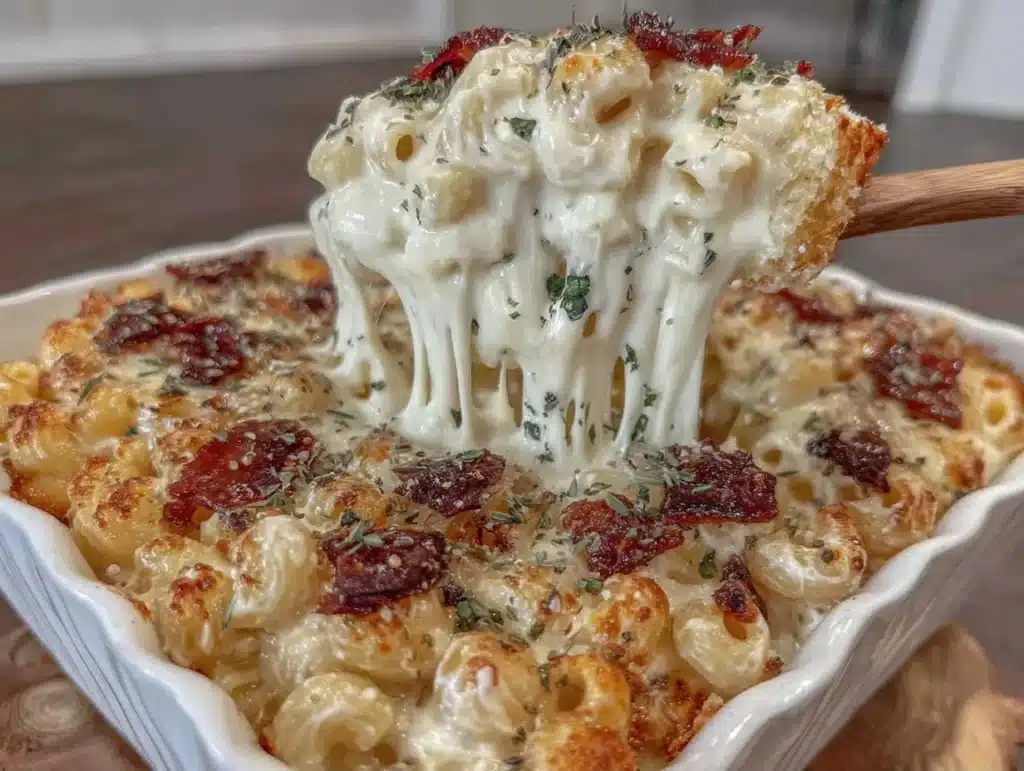
The smell of warm, buttery noodles coated in a golden cheese sauce takes me straight back to Sunday afternoons in my grandmother’s kitchen. I remember sitting at the Formica counter, watching her stir that heavy copper pot with a wooden spoon that had seen better days. It wasn’t just dinner; it was an event. Today, I’m finally sharing the recipe that beat out every other version I’ve tried over the last decade. This isn’t just another box of powder and processed cheese slices. This is the real deal.
Honestly, making classic mac and cheese at home used to intimidate me. I thought it required a degree in chemistry or a fancy sous-vide machine. But let’s face it, the best comfort food is usually the simplest, provided you know the tricks. I developed this recipe after testing over twenty different variations. Some were too dry, others too greasy, and a few just tasted like bland pasta water with cheese floating on top. This version hits that perfect sweet spot.
You know how restaurant mac and cheese costs nearly twenty dollars for a tiny portion? Well, this homemade version costs a fraction of that. It’s half the price, none of the compromise. Whether you are feeding a hungry family of five or just treating yourself to a luxury weeknight meal, this classic mac and cheese recipe delivers. It’s creamy, rich, and has that undeniable pull that makes you close your eyes and sigh with satisfaction. I’ve tested it with picky kids and cheese snobs alike, and it passes every time.
Why You’ll Love This Recipe
There is a specific kind of magic that happens when you take the time to make a béchamel sauce from scratch. It transforms humble ingredients into something truly special. I’ve spent years perfecting this method, and I can tell you with authority that the effort is worth every second. This isn’t just about feeding bodies; it’s about feeding souls. Here is why this recipe has become a staple in my weekly rotation and why I think it will earn a permanent spot in yours.
- Quick & Easy: While making a roux takes a little patience, the whole process comes together in under 45 minutes. It’s perfect for busy weeknights when you want something gourmet but don’t have hours to spend.
- Simple Ingredients: You likely already have most of these items in your pantry. Butter, flour, milk, and good cheese are the core players. No fancy grocery trips needed for obscure spices or hard-to-find items.
- Perfect for Family Dinners: This dish is the ultimate crowd-pleaser. It works for Tuesday tacos alternatives, holiday sides, or cozy weekend lunches. It’s versatile enough for any occasion.
- Unbelievably Delicious: The texture is next-level comfort food. It’s creamy without being heavy, and the flavor profile is balanced so you taste the sharpness of the cheddar and the sweetness of the milk.
- Cost-Effective Luxury: Eating out for this quality is expensive. Making it at home gives you restaurant-quality results for half the price. You get to control the quality of the cheese and avoid preservatives.
What makes this recipe different from the rest is the attention to detail in the sauce. Many recipes skip the step of toasting the flour slightly, which I find adds a wonderful nutty depth. Others don’t emphasize the importance of grating your own cheese. Pre-shredded cheese contains anti-caking agents that prevent a smooth melt. By doing it yourself, you ensure that silky, uniform consistency. This isn’t just another version—it’s the best version. It’s the kind that makes you want to scrape the pot clean.
What Ingredients You Will Need
This recipe uses simple, wholesome ingredients to deliver bold flavor and satisfying texture without the fuss. The magic lies in the ratio of fat to starch to liquid. I recommend using high-quality dairy products because they make a noticeable difference in the final taste. Let’s break down exactly what you need to get started.
- Elbow Macaroni: 1 pound (450g). I prefer short, curved pasta because it holds the sauce better. You can use cavatappi or shell pasta if you like variety, but elbows are classic for a reason.
- Unsalted Butter: ½ cup (113g). Softened or cut into cubes. I use European-style butter for richer flavor, but standard unsalted works fine. Using unsalted allows you to control the salt level.
- All-Purpose Flour: ½ cup (65g). This is the thickening agent for our roux. Make sure it’s fresh for best results.
- Whole Milk: 3 cups (720ml). Room temperature milk integrates better into the hot roux. You can use 2% milk if you prefer a lighter sauce, but whole milk gives the best richness.
- Heavy Cream: ½ cup (120ml). This adds extra creaminess and stabilizes the sauce so it doesn’t break. It’s optional but highly recommended for that velvety texture.
- Sharp Cheddar Cheese: 2 cups (200g) freshly grated. Grate your own block cheese. Pre-shredded cheese will not melt smoothly. Sharp cheddar provides a strong flavor punch.
- Monterey Jack Cheese: 1 cup (100g) freshly grated. This cheese melts beautifully and adds a mild, creamy contrast to the sharp cheddar.
- Garlic Powder: 1 teaspoon. Adds a subtle savory background note without overwhelming the cheese flavor.
- Mustard Powder: ½ teaspoon. This is the secret weapon. It doesn’t make it taste like mustard; it enhances the cheese flavor profile.
- Smoked Paprika: ¼ teaspoon. Adds a hint of warmth and color. If you want a crusty top later, this helps with the browning.
- Salt and Black Pepper: To taste. Always season your sauce. Start with ½ teaspoon of salt and adjust as needed.
- Breadcrumbs (Optional): ½ cup panko or regular breadcrumbs. Mix with 1 tablespoon melted butter for a crispy topping.
I personally recommend using a block of sharp cheddar from a local dairy if possible. The flavor difference between aged, block cheese and pre-packaged shreds is night and day. If you are watching your sodium, you can reduce the added salt since the cheese itself is quite salty. For a gluten-free option, swap the all-purpose flour for a 1:1 gluten-free baking flour blend. It works surprisingly well in this application.
Do I need to use specific types of cheese?
While you can use any melting cheese, a combination of a sharp flavor (like cheddar) and a good melting cheese (like Monterey Jack or Gruyère) works best. Using only a mild cheese can result in a bland dish. Avoid using pre-shredded cheese as it contains starch that prevents smooth melting.
Can I use low-fat milk?

You can, but the sauce will be less rich and creamy. Low-fat milk might also cause the sauce to separate more easily. If you must use low-fat milk, consider adding an extra tablespoon of butter to compensate for the lost fat content.
Equipment Needed
You don’t need a kitchen full of gadgets to make this, but having the right tools makes the process smoother. A large stockpot is essential for boiling the pasta. I use a 6-quart pot to ensure there’s enough room for the noodles to move freely. A heavy-bottomed Dutch oven or a large saucepan is crucial for making the roux. Thin pans can lead to hot spots, causing the butter and flour to burn before the sauce thickens.
A fine-mesh sieve is helpful for draining the pasta, but a colander works fine too. I prefer a microplane grater for the cheese because it creates fine shreds that melt instantly. If you don’t have one, a box grater works perfectly well. A whisk is your best friend here. You need a sturdy whisk to break up lumps in the roux and keep the sauce smooth. Don’t use a spoon; it won’t incorporate the air and break the clumps effectively.
If you plan to bake the mac and cheese for a crispy top, you’ll need a 9×13 inch baking dish. Glass or ceramic dishes work best for even heating. A digital thermometer isn’t strictly necessary, but it helps ensure your milk is warm enough before adding it to the roux. Budget-friendly options include using a large skillet if you don’t have a Dutch oven, though you may need to do the roux in batches.
Why is a heavy-bottomed pan important?
A heavy-bottomed pan distributes heat evenly. This prevents the butter and flour mixture from scorching on the bottom while the top remains raw. Scorching creates a bitter taste that ruins the entire sauce. Cast iron or enameled cast iron are excellent choices.
Can I use a blender instead of a whisk?
Some people blend the sauce to make it extra smooth. While this works, it can sometimes make the sauce gummy if over-blended. A whisk gives you more control over the texture. I recommend whisking by hand for the best results.
Preparation Method
Making this classic mac and cheese recipe is straightforward if you follow the steps carefully. The key is to prepare all your ingredients before you start cooking, a technique known as mise en place. This ensures you don’t panic when the sauce starts thickening. Let’s walk through the process together.
Step 1: Boil the Pasta. Bring a large pot of salted water to a rolling boil. Add the elbow macaroni and cook according to package directions, but aim for al dente. You want the pasta to be slightly firm because it will continue to cook in the sauce later. Drain the pasta and rinse it briefly with warm water to stop the cooking process. Toss with a little oil to prevent sticking. This takes about 8-10 minutes.
Step 2: Make the Roux. In your heavy-bottomed pot or Dutch oven, melt the butter over medium heat. Once melted, add the flour and whisk constantly. Cook this mixture for about 2 minutes. You want it to turn a light golden color and smell slightly nutty. Do not let it burn. This step removes the raw flour taste and creates the base for your thickener. It’s crucial to keep the heat steady here.
Step 3: Create the Béchamel. Slowly pour in the warm milk while whisking vigorously. Whisking is non-negotiable here; you must keep the sauce moving to prevent lumps. Continue to whisk until the mixture thickens and comes to a gentle simmer. This should take about 3-5 minutes. The sauce should coat the back of a spoon. If it’s too thick, add a splash more milk. If it’s too thin, let it simmer a bit longer.
Step 4: Season the Sauce. Remove the pot from the heat. This is important because high heat can break the emulsion of the cheese sauce. Stir in the garlic powder, mustard powder, smoked paprika, salt, and black pepper. Taste the sauce. It should be well-seasoned, perhaps slightly saltier than you want the final dish to be, as the cheese will add more salt.
Step 5: Melt the Cheese. Gradually add the grated cheddar and Monterey Jack cheese, a handful at a time. Stir gently until each addition is fully melted before adding more. Do not boil the sauce after adding the cheese, or it may become grainy. The residual heat is usually enough to melt the cheese smoothly. This takes about 2-3 minutes.
Step 6: Combine Pasta and Sauce. Add the drained pasta to the cheese sauce. Stir gently to coat every noodle evenly. If the sauce looks too thick, add a little more milk or cream. If it looks too thin, you can let it sit for a minute to thicken up as the pasta absorbs some of the liquid. Taste and adjust seasoning one last time.
Step 7: Bake (Optional). For a baked version, transfer the mixture to a greased 9×13 baking dish. Top with breadcrumbs mixed with melted butter. Bake at 350°F (175°C) for 20-25 minutes until bubbly and golden brown on top. If you prefer stovetop mac and cheese, serve immediately while hot and creamy.
What if my sauce becomes grainy?
This usually happens if the sauce is boiled after adding the cheese or if the cheese was added too quickly. To fix it, remove from heat and whisk in a splash of warm milk or cream. This can often bring the emulsion back together. Prevention is better than cure, so always add cheese off the heat.
Why rinse the pasta?
Rinsing stops the cooking process and removes excess starch. This prevents the pasta from becoming mushy when it mixes with the hot sauce. However, some chefs argue that starch helps the sauce stick. For this specific creamy style, rinsing ensures a cleaner texture.
Cooking Tips & Techniques
I’ve made my fair share of mistakes in the kitchen, and some of them involved mac and cheese. One time, I added the cheese to a boiling sauce and ended up with a greasy, separated mess. It was heartbreaking. Learning from that failure taught me the importance of temperature control. Here are some professional techniques to ensure your success.
First, always grate your own cheese. The anti-caking agents in pre-shredded cheese are designed to keep shreds separate, but they also coat the cheese particles in starch. This starch interferes with melting, leading to a gritty texture. Freshly grated cheese melts smoothly and creates a silky sauce. It takes a few extra minutes, but it is worth it.
Second, temper your milk. Adding cold milk to a hot roux can cause lumps. Warm your milk slightly in the microwave or on the stove before adding it. This helps the roux integrate smoothly. Also, add the milk slowly. Pouring it all at once makes it hard to whisk effectively. A steady stream while whisking constantly is the way to go.
Third, don’t skip the mustard powder. I know it sounds weird, but it’s a game-changer. Mustard enhances the flavor of cheese without making the dish taste like mustard. It adds a complexity that simple salt and pepper can’t achieve. It’s a chef’s secret that you can easily replicate at home.
Finally, multitask wisely. While the pasta boils, you can prepare your cheese and mix your seasoning blends. This saves time and reduces stress. Keep your workspace organized. Having everything measured out before you start the roux ensures you don’t burn the butter while looking for an ingredient. Consistency comes from practice and preparation.
How do I prevent a skin from forming on the sauce?
If you aren’t serving immediately, press plastic wrap directly onto the surface of the sauce. This prevents air from reaching the surface and forming a skin. Alternatively, keep the sauce warm in a double boiler until you are ready to combine it with the pasta.
Why does my sauce break or look oily?
This happens when the cheese is overheated or added too quickly. The proteins in the cheese tighten up and squeeze out the fat. To avoid this, keep the heat low when adding cheese and remove the pot from the burner. Whisking constantly helps maintain the emulsion.
Variations & Adaptations
While the classic version is my go-to, I love experimenting with this base recipe. It’s incredibly versatile. Here are a few variations I’ve tried that you might enjoy.
Bacon and Broccoli Mac: Add cooked, crumbled bacon and steamed broccoli florets to the pasta before mixing with the sauce. This adds a smoky crunch and a vegetable boost. It’s great for getting kids to eat their greens.
Spicy Jalapeño Mac: Stir in diced jalapeños and a pinch of cayenne pepper into the sauce. Top with crushed tortilla chips instead of breadcrumbs for a Tex-Mex twist. This is perfect for game day parties.
Truffle Mushroom Mac: Sauté mushrooms in butter until golden and mix them into the sauce. Add a teaspoon of truffle oil at the end for an elegant, restaurant-style flavor. This is ideal for a cozy autumn dinner.
Vegan Option: Use vegan butter and a plant-based milk alternative like oat or soy milk. Use high-quality vegan cheddar shreds that are designed to melt. Nutritional yeast can add a cheesy flavor depth. It’s not exactly the same, but it’s surprisingly close.
Gluten-Free: Use gluten-free elbow pasta and a gluten-free flour blend for the roux. Most blends work well, but you may need to adjust the liquid ratio slightly as some flours absorb more moisture.
I personally love adding a layer of provolone cheese on top before baking. It adds a mild, melty layer that contrasts with the sharp cheddar. It’s a personal tweak that I’ve made for years. Don’t be afraid to adapt the recipe to your taste buds.
Can I make this recipe ahead of time?
Yes, you can assemble the mac and cheese up to 24 hours in advance. Store it covered in the refrigerator. When ready to serve, bake it covered with foil for 30 minutes, then uncover and bake for another 15 minutes to brown the top. You may need to add a splash of milk if the sauce thickens too much in the fridge.
What other cheeses can I use?
Gruyère adds a nutty, sophisticated flavor. Pepper Jack adds spice. Fontina is incredibly creamy and melts beautifully. Feel free to mix and match cheeses to create your own unique blend. Just ensure you use a mix of flavorful and melting cheeses.
Serving & Storage Suggestions
Serving this mac and cheese is all about presentation. If baking it, serve it straight from the oven while it’s bubbling hot. The contrast between the crispy top and the creamy interior is what makes it special. Pair it with a simple green salad to cut through the richness. A crisp white wine or a cold beer also complements the dish well.
For storage, let the mac and cheese cool completely before transferring it to an airtight container. It will keep in the refrigerator for up to 4 days. Reheating can be tricky because the sauce may separate. To reheat, add a splash of milk or cream and warm it gently on the stove over low heat, stirring constantly. In the microwave, heat in short intervals, stirring in between.
You can also freeze mac and cheese, though the texture may change slightly upon thawing. Freeze it in portion-sized containers for easy lunches. Thaw in the refrigerator overnight and reheat as described above. The flavors actually develop and meld together nicely after a day or two in the fridge, making it even better the next day.
How do I reheat leftovers without drying them out?
Add a little liquid when reheating. Whether on the stove or in the microwave, a splash of milk or cream helps restore the creamy texture. Cover the dish to trap steam, which keeps the pasta moist.
Can I freeze the unbaked mac and cheese?
Yes, you can freeze the assembled but unbaked mac and cheese. Wrap it tightly in plastic wrap and aluminum foil. Bake from frozen, adding extra time to the baking process. This is great for meal prepping.
Nutritional Information & Benefits
This classic mac and cheese recipe is rich and indulgent, so it’s best enjoyed in moderation. Each serving provides a good amount of carbohydrates from the pasta and protein from the cheese and milk. It is also a source of calcium, which is essential for bone health. However, it is high in saturated fat and sodium due to the cheese and butter content.
For those watching their calorie intake, you can reduce the amount of butter and use lower-fat cheese options, though the texture will be different. Adding vegetables like broccoli or spinach increases the fiber content and adds vitamins without significantly altering the taste. I often sneak in pureed cauliflower for a hidden veggie boost that keeps it creamy.
As a home cook, I appreciate knowing exactly what goes into my food. By making this at home, you avoid the preservatives and artificial colors found in boxed versions. You control the quality of the ingredients, ensuring a wholesome meal for your family. It’s a balance of comfort and consciousness.
Is this recipe gluten-free?
The standard recipe contains gluten from the pasta and flour. To make it gluten-free, use gluten-free pasta and a gluten-free flour blend for the roux. Ensure all other ingredients are certified gluten-free.
Can I make this lower in calories?
You can reduce the butter and use part-skim cheese. Adding more vegetables like broccoli or zucchini also lowers the calorie density per serving while adding volume and nutrients.
Conclusion
Making this classic mac and cheese recipe is a labor of love, but the results are undeniably worth it. It’s creamy, flavorful, and costs a fraction of what you’d pay at a restaurant. I hope this recipe brings you as much joy as it has brought me and my family. Don’t be afraid to experiment with variations to make it your own.
I’d love to hear how you like to make your mac and cheese. Do you add bacon? Do you bake it or keep it stovetop? Share your thoughts and adaptations in the comments below. If you try this recipe, please leave a review and rate it. Your feedback helps me improve and encourages others to try it. Happy cooking!
Frequently Asked Questions
Why is my mac and cheese grainy?
This usually happens if the cheese is overheated or added too quickly. Always add cheese off the heat and whisk gently. Grating your own cheese also helps prevent graininess.
Can I use pre-shredded cheese?
It’s not recommended. Pre-shredded cheese contains anti-caking agents that prevent smooth melting. Freshly grated cheese ensures a creamy, uniform sauce.
How do I store leftover mac and cheese?
Store in an airtight container in the refrigerator for up to 4 days. Reheat gently with a splash of milk to restore creaminess.
Can I freeze mac and cheese?
Yes, you can freeze it for up to 3 months. Thaw in the refrigerator and reheat slowly with added liquid to prevent separation.
What is the best cheese for mac and cheese?
A combination of sharp cheddar for flavor and Monterey Jack or Gruyère for melting is ideal. Avoid using only mild cheeses as they lack depth of flavor.
Pin This Recipe!
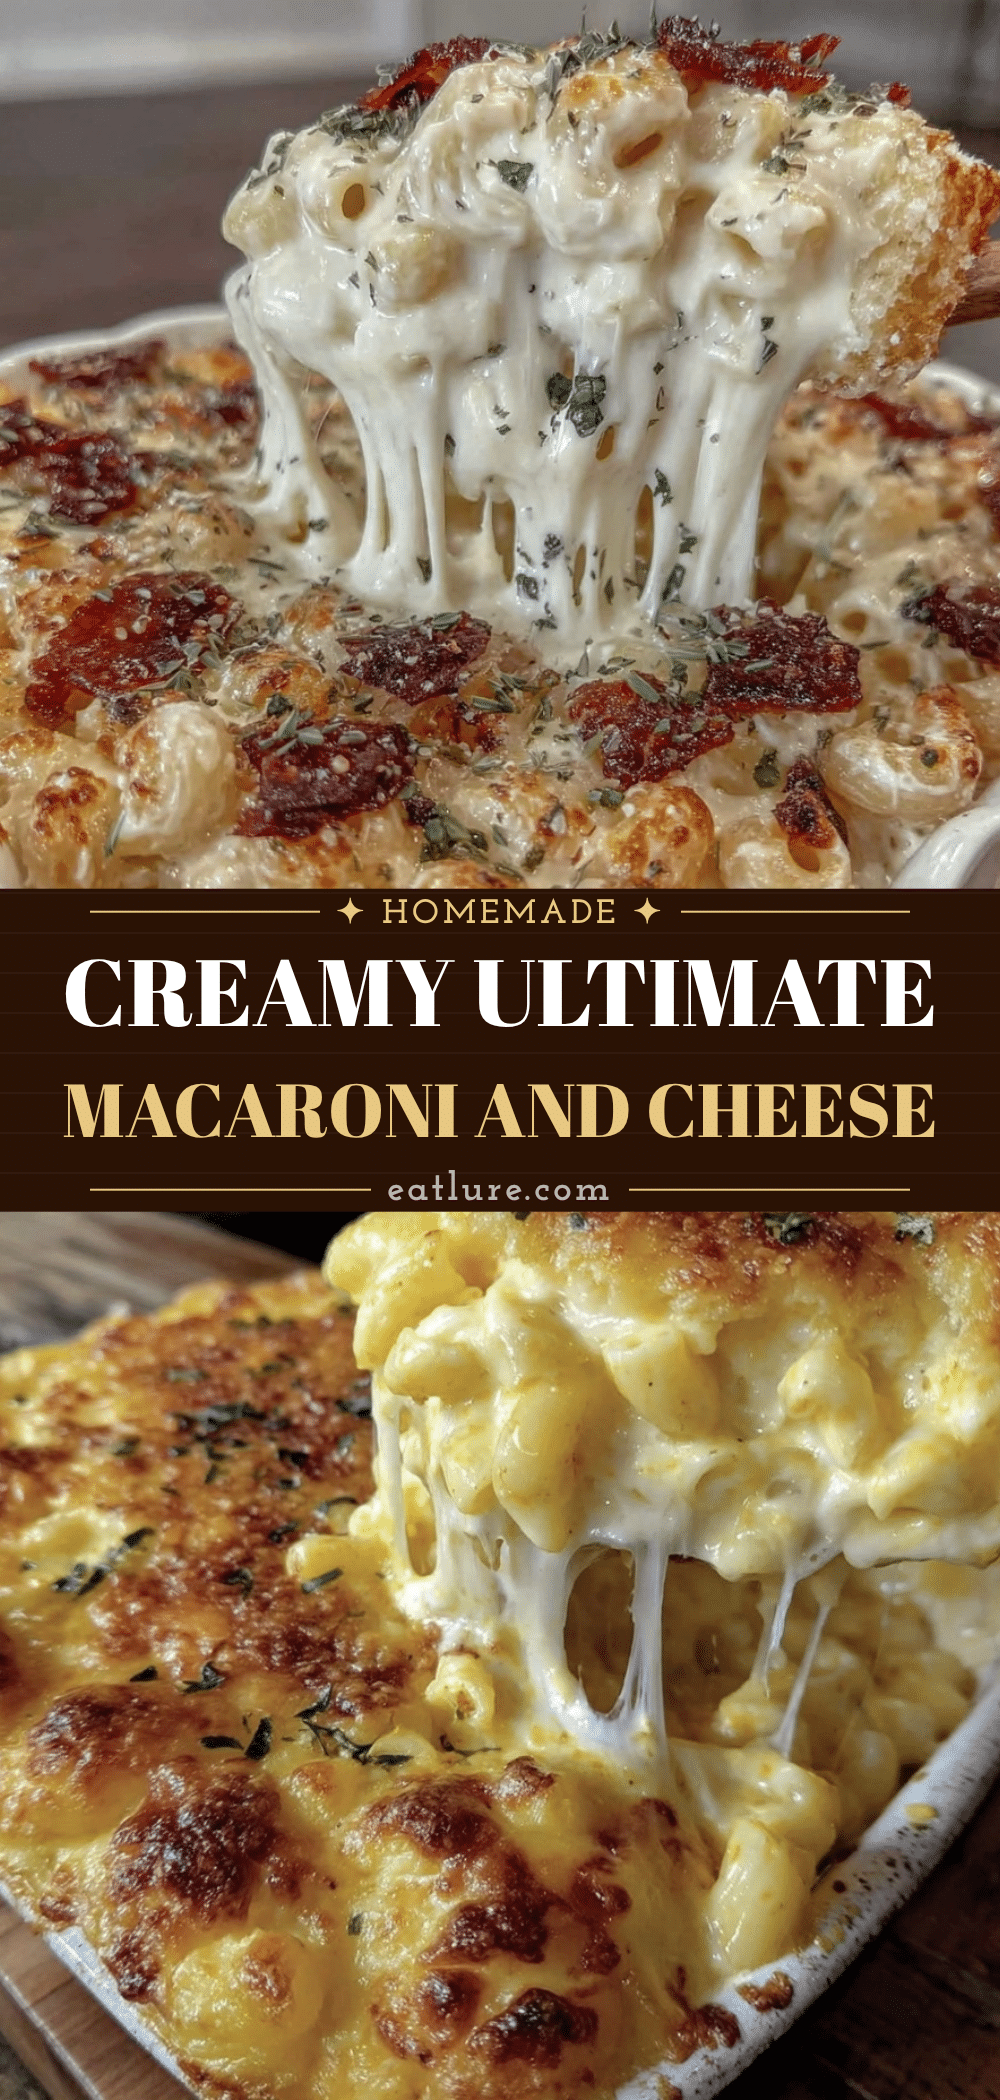

Classic Mac And Cheese: Homemade, Creamy & Half The Price
- Total Time: 45 minutes
- Yield: 6 servings 1x
Description
A homemade classic mac and cheese recipe that delivers restaurant-quality creamy texture and rich flavor at half the price. Made with a scratch-made béchamel sauce and freshly grated cheeses for the perfect comfort food meal.
Ingredients
- 1 pound (450g) elbow macaroni
- ½ cup (113g) unsalted butter
- ½ cup (65g) all-purpose flour
- 3 cups (720ml) whole milk
- ½ cup (120ml) heavy cream
- 2 cups (200g) sharp cheddar cheese, freshly grated
- 1 cup (100g) Monterey Jack cheese, freshly grated
- 1 teaspoon garlic powder
- ½ teaspoon mustard powder
- ¼ teaspoon smoked paprika
- Salt and black pepper to taste
- ½ cup panko or regular breadcrumbs (optional)
- 1 tablespoon melted butter (for topping, optional)
Instructions
- Bring a large pot of salted water to a rolling boil. Add elbow macaroni and cook until al dente. Drain and rinse briefly with warm water to stop cooking; toss with a little oil to prevent sticking.
- In a heavy-bottomed pot or Dutch oven, melt butter over medium heat. Add flour and whisk constantly for about 2 minutes until the mixture turns light golden and smells nutty.
- Slowly pour in warm milk while whisking vigorously to prevent lumps. Continue whisking until the mixture thickens and simmers gently, coating the back of a spoon (about 3-5 minutes).
- Remove the pot from heat. Stir in garlic powder, mustard powder, smoked paprika, salt, and black pepper.
- Gradually add the grated cheddar and Monterey Jack cheese, a handful at a time, stirring gently until fully melted before adding more. Do not boil after adding cheese.
- Add the drained pasta to the cheese sauce and stir to coat evenly. Adjust consistency with more milk or cream if needed.
- Optional: Transfer to a greased 9×13 baking dish, top with breadcrumbs mixed with melted butter, and bake at 350°F (175°C) for 20-25 minutes until bubbly and golden.
Notes
Grate your own cheese to avoid anti-caking agents that prevent smooth melting. Warm the milk before adding to the roux to prevent lumps. If the sauce becomes grainy, remove from heat and whisk in a splash of warm milk. For a gluten-free version, use gluten-free pasta and a 1:1 gluten-free flour blend.
- Prep Time: 15 minutes
- Cook Time: 30 minutes
- Category: Main Course
- Cuisine: American
Nutrition
- Serving Size: 1 serving
- Calories: 650
- Sugar: 8
- Sodium: 800
- Fat: 35
- Saturated Fat: 20
- Carbohydrates: 55
- Fiber: 2
- Protein: 25
Keywords: mac and cheese, homemade mac and cheese, creamy mac and cheese, comfort food, easy dinner, family meals, cheese sauce, béchamel


