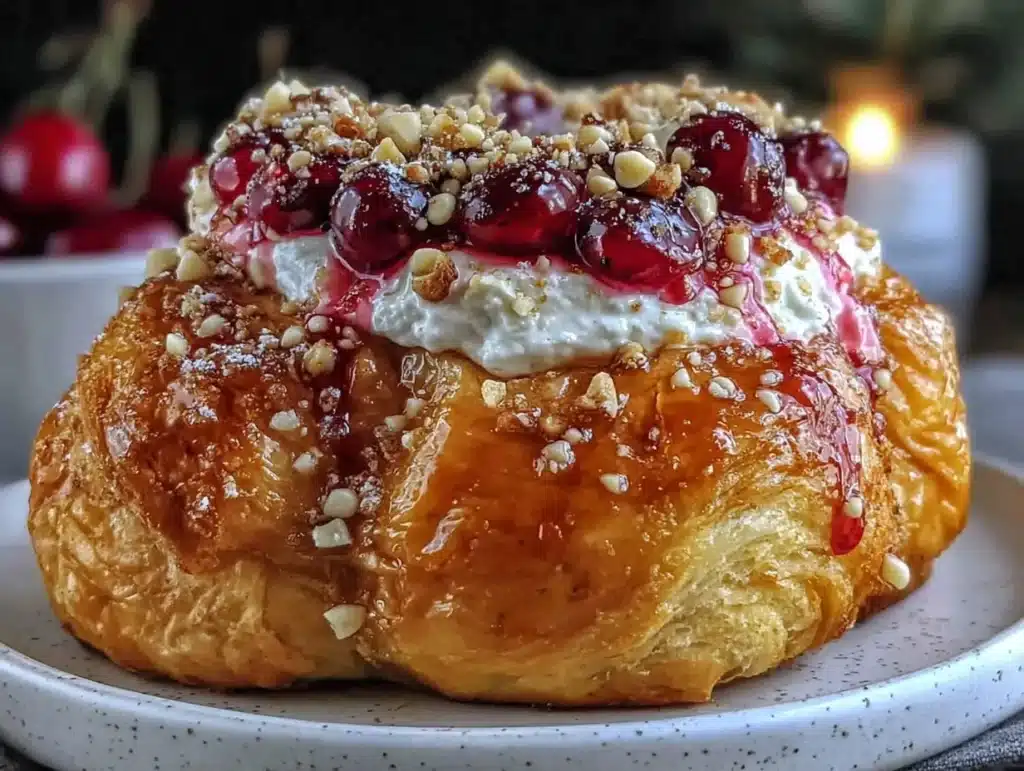
Let’s face it, I used to think Hawaiian rolls were just a lazy hack for dinner rolls. I was wrong. Honestly, I was completely wrong. The first time I made these fluffy cherry Hawaiian danishes, I nearly dropped a plate. The smell of buttery, sweet dough mixed with tart cherry filling is just too good to keep to myself. I remember standing in my kitchen at 6 AM, waiting for the oven timer, watching those golden puffs rise. It felt like I had walked into a high-end bakery in Portland, not my messy suburban kitchen.
People always ask me how I make breakfast feel so special without spending hours prepping. The secret isn’t complicated skill; it’s about picking the right dough and letting it breathe. These danishes are the ultimate “ten extra minutes, restaurant-level payoff” recipe. You take a box of pre-made dough, you add a bit of effort, and you get something that tastes like you spent all morning at the stove. My kids think I’m a wizard. My husband thinks I’m just lucky. Let’s just say the truth is somewhere in the middle.
There is something deeply comforting about the contrast of textures here. You get that soft, pillowy bread that pulls apart easily. Then you hit that warm, sticky cherry center. It’s sweet, but the tartness keeps it from being cloying. I’ve tested this recipe over a dozen times. I’ve tried different jams, different cheeses, and even savory options. But the classic cherry version? It remains the king of my weekend brunch rotation. It’s reliable, it’s delicious, and it makes everyone happy.
If you are looking for a way to impress guests without the stress, this is it. You don’t need to be a professional baker to pull this off. You just need to trust the process. The dough does most of the heavy lifting. Your job is just to add the flavor and watch it transform. I promise you, once you try this, you’ll never buy frozen danishes again. It’s a game-changer for lazy Sunday mornings or even a quick weekday treat.
Why You’ll Love This Recipe
I’ve spent years testing breakfast recipes, and I can tell you that most “easy” recipes still require a lot of patience. This one is different. It respects your time while delivering on flavor. Here is why these fluffy cherry Hawaiian danishes have earned a permanent spot in my recipe box:
- Quick & Easy: We are talking about under 45 minutes from start to finish. That is incredibly fast for something that tastes like it took hours. Perfect for busy weeknights or last-minute cravings when you want something sweet.
- Simple Ingredients: You likely already have most of these items in your kitchen. The star is the Hawaiian roll dough, but the rest is pantry staples like butter, sugar, and jam. No fancy grocery trips needed.
- Perfect for Brunch: These are the ultimate crowd-pleaser for potlucks, holiday mornings, or a relaxed weekend brunch. They look elegant on a platter but are incredibly simple to assemble.
- Unbelievably Delicious: The texture is next-level comfort food. The dough becomes golden and crisp on the outside while staying soft inside. The cherry filling gets bubbly and warm, creating a perfect bite every time.
- Crowd-Pleaser: I have served these to picky eaters and food critics alike. They all love them. The sweet-tart combination is universally appealing. Kids love the sweetness, and adults appreciate the balance.
What makes this recipe stand out is the technique. Many people just dump jam on top and bake it. That leads to soggy bottoms and uneven cooking. I’ve developed a method that ensures every single danish gets that rich, buttery crust. By brushing them with an egg wash and sprinkling them with a cinnamon-sugar blend, you get a bakery-quality finish. It’s not just another version of Hawaiian rolls. It’s your best version. It’s the kind of recipe that makes you close your eyes after the first bite. It’s comfort food reimagined—faster, but with the same soul-soothing satisfaction. It’s perfect for impressing guests without stress.
What Ingredients You Will Need
This recipe relies on high-quality, simple ingredients to deliver bold flavor and satisfying texture. The magic happens when you combine the convenience of store-bought dough with fresh, thoughtful additions. Here is what you need to gather before you start baking.
- Hawaiian Sweet Roll Dough: Look for a package of soft, sweet dinner rolls. I recommend brands like Rhodes or any local bakery brand that offers raw dough balls. The dough should be soft and pliable. Avoid hard, crusty rolls. You want that pillowy texture.
- Cherry Preserves or Jam: This is the heart of the danish. Use a high-quality cherry preserve. If you can find one with actual fruit chunks, that is even better. It adds texture and bursts of flavor. If you only have smooth jam, that works too. Just make sure it is tart enough to balance the sweet dough.
- Butter: You will need unsalted butter for the brushing mixture. Use real butter, not margarine. It adds a rich, creamy flavor that you can’t fake. Let it soften slightly so it mixes easily.
- Egg: One large egg for the egg wash. This is crucial for getting that golden, shiny finish. It helps the sugar stick and promotes browning.
- Milk or Cream: A tablespoon of milk or heavy cream to thin out the egg wash. This makes it easier to brush evenly over the rolls.
- Granulated Sugar: For the cinnamon-sugar topping. White sugar gives that classic crunch and shine.
- Ground Cinnamon: A warm, aromatic spice that pairs perfectly with cherries. Don’t skimp on this. It adds depth to the sweetness.
- Cream Cheese (Optional): Some people like to add a small cube of cream cheese in the center before adding the jam. This adds a tangy, rich layer that mimics a traditional cream cheese danish. It is a great variation if you want something more savory-sweet.
I always suggest using a good brand of cherry preserves. I personally like Smucker’s or Bonne Maman for their consistent texture and flavor. If you are feeling fancy, you can make your own cherry compote, but for this recipe, the jarred stuff works perfectly. Look for firm, small-curd cottage cheese if you decide to add the cream cheese variation, though it’s not strictly necessary. In summer, you might swap the cherries for fresh peaches, but the cherry version is a classic for a reason.
Equipment Needed
You don’t need a fancy kitchen to make these. Here is what you will need to get the job done right.
- Baking Sheet: A standard 13×9 inch baking sheet is ideal. Make sure it is light-colored if possible, as dark pans can burn the bottoms. Line it with parchment paper for easy cleanup. This is a lifesaver when the sugar melts.
- Parchment Paper: Essential for preventing sticking. It also makes cleanup a breeze. I never bake these without it.
- Pastry Brush: A silicone pastry brush is best for the egg wash and butter mixture. It handles heat well and cleans easily. A natural bristle brush works too, but you have to be careful not to get butter in the bristles.
- Mixing Bowl: A small bowl for whisking the egg wash and melting the butter. Any size will do.
- Small Knife or Paring Knife: To make the cuts in the dough. You don’t need a sharp chef’s knife. A simple paring knife is perfect for making those decorative slits.
- Oven: A reliable oven that preheats evenly. If your oven runs hot, you might need to lower the temperature by 25 degrees. Use an oven thermometer to check if you are unsure.
If you don’t have a pastry brush, you can use a fork to drizzle the butter, but it won’t be as even. I recommend investing in a silicone brush; they are cheap and last forever. Also, make sure your baking sheet is clean and dry before you start. Any residue from previous bakes can affect the texture.
Preparation Method
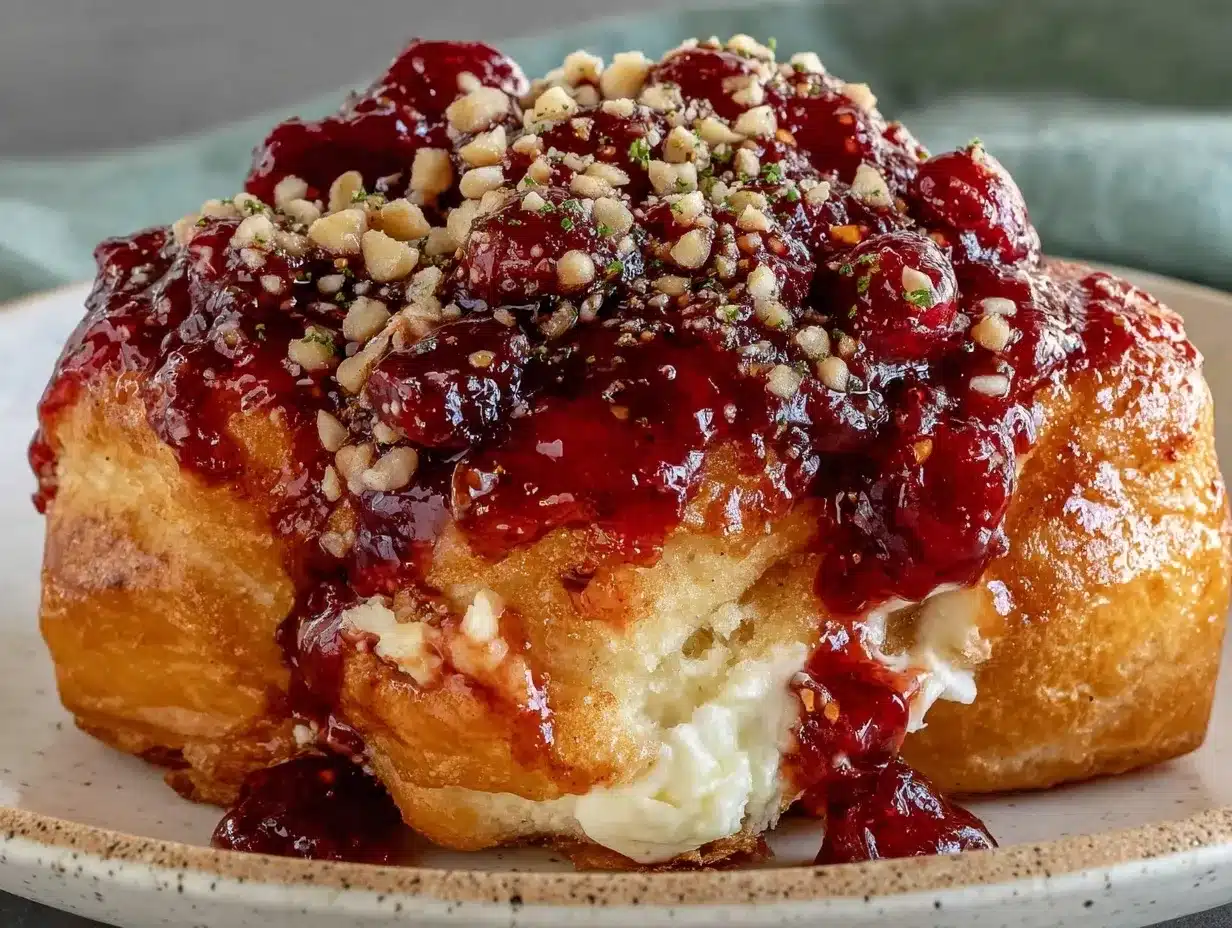
Let’s get into the nitty-gritty. This process is straightforward, but attention to detail makes all the difference. Follow these steps closely for the best results.
- Preheat Your Oven: Start by preheating your oven to 350°F (175°C). This is crucial. If the oven isn’t hot enough when the rolls go in, they will spread too much and lose their fluffiness. While it heats, line your baking sheet with parchment paper.
- Prepare the Dough: Once the dough comes out of the fridge, let it sit on the counter for about 10-15 minutes. You want it to be slightly softer so it is easier to work with. Do not microwave it. Just let it warm up naturally. If the dough is too cold, it will tear when you cut it.
- Arrange the Rolls: Gently place the dough balls on the prepared baking sheet. Leave about 2 inches of space between each roll. They will expand significantly during baking. If you pack them too close, they will merge into one giant blob instead of individual danishes.
- Make the Cuts: This is the step that transforms rolls into danishes. Take your paring knife and make two parallel cuts in the center of each roll. Do not cut all the way through. You want to create a pocket for the filling. The cuts should be about an inch long and an inch apart. Be gentle. You don’t want to crush the dough.
- Add the Filling: Spoon about a teaspoon of cherry preserves into each pocket. If you are using the cream cheese variation, place a small cube of cream cheese in the pocket first, then top with the jam. Be careful not to overfill. Too much filling will leak out and burn on the pan.
- Make the Egg Wash: In a small bowl, whisk together one egg and one tablespoon of milk or cream. Whisk until it is completely smooth and uniform in color. This mixture will give your danishes that beautiful golden-brown shine.
- Brush the Rolls: Using your pastry brush, gently brush the tops and sides of each roll with the egg wash. Be careful not to get egg wash in the cherry pockets. It can make the filling runny. You want the egg wash only on the dough.
- Add the Topping: Mix two tablespoons of melted butter with two tablespoons of granulated sugar and one teaspoon of cinnamon. Brush this mixture generously over the egg-washed rolls. Then, sprinkle any remaining sugar mixture on top. This creates that sweet, crunchy crust.
- Bake: Place the baking sheet in the preheated oven. Bake for 12-15 minutes. Keep a close eye on them after the 10-minute mark. You want them to be golden brown, not dark brown. The cherries should be bubbling slightly.
- Cool and Serve: Remove the danishes from the oven and let them cool on the pan for 5 minutes. This allows the structure to set. Serve them warm. They are best enjoyed fresh out of the oven.
Common issue: If the bottoms get too dark, place a second baking sheet underneath the first one. This provides extra insulation. Another tip: if your cherries are very watery, you might want to drain them slightly before adding. This prevents a soggy bottom.
Cooking Tips & Techniques
I have learned a few things the hard way. Here are some professional techniques to ensure your danishes turn out perfectly every time.
- Temperature Control: The most common mistake is an oven that is too hot. Hawaiian dough is high in sugar, which burns quickly. If your oven runs hot, use an oven thermometer to verify the actual temperature. If it is too hot, lower it to 325°F (160°C) and bake for a few minutes longer.
- Don’t Skip the Resting Time: I know it is tempting to rush. But letting the dough rest for 10 minutes makes it much easier to handle. Cold dough tears. Tearing ruins the pocket for the filling. Patience pays off.
- Watch the Filling: Cherries expand when heated. If you use too much jam, it will overflow. Overflowing jam burns and sticks to the pan. It is better to underfill slightly than overfill. You can always add more jam after baking if you want.
- Brushing Technique: When brushing the egg wash, use light, even strokes. Do not saturate the dough. You just want a thin layer. A thick layer of egg wash can make the crust tough. You want a delicate, shiny finish.
- Multitasking: While the danishes are baking, you can start cleaning up. The smell of baking cinnamon and cherries is amazing, but the cleanup is minimal. Just wash your bowls and brushes while they cool.
- Consistency: Make sure all your rolls are the same size. If some are bigger than others, they will bake at different rates. Trim any large pieces if necessary to ensure even cooking.
One of my personal failures was rushing the cutting step. I cut too deep and the filling spilled out everywhere. It was a mess. Now, I measure my cuts carefully. It takes an extra minute, but it looks so much better. Also, always use a sharp knife. A dull knife will squish the dough instead of cutting it cleanly.
Variations & Adaptations
While the classic cherry version is my favorite, there are many ways to tweak this recipe to suit your taste.
- Berry Medley: Instead of cherry, use a mixed berry jam. Strawberry, raspberry, or blueberry all work beautifully. A mixed berry jam adds a complex flavor profile that is very sophisticated.
- Apple Cinnamon: For a fall-inspired twist, use apple butter or cinnamon applesauce. Add a pinch of nutmeg to the sugar topping. This tastes like apple pie in danish form.
- Chocolate Cherry: Add a square of dark chocolate in the center with the cherry jam. The bitterness of the chocolate balances the sweetness perfectly. This is a great option for dessert-style breakfasts.
- Gluten-Free Option: You can use gluten-free sweet roll dough if available. However, the texture will be different. It might be denser. Test a small batch first to see how it holds up.
- Low-Sugar Variation: Use a sugar-free cherry preserves and substitute the granulated sugar with a erythritol blend. The texture might be slightly different, but it is a healthier option.
I once tried making these with pumpkin puree instead of jam. It was interesting, but the texture was too wet. Stick to thicker preserves for best results. Another personal variation I love is adding a thin layer of almond butter under the jam. It adds a nutty richness that complements the cherries beautifully.
Serving & Storage Suggestions
These danishes are best served warm. The warmth brings out the aroma of the cherries and cinnamon. Pair them with a hot cup of coffee or a glass of orange juice. They also go well with a side of bacon or sausage for a complete brunch.
If you have leftovers, store them in an airtight container at room temperature for up to two days. Do not refrigerate them, as the dough will become hard and stale. If you need to store them longer, freeze them. Wrap each danish individually in plastic wrap, then place them in a freezer-safe bag. They will last for up to three months.
To reheat, thaw them at room temperature, then warm them in the oven at 300°F (150°C) for 5-10 minutes. This restores the softness. You can also microwave them for 20-30 seconds, but they might get a bit chewy. The oven method is always superior for texture.
The flavors actually meld together nicely over time. If you make them ahead and let them sit overnight, the dough absorbs some of the cherry moisture, making them even more tender. Just be careful not to let them dry out.
Nutritional Information & Benefits
While these are definitely a treat, they can fit into a balanced diet. Each danish contains approximately 250-300 calories, depending on the size of the roll and the amount of filling. The dough provides carbohydrates for energy, while the cherry jam offers some vitamin C and antioxidants.
If you use the cream cheese variation, you add some protein and calcium. However, the sugar content is relatively high due to the sweet dough and jam. Enjoy them as an occasional indulgence rather than a daily staple. They are not gluten-free or low-carb unless you use specific substitutes.
From a wellness perspective, I love that this recipe feels like a special occasion meal without being overly heavy. It satisfies a sweet tooth without leaving you feeling sluggish. It’s a nice way to start the day with something joyful.
Conclusion
These fluffy cherry Hawaiian danishes are proof that you don’t need to be a pro baker to make something amazing. They are soft, sweet, and utterly irresistible. I hope you try this recipe and enjoy it as much as my family does. Feel free to experiment with different fillings and toppings. Make it your own.
I would love to hear how they turn out for you. Leave a comment below with your thoughts or share a photo of your creation. Tag me on social media if you do! Let’s spread the joy of homemade breakfast. Happy baking!
FAQs
Can I use frozen dough instead of refrigerated dough?
Yes, you can use frozen dough, but you need to thaw it completely before using it. Follow the package instructions for thawing. Once thawed, let it sit on the counter for 10-15 minutes to warm up slightly. Cold frozen dough can be harder to cut without tearing.
Why did my danishes spread out and merge together?
This usually happens if the dough was too warm when you put it in the oven, or if you placed the rolls too close together. Make sure to leave at least 2 inches of space between each roll. Also, ensure your oven is preheated correctly. If the dough is too warm, it will spread before it sets.
Can I make these ahead of time?
You can assemble them the night before and store them in the fridge overnight. However, the dough might rise too much. If you do this, let them sit at room temperature for 20 minutes before baking. You may need to adjust the baking time slightly.
What can I use instead of cherry preserves?
You can use any thick fruit preserves. Strawberry, raspberry, apricot, or peach all work well. Just make sure the jam is thick enough so it doesn’t make the dough soggy. Avoid runny jams or fresh fruit without cooking.
How do I prevent the filling from leaking out?
Do not overfill the pockets. Use about a teaspoon of jam per danish. Also, make sure your cuts are not too deep. If the cuts go all the way through, the filling will escape. Gentle handling is key.
Pin This Recipe!


Fluffy Cherry Hawaiian Danishes
- Total Time: 30 minutes
- Yield: 12 servings 1x
Description
Soft, pillowy Hawaiian sweet rolls filled with tart cherry preserves and topped with a buttery cinnamon-sugar crust. This easy breakfast recipe delivers bakery-quality results in under 45 minutes.
Ingredients
- 1 package (approx. 12 rolls) Hawaiian sweet roll dough (raw dough balls)
- 1 cup cherry preserves or jam
- 2 tablespoons unsalted butter, softened
- 1 large egg
- 1 tablespoon milk or heavy cream
- 2 tablespoons granulated sugar
- 1 teaspoon ground cinnamon
- Optional: Small cubes of cream cheese
Instructions
- Preheat oven to 350°F (175°C). Line a 13×9 inch baking sheet with parchment paper.
- Remove dough from refrigerator and let it sit on the counter for 10-15 minutes to soften slightly.
- Arrange dough balls on the prepared baking sheet, leaving 2 inches of space between each roll.
- Using a paring knife, make two parallel cuts in the center of each roll, about an inch long and an inch apart. Do not cut all the way through.
- Spoon about 1 teaspoon of cherry preserves into each pocket. (Optional: Place a small cube of cream cheese in the pocket first, then top with jam).
- In a small bowl, whisk together the egg and milk/cream until smooth.
- Gently brush the tops and sides of each roll with the egg wash, avoiding the filling pockets.
- Mix the softened butter, granulated sugar, and cinnamon. Brush this mixture generously over the egg-washed rolls and sprinkle any remaining mixture on top.
- Bake for 12-15 minutes, or until golden brown and the cherries are bubbling slightly.
- Cool on the pan for 5 minutes before serving warm.
Notes
Ensure the dough is not too cold when cutting to prevent tearing. Leave adequate space between rolls to prevent merging. If your oven runs hot, lower the temperature to 325°F. For storage, keep in an airtight container at room temperature for up to two days or freeze for up to three months.
- Prep Time: 15 minutes
- Cook Time: 15 minutes
- Category: Breakfast
- Cuisine: American
Nutrition
- Serving Size: 1 danish
- Calories: 275
- Sugar: 28
- Sodium: 180
- Fat: 8
- Saturated Fat: 4
- Carbohydrates: 45
- Fiber: 1
- Protein: 4
Keywords: Hawaiian rolls, cherry danishes, breakfast recipe, easy brunch, sweet rolls, homemade danishes, cinnamon sugar


