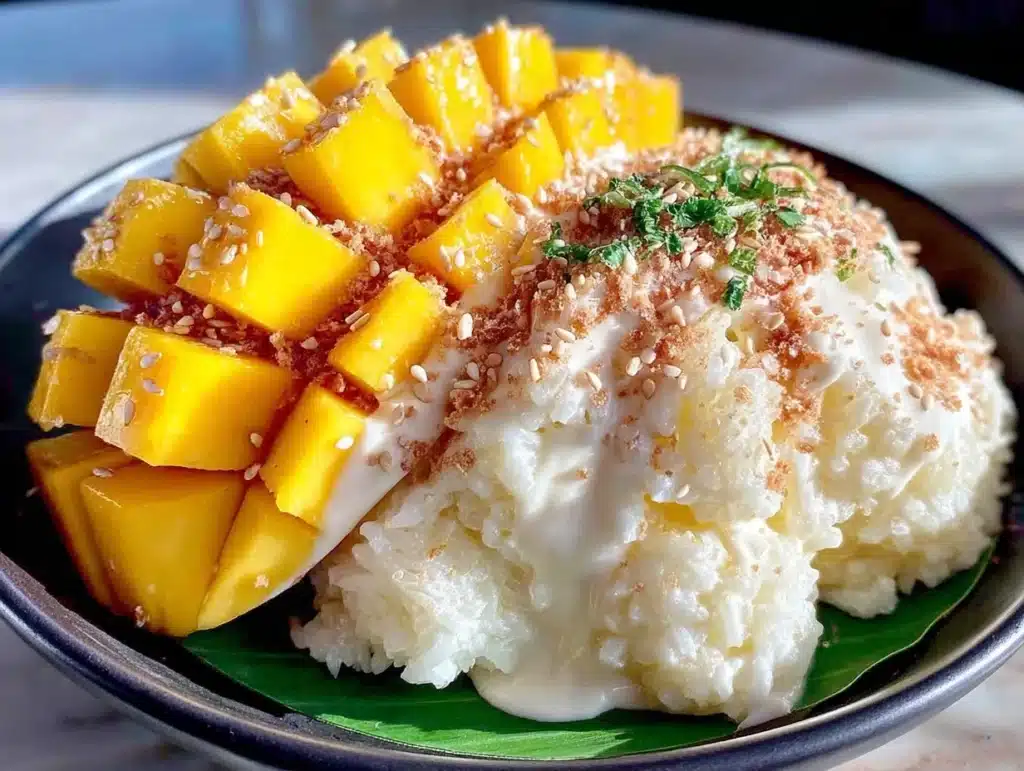
It was raining sideways in Bangkok, the kind of tropical downpour that turns the streets into rivers and traps you inside a tiny, humid shop with nothing but the smell of coconut milk in the air. I was shivering, hungry, and ready to give up on finding a decent meal until I saw it. A small plastic plate with a mound of glistening white rice, topped with thick, golden slices of ripe mango. One bite changed everything. The rice wasn’t just sticky; it was creamy, sweet, and perfectly salty. The mango burst with juice that cut through the richness. It wasn’t just dessert. It was comfort. It was home.
Most people think making authentic Thai mango sticky rice at home is impossible. They think you need a pressure cooker or hours of steaming. Let’s face it, I tried the lazy way first. I used regular short-grain rice and just boiled it. It was mushy. It was bland. It was a tragedy. After testing this recipe over a dozen times—some with jasmine rice, some with glutinous rice, some with coconut cream that was too thick and others too thin—I finally cracked the code. The secret isn’t the rice itself. It’s the balance of salt, sugar, and fat. It’s the timing. And honestly, it’s the patience to let the rice rest.
This isn’t just another dessert recipe. It’s a journey into the heart of Thai street food, brought into your kitchen without the stress. You don’t need to be a chef to make this. You just need to care about getting the texture right. When you get it right, the rice has a chewy, tender bite that holds its shape. The coconut sauce is silky, not greasy. The mango is sweet enough to stand up to the coconut. It’s the kind of dish that makes you close your eyes after the first bite. It’s simple, but it’s not basic. It’s restaurant-quality comfort food that tastes like it cost more than your rent.
I’ve made this for dinner parties where guests asked for the recipe before they even finished their plates. I’ve made it for my kids, who usually hate “weird” textures, and they went back for seconds. It’s perfect for hot summer days when you want something cool and refreshing, or for cozy nights when you need a little warmth. It’s gluten-free, naturally dairy-free (unless you add cream, which is optional), and it comes together faster than you’d think. Once you taste this version, you’ll never go back to the canned stuff again.
Why You’ll Love This Recipe
There is a specific magic that happens when you combine high-quality glutinous rice with fresh coconut milk. It’s not just about eating it; it’s about the experience. The contrast between the warm, soft rice and the cool, crisp mango is what keeps people coming back. But let’s be real, most homemade versions fall flat. They’re too sweet, or the rice is hard as a rock, or the coconut sauce separates into an oily mess. I’ve been there. I’ve wasted expensive mangoes on bad rice. That’s why I developed this method. It’s built on trial, error, and a lot of tasting.
- Authentic Texture: This recipe uses true glutinous rice (also called sticky rice), not regular short-grain rice. This gives it that distinct, chewy, tender bite that you can’t get any other way. It’s not mushy. It’s substantial. It holds together without being gummy.
- Perfectly Balanced Sweetness: Too much sugar is the enemy of good Thai dessert. This recipe uses palm sugar, which has a deep, caramel-like flavor, and balances it with a pinch of sea salt. The salt isn’t just for flavor; it makes the sweetness pop. It’s the kind of balance that makes you feel like a pro.
- Restaurant-Quality Coconut Sauce: The sauce is the soul of this dish. It’s made with full-fat coconut milk, not that light carton stuff. It’s heated gently to release the oils, creating a silky, luxurious coating that clings to every grain. It’s rich, but not heavy.
- Simple Ingredients: You likely have most of these in your pantry. Glutinous rice, coconut milk, sugar, salt, and mango. No fancy gadgets. No obscure spices. Just pure, clean flavors that let the ingredients speak for themselves.
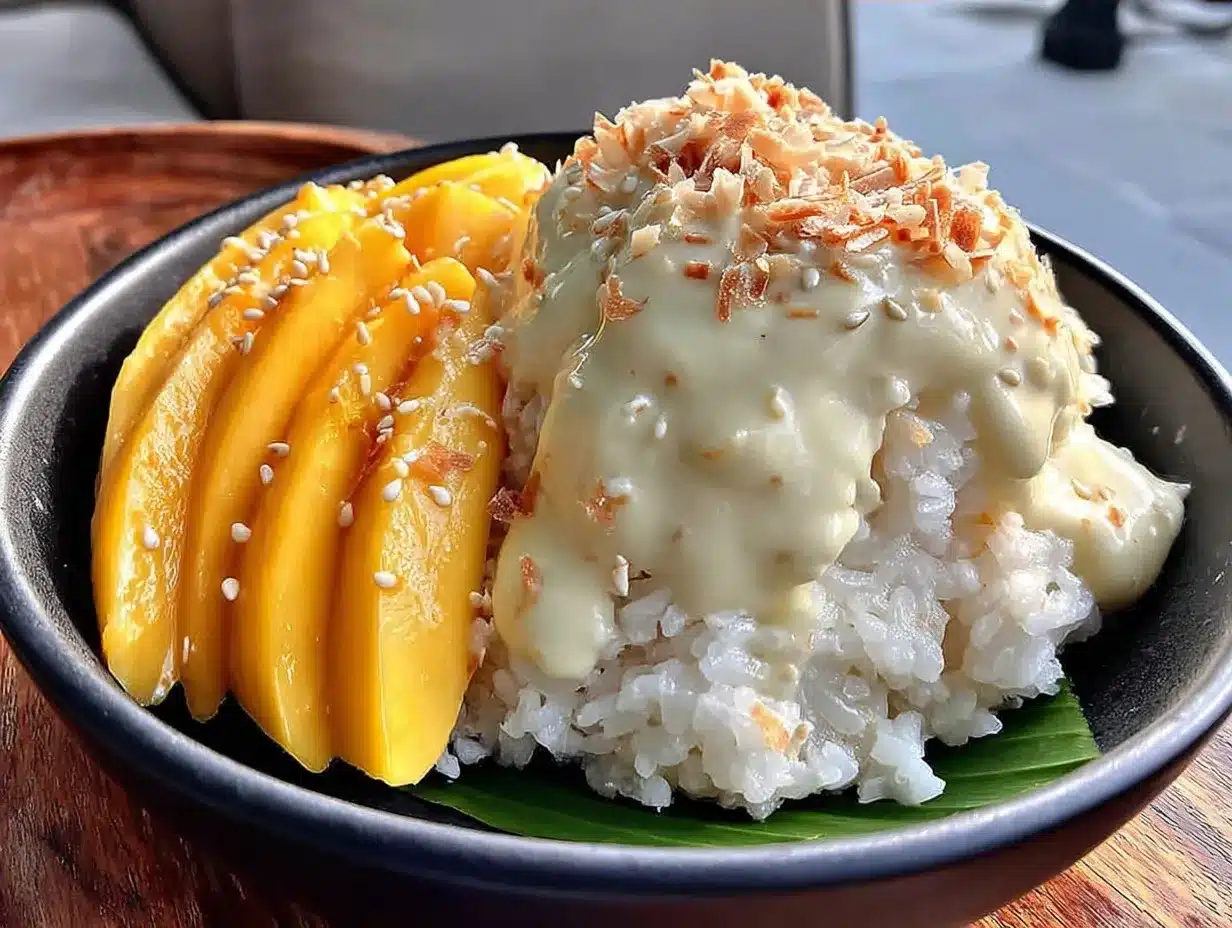
- Visual Appeal: Let’s be honest, we eat with our eyes first. The contrast of the bright yellow mango against the white rice and the drizzle of golden coconut sauce is stunning. It’s Instagram-worthy, but more importantly, it’s delicious. It looks as good as it tastes.
- Make-Ahead Friendly: You can steam the rice ahead of time and reheat it. The coconut sauce can be made the day before. This makes it perfect for entertaining. You can set up a mango sticky rice bar for your guests, letting them add their own toppings.
This recipe isn’t just about following instructions. It’s about understanding the why. Why do we salt the rice? To enhance the sweetness. Why do we soak the rice? To ensure even cooking. Why do we use palm sugar? For depth. When you understand these small details, you stop cooking by rote and start cooking with intuition. That’s what separates a good home cook from a great one. And honestly, once you master this, you’ll feel like you’ve unlocked a secret language of Thai cuisine.
What Ingredients You Will Need
This recipe relies on the quality of its components. Because there are so few ingredients, each one plays a starring role. You can’t hide behind complex spices or heavy sauces. If the rice is old, it won’t steam properly. If the coconut milk is watery, the sauce will be thin. If the mango isn’t ripe, the dish will taste flat. So, let’s talk about what to look for.
- Glutinous Rice (Sticky Rice): This is non-negotiable. Do not substitute with jasmine rice or sushi rice. Glutinous rice has a higher starch content that gives it that signature chewy texture. Look for white, round-grain glutinous rice in the Asian section of your grocery store or at an Asian market. It usually comes in a bag with a picture of a steamer basket. (Tip: If you can’t find it locally, online retailers are great for this. It keeps well in a pantry.)
- Full-Fat Coconut Milk: Avoid the carton coconut milk meant for drinking. You need the canned version, preferably the unsweetened kind. Shake the can well before opening. You want the thick, creamy part for the sauce. (Brand Note: Aroy-V or Chaokoh are reliable brands that I trust for their consistency and lack of additives.)
- Palm Sugar: This is the traditional sweetener for Thai desserts. It has a complex, caramel-like flavor with hints of smokiness. You can buy it in blocks or as a powder. If you can’t find it, brown sugar is a decent substitute, but it won’t have the same depth. (Keep it in an airtight container; it hardens over time.)
- Sea Salt: A small pinch of fine sea salt is crucial. It balances the sweetness of the sugar and the richness of the coconut. Don’t skip this. It’s the secret ingredient that makes the dessert taste “professional.”
- Ripe Mangoes: You need mangoes that are sweet, fragrant, and juicy. Thai mangoes are ideal, but ripe Alphonso or Ataulfo (Honey) mangoes work beautifully. They should yield slightly to pressure but not be mushy. Avoid green or underripe mangoes, as they are too tart and fibrous.
- Mung Beans (Optional): Traditionally, toasted mung beans are sprinkled on top for crunch. You can find split mung beans at Asian markets. Toast them in a dry pan until golden and crispy. If you can’t find them, skip them. The texture of the rice and mango is enough.
- Vanilla Extract (Optional): Some modern variations add a drop of vanilla to the coconut sauce for extra aroma. It’s not traditional, but it’s delicious. Use sparingly if you choose to add it.
Shopping for these ingredients is part of the fun. Visit your local Asian market if you can. The variety is amazing, and the staff are often happy to help you find the right rice. It’s a sensory experience—the smell of the spices, the sight of the colorful produce. It makes you feel connected to the culture of the dish. And honestly, buying fresh mangoes from a farmer’s market or a good grocery store ensures the best flavor. Don’t compromise on the mango.
Equipment Needed
You don’t need a fancy kitchen to make this. In fact, some of the best tools are the simplest ones. Here is what you’ll need to get started.
- Bamboo Steamer: This is the traditional tool for steaming glutinous rice. It allows steam to circulate evenly around the grains. If you don’t have one, a metal steamer insert works fine. Avoid using a pot with a tight lid, as it can trap too much water and make the rice soggy. (Care Tip: Soak your bamboo steamer in water for 30 minutes before first use to prevent cracking.)
- Small Saucepan: For heating the coconut milk and sugar mixture. A small saucepan ensures you can control the heat and prevent the coconut milk from boiling over.
- Medium Bowl: For soaking the rice. A bowl large enough to hold the rice and water, with room for the grains to expand.
- Serving Plates: Shallow bowls or plates work best for serving. They allow you to arrange the rice and mango beautifully.
- Measuring Cups and Spoons: Precision matters in dessert. Use standard measuring tools for the sugar and salt.
If you don’t have a steamer, you can use a colander over a pot of boiling water, but you’ll need to line it with cheesecloth or a clean kitchen towel to prevent the rice from falling through. It’s not ideal, but it works in a pinch. The goal is to get gentle, even steam. High heat can cook the outside of the grains while the inside remains hard. So, patience is key. And honestly, investing in a bamboo steamer is worth it if you plan to make this often. It’s a versatile tool that you can use for dumplings, buns, and vegetables too.
Preparation Method
Making mango sticky rice is a process, not a race. Rushing it will lead to disappointment. But if you take your time, the results are worth every minute. Here is how to do it step-by-step.
- Soak the Rice (2-4 Hours): Rinse the glutinous rice under cold water until the water runs clear. This removes excess starch. Place the rice in a medium bowl and cover with cold water by about an inch. Let it soak for at least 2 hours, or preferably overnight. (Note: Soaking is critical. It hydrates the grains, ensuring they cook evenly and become tender. Skipping this step will result in hard, crunchy rice.)
- Prepare the Steamer: Fill a pot with about 2 inches of water and bring it to a boil. Place your bamboo steamer (lined with cheesecloth if necessary) over the pot. Ensure the water doesn’t touch the bottom of the steamer. Let the steam build up for a few minutes.
- Steam the Rice (20-25 Minutes): Drain the soaked rice and spread it evenly in the steamer. Do not pack it down. Steam the rice for 20-25 minutes. Check it after 15 minutes. The rice is done when the grains are tender and translucent, but still hold their shape. (Troubleshooting: If the rice is still hard, add a few tablespoons of water to the pot and continue steaming for 5 more minutes. If it’s too wet, steam it uncovered for a few minutes to let the excess moisture evaporate.)
- Make the Coconut Sauce: While the rice is steaming, combine the coconut milk, palm sugar, and salt in a small saucepan. Heat over medium-low heat, stirring constantly until the sugar dissolves. Do not let it boil vigorously, or the coconut milk may separate. Once the sugar is dissolved and the sauce is slightly thickened, remove from heat. (Tip: The sauce should coat the back of a spoon. If it’s too thin, simmer it a bit longer. If it’s too thick, add a splash of water.)
- Combine Rice and Half the Sauce: Transfer the hot, steamed rice to a large bowl. Pour half of the warm coconut sauce over the rice. Gently fold the rice with a spatula or a large spoon, being careful not to mash the grains. Let it sit for 10-15 minutes to absorb the sauce. This step infuses the rice with flavor.
- Prepare the Mango: Peel the ripe mangoes and slice the flesh off the pit. Cut the slices into bite-sized pieces or keep them whole, depending on your preference. Arrange them on serving plates.
- Serve: Place a mound of the coconut-infused rice next to the mango slices. Drizzle the remaining coconut sauce over the rice and mango. Sprinkle with toasted mung beans if using. Serve immediately while the rice is warm.
The key to success here is the folding step. You want to distribute the sauce evenly without breaking the delicate grains. It’s a gentle process. Think of it like mixing a delicate salad. And don’t be afraid to taste the rice after folding. If it needs more sweetness, add a little more sauce. If it needs more salt, add a pinch. Adjust to your taste.
Cooking Tips & Techniques
I’ve made enough mistakes to fill a cookbook. Here are some tips to help you avoid them.
- Don’t Skip the Soak: I know it’s tempting to rush. But soaking is the most important step. It ensures the rice cooks evenly. If you’re short on time, soak it for at least 1 hour, but 2-4 hours is better.
- Control the Heat: When heating the coconut milk, use low to medium heat. High heat can cause the oil to separate, leaving you with a grainy sauce. If this happens, blend it briefly to smooth it out, but prevention is better than cure.
- Use Palm Sugar: I can’t stress this enough. Regular white sugar is too sweet and one-dimensional. Palm sugar adds depth and complexity. If you can’t find it, brown sugar is the next best option.
- Let the Rice Rest: After folding in the sauce, let the rice sit for 10-15 minutes. This allows the grains to fully absorb the flavor. It’s a small step that makes a big difference.
- Warm the Serving Plates: If you want to keep the rice warm, warm your serving plates in the oven before plating. Cold plates can cool the rice too quickly.
One common mistake is over-steaming the rice. Glutinous rice can become mushy if steamed for too long. Check it frequently. The grains should be tender but still distinct. They should not stick together in a solid mass. If they do, you’ve overcooked it. But don’t worry, it’s still edible. Just next time, reduce the steaming time by a few minutes.
Variations & Adaptations
This recipe is versatile. You can adapt it to suit your tastes or dietary needs.
- Dairy-Free Option: This recipe is naturally dairy-free. Just ensure your coconut milk is unsweetened and doesn’t contain added dairy.
- Gluten-Free Option: Glutinous rice is naturally gluten-free. Just ensure your palm sugar and coconut milk are certified gluten-free if you have celiac disease.
- Low-Sugar Option: Reduce the amount of palm sugar by half, or use a natural sweetener like stevia or monk fruit. Keep in mind, this will change the flavor profile.
- Coconut Cream Topping: For an extra rich treat, top the dessert with a dollop of whipped coconut cream. Chill a can of coconut milk overnight, scoop out the solid cream, and whip it with a little sugar.
- Seasonal Fruit: While mango is traditional, you can use other fruits like strawberries, blueberries, or even roasted plantains. The coconut rice pairs well with many fruits.
I once tried making this with taro instead of mango. It was surprisingly good. The earthy flavor of the taro complemented the sweet coconut rice. It’s a nice variation for autumn. But for summer, nothing beats the classic mango. It’s refreshing and light.
Serving & Storage Suggestions
Mango sticky rice is best served fresh. The rice is warm, and the mango is cool. It’s a contrast of temperatures that is delightful. But if you have leftovers, here’s how to store them.
- Refrigerator: Store the rice and sauce in an airtight container for up to 3 days. The rice will harden in the fridge, so you’ll need to reheat it.
- Reheating: To reheat, add a splash of water to the rice and microwave it in 30-second intervals, stirring in between. Or, steam it for 5-10 minutes. This will soften the rice and restore its texture.
- Freezing: You can freeze the cooked rice for up to 1 month. Thaw it in the fridge overnight and reheat as directed above. The sauce does not freeze well, so make it fresh.
When serving, consider adding a sprinkle of sesame seeds or crushed peanuts for extra crunch. It adds a nice textural contrast. And don’t forget to garnish with a mint leaf or two for a pop of color. It’s all about the presentation.
Nutritional Information & Benefits
Mango sticky rice is a indulgent dessert, but it’s also surprisingly nutritious in moderation. Glutinous rice is a good source of carbohydrates, providing energy. Coconut milk contains medium-chain triglycerides (MCTs), which are easily metabolized by the body. Mangoes are rich in Vitamin C, Vitamin A, and fiber. The palm sugar has a lower glycemic index than white sugar, but it’s still a sugar, so enjoy in moderation.
For those watching their calorie intake, be mindful of the portion size. A small bowl is enough to satisfy your sweet tooth. And remember, this is a treat, not a daily staple. But when you do have it, enjoy it fully. It’s a moment of joy.
Conclusion
Making authentic mango sticky rice at home is easier than you think. It just takes a little patience and the right ingredients. Once you master this recipe, you’ll have a dessert that rivals any Thai restaurant. It’s simple, elegant, and deeply satisfying. I hope you try it and enjoy it as much as I do. And if you do, let me know how it turns out. I love hearing from my readers.
Don’t forget to tag me on social media if you make this. I’d love to see your creations. And if you have any questions, leave them in the comments below. I’m here to help. Happy cooking!
Frequently Asked Questions
Can I use regular rice instead of glutinous rice?
No, regular rice will not work. Glutinous rice has a unique starch structure that gives it the chewy, sticky texture essential for this dish. Using regular rice will result in a loose, fluffy texture that doesn’t hold together.
What is the best type of mango to use?
Thai mangoes are ideal, but ripe Alphonso or Ataulfo (Honey) mangoes are excellent substitutes. Look for mangoes that are fragrant, yellow, and yield slightly to pressure. Avoid green or hard mangoes.
Can I make the coconut sauce ahead of time?
Yes, you can make the coconut sauce up to 3 days in advance. Store it in an airtight container in the refrigerator. Reheat gently before serving.
How do I know when the rice is done steaming?
The rice is done when the grains are tender and translucent, but still hold their shape. They should not be hard or crunchy. If you’re unsure, taste a grain. It should be soft but with a slight chew.
Can I freeze mango sticky rice?
You can freeze the cooked rice, but the texture may change slightly. Thaw it in the fridge overnight and reheat it with a splash of water. The sauce does not freeze well, so make it fresh.
Pin This Recipe!

Best Mango Sticky Rice: Easy Thai Dessert With Perfect Crust
- Total Time: 2 hours 45 minutes
- Yield: 4 servings 1x
Description
An authentic Thai dessert featuring chewy glutinous rice infused with rich coconut milk, served with sweet ripe mangoes and a silky palm sugar sauce.
Ingredients
- 1 cup glutinous rice (sticky rice)
- 1 can (13.5 oz) full-fat coconut milk, shaken well
- 1/4 cup palm sugar (or brown sugar)
- 1/4 tsp fine sea salt
- 2 ripe mangoes (Thai, Alphonso, or Ataulfo/Honey)
- 2 tbsp split mung beans, toasted (optional)
- 1/2 tsp vanilla extract (optional)
Instructions
- Rinse the glutinous rice under cold water until the water runs clear. Place in a medium bowl and cover with cold water by an inch. Soak for at least 2 hours or overnight.
- Fill a pot with about 2 inches of water and bring to a boil. Place a bamboo steamer (lined with cheesecloth if necessary) over the pot, ensuring water does not touch the bottom. Let steam build for a few minutes.
- Drain the soaked rice and spread it evenly in the steamer. Steam for 20-25 minutes until grains are tender and translucent but hold their shape.
- While rice steams, combine coconut milk, palm sugar, and salt in a small saucepan. Heat over medium-low heat, stirring constantly until sugar dissolves and sauce thickens slightly. Do not boil vigorously. Remove from heat.
- Transfer hot steamed rice to a large bowl. Pour half of the warm coconut sauce over the rice. Gently fold to combine without mashing grains. Let rest for 10-15 minutes to absorb sauce.
- Peel mangoes and slice flesh off the pit into bite-sized pieces.
- Place a mound of coconut-infused rice next to mango slices on serving plates. Drizzle with remaining coconut sauce and sprinkle with toasted mung beans if using. Serve immediately.
Notes
Soaking the rice is critical for even cooking and tender texture. Use full-fat canned coconut milk, not carton drinking milk. Palm sugar provides a deeper caramel flavor than white sugar. If rice is too wet after steaming, steam uncovered for a few minutes to evaporate excess moisture.
- Prep Time: 2 hours 15 minutes
- Cook Time: 30 minutes
- Category: Dessert
- Cuisine: Thai
Nutrition
- Serving Size: 1 bowl per serving
- Calories: 380
- Sugar: 32
- Sodium: 120
- Fat: 18
- Saturated Fat: 14
- Carbohydrates: 52
- Fiber: 3
- Protein: 4
Keywords: mango sticky rice, thai dessert, glutinous rice, coconut milk, palm sugar, gluten-free, dairy-free, asian dessert, easy thai recipe


