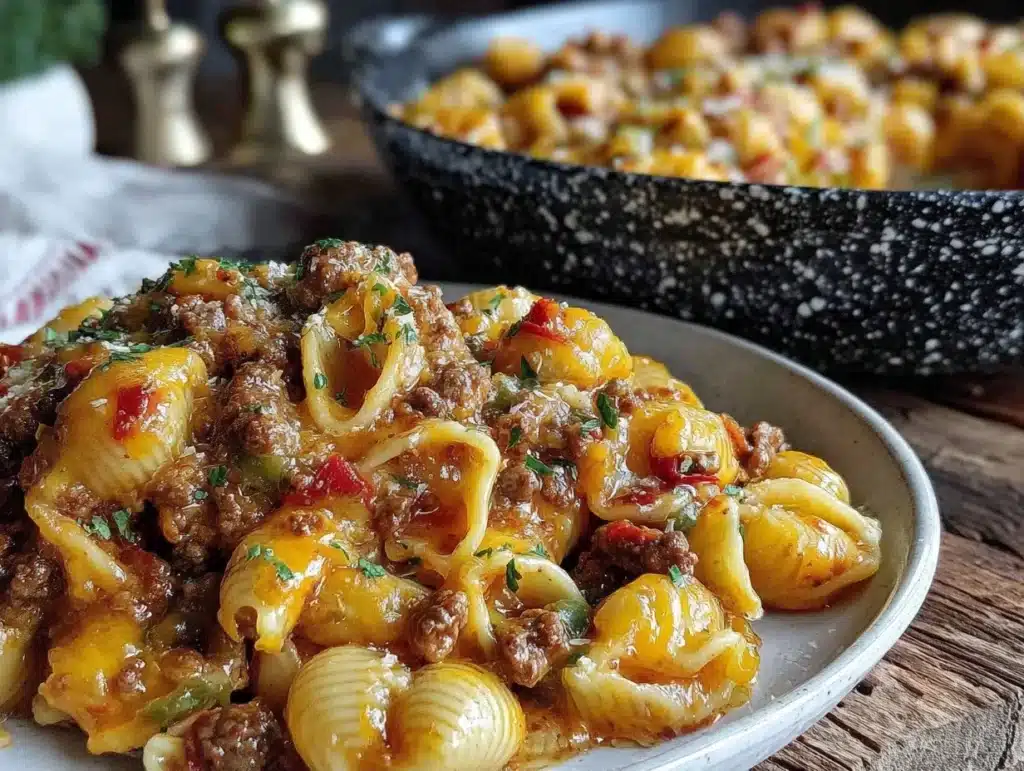
The smell of burning popcorn from the movie theater still lingers in my memory, but honestly, the smell of that first takeout bag opening was the real star. You know the one. It’s that heavy, greasy scent of melted cheese and seasoned beef that hits you the second you lift the lid. I used to order this exact dish—taco mac and cheese—every single Friday for years. It was my treat, my reward, and my guilty pleasure. Then came the pandemic, the delivery fees skyrocketed, and I realized I was spending more on gas than the actual meal. That was the turning point.
I decided to tackle it myself. Not just any version, but the kind that actually tastes like the restaurant version but without the three-hour cleanup. I tested this one pot cheesy taco mac recipe over a dozen times. Some batches were too dry, others were soupy, and one was so spicy I cried. But finally, I nailed it. This dish brings together the comfort of creamy pasta with the zesty kick of seasoned tacos, all cooked in a single pot. It’s easier than making a salad, honestly.
If you’re a busy parent, a college student, or just someone who loves cheesy carbs, this recipe is for you. It’s quick, it’s affordable, and it tastes like you spent hours on it. I’ve made this for dinner parties where people asked for the secret ingredient. (Spoiler: It’s just good cheese and patience). Let’s face it, homemade is always better when you control the sodium and the cheese ratio. This version is my best attempt at beating the original, and I think it wins.
Why You’ll Love This One Pot Cheesy Taco Mac
Let’s be real for a second. Cooking after work can feel like a chore. You come home tired, your feet hurt, and the last thing you want to do is scrub five different pots and pans. This recipe changes the game because everything happens in one pot. No boiling pasta separately, no frying meat in a different skillet, no washing a colander. Just one pot, one spoon, and dinner is done. It’s the kind of efficiency that feels like cheating, but it’s actually just good planning.
Here is why this specific recipe stands out from the crowd of internet recipes:
- Quick & Easy: The entire process takes about 30 minutes from start to finish. That’s less time than it takes for a delivery driver to find your house. It’s perfect for those chaotic weeknights when you need food fast.
- Simple Ingredients: You probably have most of this in your kitchen right now. Ground beef (or turkey), elbow macaroni, taco seasoning, milk, and cheese. No obscure ingredients or fancy grocery runs needed. It’s pantry-friendly comfort food.
- Perfect for Family Dinners: This is a crowd-pleaser. Kids usually love mac and cheese, and they love tacos. This combines both worlds. It’s great for picky eaters because you can customize the toppings. My kids argue over who gets the last bite, which is high praise.
- Unbelievably Delicious: The texture is creamy but not gluey. The flavor profile is savory, salty, and slightly spicy. It’s not just good—it’s the kind of meal that makes you close your eyes after the first bite. It’s comfort food reimagined for the modern kitchen.
- Less Mess, More Joy: Because it’s a one-pot meal, cleanup is a breeze. You just rinse the pot while the food cools. This small detail makes a huge difference in whether you’ll actually cook at home or just order out again.
What makes this recipe different is the technique. Most people just boil the pasta and mix it with cheese sauce. That leads to mushy noodles and separated cheese. My method involves cooking the pasta directly in the seasoned milk and broth. This allows the starch from the pasta to thicken the sauce naturally, creating a creamy emulsion without needing a heavy roux. It’s a smarter way to cook, and it yields a result that is richer and more flavorful than the standard version.
What Ingredients You Will Need
This recipe relies on simple, wholesome ingredients to deliver bold flavor and satisfying texture without the fuss. You don’t need anything fancy. In fact, using high-quality basics is what makes this dish shine. The key is balance: you want the savory beef to stand up to the rich cheese, and the spice to cut through the creaminess. Here is what you need to gather before you start cooking.
For the Base:
- Ground Beef: About 1 pound. I prefer 80/20 fat ratio for flavor, but you can use 93/7 if you want it leaner. If you’re avoiding red meat, ground turkey works well too, though it’s less juicy.
- Yellow Onion: One medium onion, finely diced. This adds sweetness and depth. Don’t skip it; it’s the foundation of the savory flavor.
- Garlic: 3 cloves, minced. Fresh garlic is best here. Powdered garlic works in a pinch, but fresh gives it that restaurant-quality punch.
- Taco Seasoning: One packet (about 25 grams) or 2-3 tablespoons of homemade blend. I recommend using a packet for consistency, but homemade is great if you control the salt. Look for a brand like McCormick or Lawry’s for that classic taste.
For the Sauce & Pasta:
- Elbow Macaroni: 8 ounces (about 2 cups dry). Elbows are classic, but penne or shells work too. Avoid long pasta like spaghetti because it’s hard to mix in one pot.
- Beef Broth: 1 cup. This adds a deeper umami flavor than water alone. Use low-sodium broth so you can control the saltiness.
- Whole Milk: 1 cup. Whole milk creates the creamiest sauce. If you need a lighter option, 2% milk works, but the sauce will be slightly thinner.
- Heavy Cream: 1/4 cup. This is the secret weapon for that rich, restaurant-style texture. You can substitute with extra milk, but the richness drops.
For the Cheese & Toppings:
- Cheddar Cheese: 1.5 cups, freshly shredded. Important: Do not use pre-shredded cheese. It contains anti-caking agents that prevent it from melting smoothly. Buy a block and shred it yourself.
- Mozzarella Cheese: 1/2 cup, shredded. This adds stretchiness and mildness.
- Black Beans: 1 can (15 oz), rinsed and drained. Optional, but adds fiber and bulk. Pinto beans work too.
- Corn: 1/2 cup, frozen or canned. Adds sweetness and crunch.
- Green Onions: 2-3 stalks, sliced. For garnish and fresh bite.
- Sour Cream: For serving. Adds a cool contrast to the hot, spicy pasta.
I personally prefer using a sharp cheddar for the base flavor and a mild cheddar or Monterey Jack for melting. If you’re lactose intolerant, there are dairy-free cheese alternatives that melt surprisingly well these days, though the texture might be slightly different. For a gluten-free option, simply swap the elbow macaroni for your favorite gluten-free pasta. Just keep an eye on the cooking time, as GF pasta can cook faster or slower depending on the brand.
Equipment Needed
You don’t need a fancy kitchen to make this. In fact, keeping it simple is part of the charm. Here is what you’ll need to get the job done efficiently.
- Large Dutch Oven or Deep Skillet: This is non-negotiable. You need a pot with high sides and a heavy bottom. A 5-6 quart Dutch oven is ideal. It distributes heat evenly, preventing the cheese sauce from scorching at the bottom. If you don’t have one, a large cast-iron skillet works well, but make sure it has a lid or you can cover it with foil.
- Wooden Spoon or Silicone Spatula: You need a sturdy utensil to stir the thickening sauce. Metal spoons can scratch non-stick surfaces, so stick to wood or silicone.
- Colander: Only needed if you are rinsing the canned beans and corn. If you skip rinsing, you can use this to drain the beef after browning, though many people leave the fat in for flavor.
- Microplane or Box Grater: For shredding your own cheese. This is crucial for smooth melting. Pre-shredded cheese will make your sauce grainy.
- Measuring Cups and Spoons: Basic tools. Accuracy matters here, especially with the liquid-to-pasta ratio.
I’ve tried making this in a standard saucepan, and it was a disaster. The sauce burned because the surface area was too small. Always use the largest pot you have that fits on your stove. If you’re cooking for a large group, consider doubling the recipe but using a larger pot to prevent overflow. Also, keep your pot clean. A quick rinse while the food simmers makes cleanup take less than two minutes.
Preparation Method
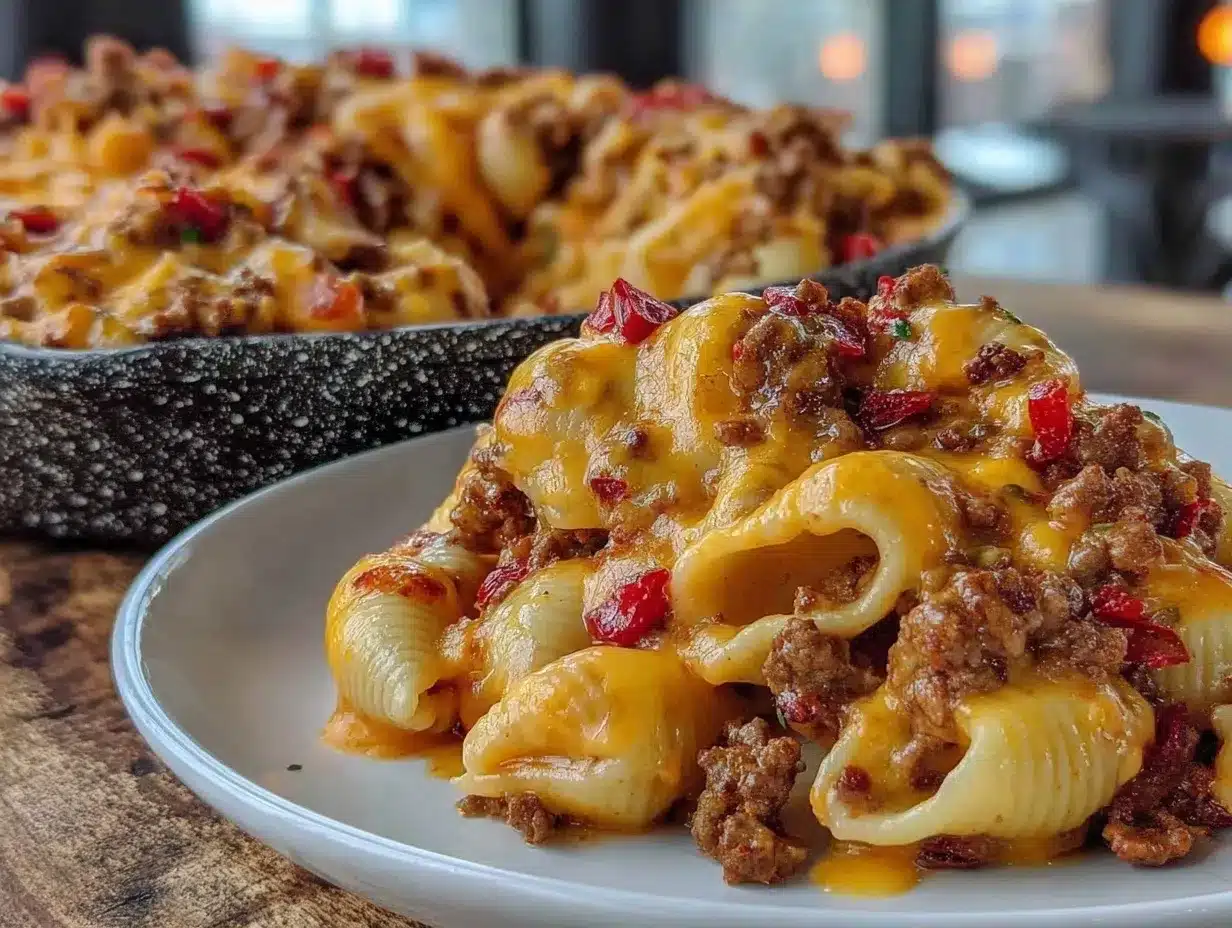
Let’s get into the nitty-gritty. This process is straightforward, but attention to detail ensures the best results. Follow these steps closely, and you’ll have a restaurant-quality meal in no time.
- Brown the Beef (5 minutes): Heat your large pot or Dutch oven over medium-high heat. Add the ground beef and diced onion. Break up the meat with your wooden spoon as it cooks. You want small, crumbly pieces, not large chunks. Cook until the beef is no longer pink and the onions are translucent. If using lean beef, you might need to drain some excess fat, but if you’re using 80/20, leave about a tablespoon for flavor. Drain if necessary.
- Add Aromatics and Seasoning (2 minutes): Stir in the minced garlic and taco seasoning. Cook for about one minute, stirring constantly. Be careful not to burn the garlic. The scent will become incredibly aromatic. This step blooms the spices, releasing their essential oils for a deeper flavor.
- Combine Liquids and Pasta (1 minute): Pour in the beef broth, milk, and heavy cream. Stir well to combine. Add the dry elbow macaroni and the rinsed black beans and corn. Make sure the pasta is submerged in the liquid. If it’s not, add a splash more water or broth. Stir everything together so the pasta is evenly coated in the seasoned liquid.
- Simmer the Pasta (10-12 minutes): Bring the mixture to a boil, then reduce the heat to medium-low. Cover the pot with a lid. Let it simmer gently. Stir every 3-4 minutes to prevent sticking. The pasta will absorb the liquid and release starch. Check the pasta texture after 10 minutes. It should be tender but still have a slight bite (al dente). If it’s too firm, add a little more liquid and cook for another 2 minutes.
- Melt the Cheese (3-4 minutes): Once the pasta is cooked and most of the liquid has been absorbed, remove the pot from the heat. This is crucial. Do not boil the cheese. Stir in the shredded cheddar and mozzarella cheese gradually. The residual heat will melt the cheese. Stir continuously until the sauce is smooth and creamy. If it looks too thick, add a splash of milk. If it’s too thin, let it sit for a minute to thicken.
- Final Seasoning and Serve (2 minutes): Taste the mac and cheese. Add salt and pepper if needed. Remember, the taco seasoning and cheese already have salt. Garnish with sliced green onions, a dollop of sour cream, and maybe some diced tomatoes or jalapeños if you like heat. Serve immediately while hot and gooey.
The key here is patience during the simmering stage. Stirring regularly prevents the bottom from burning and ensures even cooking. When you add the cheese, make sure the pot is off the heat. High heat can cause the cheese to separate and become oily. Low and slow is the way to go for that perfect creamy texture.
Cooking Tips & Techniques
Having cooked this recipe dozens of times, I’ve learned a few tricks that separate the good batches from the great ones. Here are some professional techniques that will help you succeed.
- Shred Your Own Cheese: I cannot stress this enough. Pre-shredded cheese is coated in cellulose to prevent clumping. This coating stops it from melting properly. You’ll end up with a grainy, oily sauce. Buy a block of cheddar and mozzarella and shred it yourself. It takes five minutes and makes a world of difference.
- Control the Heat: When melting the cheese, turn off the heat. The pot retains enough heat to melt the cheese without breaking the emulsion. If you keep it on the burner, the proteins in the cheese can tighten up and squeeze out the fat, resulting in a greasy mess.
- Don’t Overcook the Pasta: Pasta continues to cook even after you remove it from the heat. Remove it from the pot when it’s slightly underdone. It will finish cooking in the hot sauce. Overcooked pasta turns mushy and loses its structure.
- Season in Layers: Season the beef, then the sauce, and finally taste before serving. This ensures balanced flavor throughout. If you only season at the end, the beef might taste bland.
- Multitask Wisely: While the pasta simmers, chop your toppings. Have your sour cream, green onions, and salsa ready to go. This way, you can assemble the dish quickly once it’s done, keeping it hot and fresh.
I once made this recipe using low-sodium broth and no added salt, and it tasted flat. Don’t be afraid of salt. It enhances flavor. However, taste as you go. Every brand of taco seasoning is different. Some are saltier than others. Adjust accordingly. Also, if your sauce is too thick, add milk one tablespoon at a time. If it’s too thin, let it simmer uncovered for a minute to reduce.
Variations & Adaptations
This recipe is incredibly versatile. You can tweak it to fit your dietary needs or taste preferences without losing the core flavor profile.
- Vegetarian Version: Swap the ground beef for a plant-based ground meat alternative or simply omit it and add extra beans and corn. Use vegetable broth instead of beef broth. The flavor will be lighter but still delicious.
- Chicken Taco Mac: Use ground chicken or shredded rotisserie chicken instead of beef. Chicken pairs beautifully with taco seasoning and cheese. It’s a lighter option that still feels indulgent.
- Spicy Kick: If you love heat, add a diced jalapeño with the onions. You can also stir in a tablespoon of chipotle peppers in adobo sauce for a smoky, spicy depth. Top with sliced jalapeños before serving.
- Gluten-Free: Use gluten-free elbow macaroni. Be sure to check that your taco seasoning is certified gluten-free, as some blends contain wheat flour as a thickener.
- Dairy-Free: Use dairy-free milk and cream alternatives. For the cheese, use a high-quality dairy-free shreds that melt well, like Violife or Follow Your Heart. The texture might be slightly different, but the flavor will still be satisfying.
I personally like to add a handful of spinach at the end for a pop of color and nutrients. It wilts quickly and doesn’t change the flavor much. Another variation I love is adding a can of diced green chiles for extra tang. It’s a subtle change that makes the dish taste more complex. Feel free to experiment. This recipe is a canvas for your creativity.
Serving & Storage Suggestions
This dish is best served immediately while the cheese is still gooey and the pasta is hot. Present it in shallow bowls to showcase the creamy texture. Top with fresh green onions, a dollop of sour cream, and a sprinkle of cilantro. A wedge of lime on the side adds a nice acidic contrast that cuts through the richness.
For leftovers, store the mac and cheese in an airtight container in the refrigerator for up to 3 days. The pasta will absorb more liquid as it sits, so it might look thicker in the fridge. When reheating, add a splash of milk or water to loosen the sauce. Reheat gently in the microwave or on the stovetop over low heat, stirring frequently. Do not boil it, or the cheese might separate.
You can also freeze this dish, though the texture of the pasta may become softer upon thawing. Freeze in portion-sized containers for easy lunches. Thaw overnight in the fridge before reheating. This meal is perfect for meal prep, as it reheats well and tastes even better the next day as the flavors meld together.
Nutritional Information & Benefits
This one pot cheesy taco mac is a hearty meal, so portion control is key. A typical serving (about 1.5 cups) contains approximately 600-700 calories, depending on the cheese and meat used. It provides a good balance of protein from the beef and cheese, carbohydrates from the pasta, and fat from the dairy.
The cheddar cheese offers calcium and vitamin B12, which are essential for bone health and energy. The beef provides iron and zinc, which support immune function. If you use whole milk and cream, the saturated fat content is higher, so consider using lower-fat dairy options if you’re watching your intake. The addition of beans and corn adds fiber, which aids digestion and keeps you full longer.
For those with dietary restrictions, this recipe can be adapted to be gluten-free or dairy-free. Just be mindful of hidden allergens in the taco seasoning and cheese alternatives. Overall, this is a comforting treat that fits into a balanced diet when enjoyed in moderation.
Conclusion
Making this one pot cheesy taco mac at home is a game-changer. It’s easier, cheaper, and tastier than ordering takeout. You get to control the ingredients, adjust the spice level, and enjoy the satisfaction of cooking a delicious meal from scratch. The best part? Cleanup is minimal.
I hope you try this recipe and love it as much as I do. It’s become a staple in our weekly rotation, and I know it will become one in yours too. Feel free to customize it with your favorite toppings and variations. Let me know in the comments how you like to eat your taco mac! Do you add jalapeños? Extra sour cream? I’d love to hear your twists.
Share this recipe with friends who love comfort food, and don’t forget to pin it for later. Happy cooking!
Frequently Asked Questions
Can I use whole wheat pasta?
Yes, you can use whole wheat elbow macaroni. It will add a nuttier flavor and more fiber. Just note that it may take a few minutes longer to cook, so keep an eye on the texture.
Why is my cheese sauce grainy?
This usually happens if you use pre-shredded cheese or if you boil the cheese. Always shred your own cheese and remove the pot from the heat before adding the cheese. Stir gently until melted.
Can I make this in a slow cooker?
While this recipe is designed for stovetop, you can adapt it. Brown the beef and onions first, then add everything else to the slow cooker. Cook on low for 2-3 hours until pasta is tender. Add cheese at the end and stir until melted.
Is this recipe spicy?
It has a mild kick from the taco seasoning. If you want it milder, use a mild taco seasoning blend. If you want it spicier, add jalapeños or hot sauce.
Can I freeze this meal?
Yes, you can freeze it for up to 3 months. The pasta may become softer upon thawing, but the flavor will remain delicious. Reheat with a splash of milk to restore creaminess.
Pin This Recipe!
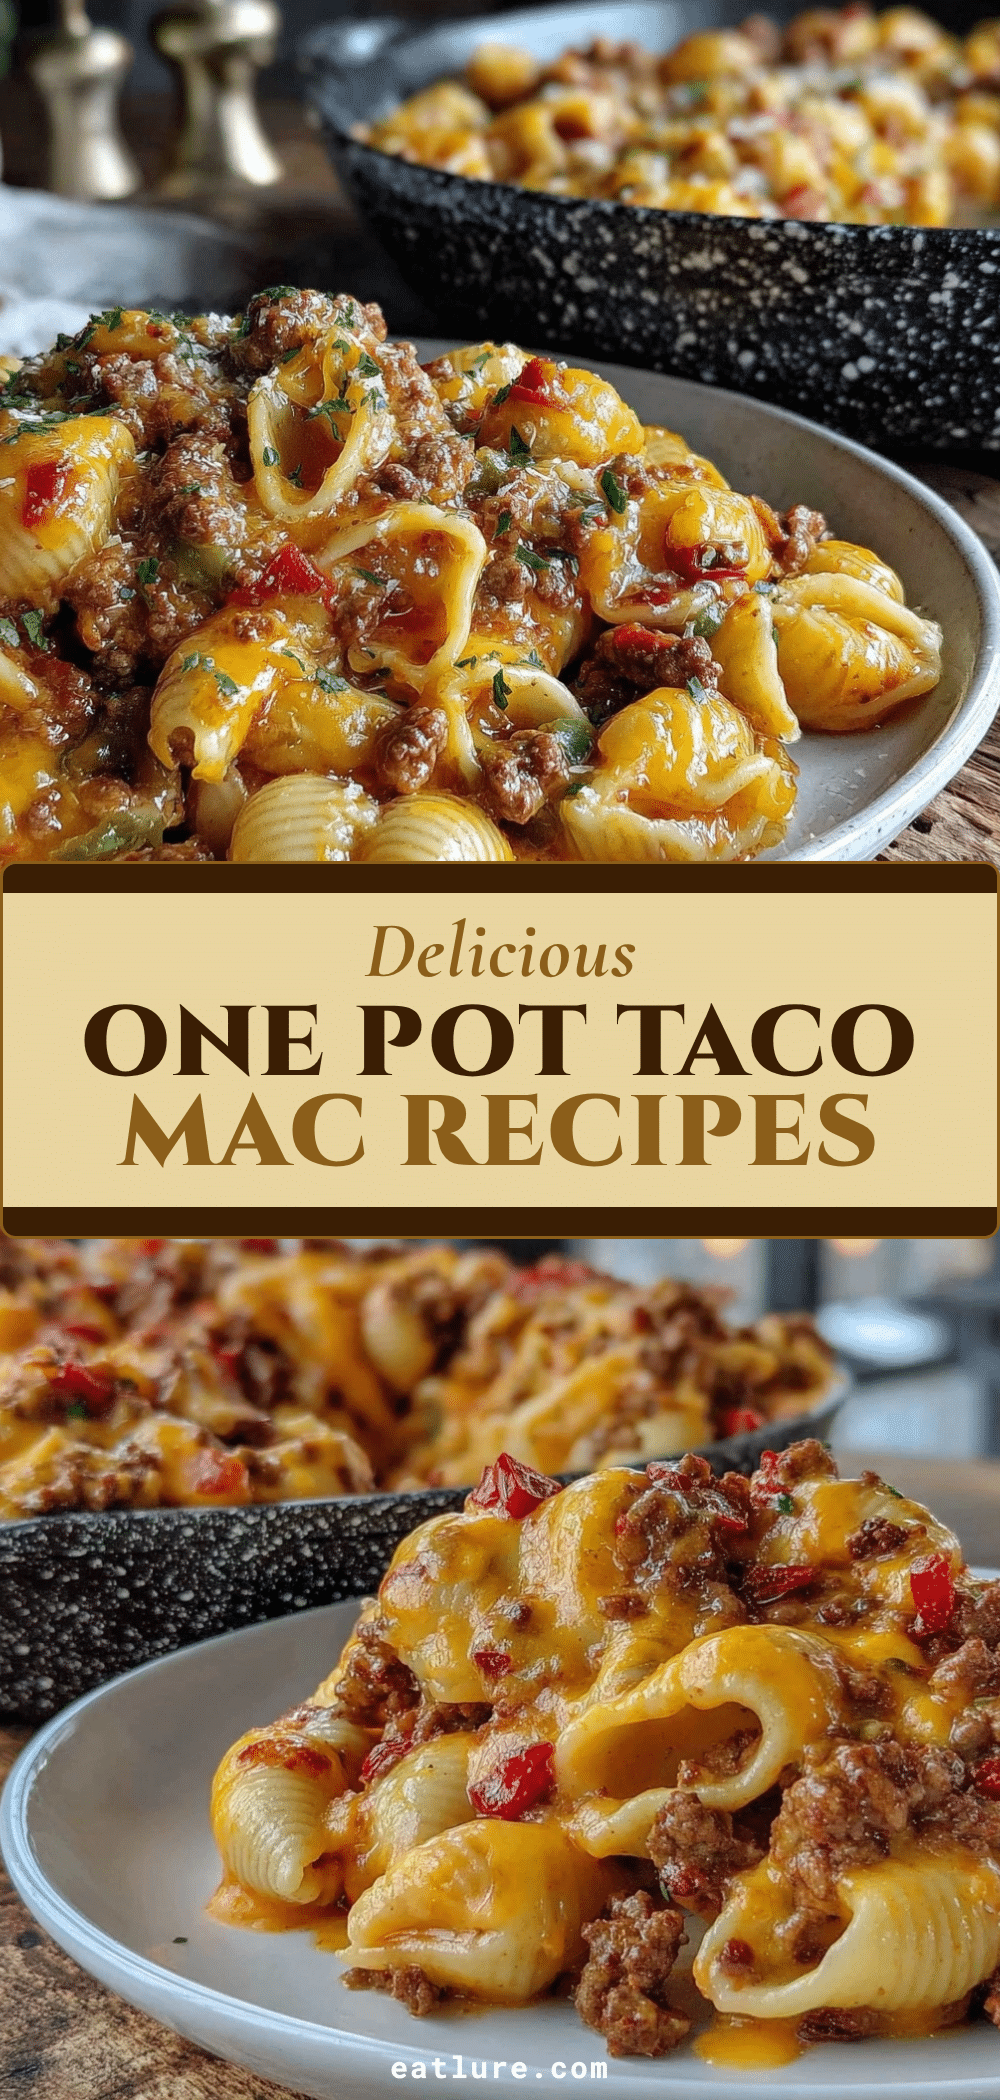

One Pot Cheesy Taco Mac: 30-Min Copycat Dinner
- Total Time: 30 minutes
- Yield: 4 servings 1x
Description
A quick, creamy, and cheesy one-pot meal that combines the flavors of tacos with comfort food macaroni and cheese. This easy dinner is ready in 30 minutes with minimal cleanup.
Ingredients
- 1 pound ground beef (80/20 fat ratio preferred)
- 1 medium yellow onion, finely diced
- 3 cloves garlic, minced
- 1 packet taco seasoning (about 25 grams) or 2-3 tablespoons homemade blend
- 8 ounces elbow macaroni (about 2 cups dry)
- 1 cup beef broth (low-sodium)
- 1 cup whole milk
- 1/4 cup heavy cream
- 1.5 cups sharp cheddar cheese, freshly shredded
- 1/2 cup mozzarella cheese, shredded
- 1 can (15 oz) black beans, rinsed and drained
- 1/2 cup corn (frozen or canned)
- 2–3 stalks green onions, sliced
- Sour cream, for serving
Instructions
- Heat a large Dutch oven or deep skillet over medium-high heat. Add ground beef and diced onion, breaking up the meat into small crumbles. Cook until beef is no longer pink and onions are translucent (about 5 minutes). Drain excess fat if using lean beef, otherwise leave about a tablespoon for flavor.
- Stir in minced garlic and taco seasoning. Cook for about 1 minute, stirring constantly, until fragrant.
- Pour in beef broth, milk, and heavy cream. Stir to combine. Add dry elbow macaroni, black beans, and corn. Ensure pasta is submerged in liquid; add a splash of water or broth if needed.
- Bring mixture to a boil, then reduce heat to medium-low. Cover with a lid and simmer gently for 10-12 minutes, stirring every 3-4 minutes to prevent sticking. Pasta should be tender but slightly al dente.
- Remove pot from heat. Stir in shredded cheddar and mozzarella cheese gradually. Use residual heat to melt cheese, stirring continuously until smooth and creamy. If too thick, add a splash of milk; if too thin, let sit to thicken.
- Taste and add salt and pepper if needed. Garnish with green onions and serve immediately with sour cream on the side.
Notes
Shred your own cheese to ensure smooth melting; pre-shredded cheese contains anti-caking agents that can make the sauce grainy. Remove the pot from heat before adding cheese to prevent separation. Pasta continues to cook after being removed from heat, so remove it when slightly underdone. Leftovers can be stored in the refrigerator for up to 3 days or frozen for up to 3 months.
- Prep Time: 10 minutes
- Cook Time: 20 minutes
- Category: Main Course
- Cuisine: American
Nutrition
- Serving Size: 1.5 cups
- Calories: 650
- Sugar: 6
- Sodium: 900
- Fat: 35
- Saturated Fat: 18
- Carbohydrates: 55
- Fiber: 4
- Protein: 28
Keywords: one pot meal, cheesy taco mac, easy dinner, comfort food, copycat recipe, quick meals, family dinner, pasta recipes


