
Let’s face it. You’ve been there. You’re sitting in a dimly lit bistro, the kind with exposed brick and overpriced craft beers, and you order the mac and cheese as a side. It arrives steaming, bubbling at the edges, with that perfect golden crust. You take one bite and think, “I could eat this every single day.” Then you check the bill and almost choke on your water. But honestly? The real magic isn’t in the price tag. It’s in the technique. Most home cooks try to make mac and cheese by just melting cheese on top of boiled pasta. That’s a recipe for grease pools and grainy textures. I learned the hard way that restaurant-quality queso mac requires a specific roux-based strategy that creates an emulsion so smooth it feels like liquid gold.
I first attempted to recreate my favorite bar’s queso mac about five years ago. I ended up with a clumpy, oily disaster that looked more like cheese fondue gone wrong. It was embarrassing. I was trying to impress some friends for a game night, and instead of bragging, I had to apologize for the “experimental dish.” That failure changed everything. I started studying professional culinary techniques, specifically how chefs handle cheese sauces. The key isn’t just the cheese; it’s the restaurant queso mac & cheese method of building a stable emulsion using a proper roux and careful temperature control. This isn’t just comfort food; it’s culinary engineering that you can actually do at home.
What makes this version worth the extra ten minutes of effort is the texture. We aren’t talking about box mixes or quick stovetop shortcuts. This is about creating a sauce that clings to every noodle, rich and velvety, with a sharp cheddar bite and a hint of smoky paprika. It’s the kind of dish that brings people to your table. Whether you are hosting a dinner party or just need a hug in a bowl after a long week, this recipe delivers. It’s hearty, it’s indulgent, and it tastes like you hired a professional chef. Let’s get into the details of how to make this happen without the stress.
Why You’ll Love This Recipe
After testing this recipe over a dozen times, I can confidently say this is the ultimate comfort food hack. It bridges the gap between quick weeknight dinners and fancy restaurant fare. Here is why this specific approach to restaurant queso mac & cheese stands out from the crowd:
- Professional Emulsion Technique: Unlike standard recipes that just melt cheese into milk, this method uses a stabilized roux. This prevents the sauce from breaking or becoming oily, ensuring a creamy consistency that holds up even if you need to hold it for a few minutes before serving.
- Pantry-Friendly Staples: You don’t need obscure ingredients. The base relies on butter, flour, milk, and good-quality cheddar. The “secret” is in the ratio and the heat management, not in finding rare spices. This makes it accessible for any cook, regardless of skill level.
- Perfect for Any Occasion: While it’s rich enough for a holiday centerpiece, it’s simple enough for a Tuesday night. It pairs beautifully with a crisp green salad or a heavy steak. It’s versatile enough to be a main dish with added protein or a side that steals the show.
- Crowd-Pleasing Flavor Profile: The combination of sharp cheddar, a touch of mustard powder, and a dash of hot sauce creates a complex flavor profile. It’s tangy, savory, and slightly spicy. Kids love the creaminess, and adults appreciate the depth of flavor. It’s a universal hit.
- Unbelievably Delicious Texture: There is nothing worse than grainy mac and cheese. By grating your own cheese and adding it off the heat, you guarantee a silky-smooth mouthfeel. It coats the pasta perfectly, creating that luxurious experience you only usually find in high-end eateries.
What really sets this apart is the confidence it gives you in the kitchen. When you pull this out of the oven or serve it straight from the pot, the reaction is always the same. People close their eyes after the first bite. It’s not just food; it’s a moment. You feel like a pro. You’ve mastered a technique that restaurants guard closely. It’s comforting, yes, but it’s also impressive. You’re not just feeding people; you’re sharing a culinary secret. This recipe transforms a simple dish into a memorable experience, proving that you don’t need a professional kitchen to create restaurant-quality meals.
What Ingredients You Will Need
This recipe relies on high-quality ingredients because there are nowhere to hide. The flavor of the cheese and the richness of the butter are front and center. I’ve tested many brands, but sticking to block cheese rather than pre-shredded is non-negotiable for this level of smoothness. Pre-shredded cheese contains anti-caking agents like cellulose, which prevent proper melting and can lead to a gritty texture. Here is exactly what you need to build the perfect restaurant queso mac & cheese.
For the Pasta
- Elbow Macaroni: 1 pound (450g). Elbows are classic because their curve holds the sauce well. You can use cavatappi or shells if you prefer, but elbows are the traditional choice for that authentic diner feel.
- Salt: 1 tablespoon. You need to salt the pasta water generously. It should taste like the sea. This is your only chance to season the pasta itself.
For the Cheese Sauce (The Roux Base)

- Unsalted Butter: 1 cup (2 sticks / 226g). I recommend using high-quality European-style butter if you can find it. The higher fat content adds incredible richness. Room temperature butter blends easier, but cold works fine if you melt it gently.
- All-Purpose Flour: 1 cup (120g). This creates the roux, which thickens the sauce and stabilizes the emulsion. Don’t skip this, or you’ll have a pool of melted cheese.
- Whole Milk: 4 cups (950ml). Full-fat milk is essential. Low-fat milk can make the sauce taste thin and watery. The fat carries the flavor and creates that luxurious mouthfeel.
- Heavy Cream: 1 cup (240ml). This adds extra richness and helps keep the sauce stable. It prevents the sauce from splitting when heated.
For the Cheese Blend
- Sharp Cheddar Cheese: 4 cups (approx. 400g), freshly grated. This is the star. Use a block of sharp cheddar and grate it yourself. Sharp cheddar has more flavor than mild, so you get a punchy taste without needing as much volume. I prefer aged cheddar for the best depth.
- Gruyère Cheese: 2 cups (approx. 200g), freshly grated. Gruyère is a Swiss cheese that melts beautifully and adds a nutty, sophisticated flavor. It balances the sharpness of the cheddar. If you can’t find Gruyère, a good fontina or Monterey Jack works as a substitute for melting.
For the Seasoning
- Dijon Mustard: 1 tablespoon. This adds a tangy kick and helps emulsify the sauce. It’s a subtle flavor you might not taste directly, but it makes the cheese flavor pop.
- Garlic Powder: 1 teaspoon. Adds a savory backbone without the risk of burning fresh garlic.
- Smoked Paprika: 1 teaspoon. This gives that subtle smokiness reminiscent of BBQ joints or grilled cheese sandwiches. It adds warmth and color.
- Cayenne Pepper: 1/4 teaspoon (optional). For a little heat. Adjust based on your spice tolerance.
- Salt and Black Pepper: To taste. Remember, the cheese is already salty, so taste before adding extra salt.
Equipment Needed
You don’t need fancy gadgets to make this, but having the right tools makes a huge difference. The most critical piece of equipment is a heavy-bottomed saucepan or a Dutch oven. Thin pots heat unevenly and can scorch the butter and flour mixture, leading to a burnt taste. A heavy pot distributes heat evenly, which is crucial for making a smooth roux. If you don’t have a Dutch oven, a large stainless steel pot with a thick base works well.
A box grater is essential. I cannot stress this enough. Do not buy pre-shredded cheese. The anti-caking agents in bagged cheese will ruin your sauce’s texture. Grating your own cheese ensures it melts quickly and evenly. A microplane or food processor grater works great, but a standard box grater gives you control.
You’ll also need a whisk. A sturdy silicone or stainless steel whisk helps you break up lumps in the roux and keep the sauce smooth as you add the milk. A spoon won’t cut it here; you need to aerate the mixture slightly to prevent separation.
Finally, a colander for draining the pasta. Make sure it’s large enough to handle the volume of noodles. If you plan to bake this mac and cheese in a casserole dish, you’ll also need a 9×13 inch baking dish. I recommend buttering the dish and sprinkling it with a little panko breadcrumbs for a crispy topping, though it’s optional for stovetop-only versions.
Preparation Method
Now, let’s get into the nitty-gritty. This process requires attention, but it’s straightforward if you follow the steps. The goal is to build a stable sauce before introducing the pasta and cheese.
- Boil the Pasta: Bring a large pot of salted water to a rolling boil. Add the elbow macaroni and cook according to package directions, but aim for al dente. Since the pasta will continue to cook slightly in the sauce or oven, undercooking it by one minute is smart. Drain the pasta and set it aside. Do not rinse it! The starch on the surface helps the sauce cling to the noodles.
- Make the Roux: In your heavy-bottomed saucepan or Dutch oven, melt the butter over medium heat. Once melted and foaming, add the flour. Whisk constantly for about 2-3 minutes. You want the mixture to turn a light blonde color and smell nutty. This cooks out the raw flour taste. If you burn this step, you’ll have to start over, so keep the heat moderate.
- Add the Liquids: Slowly pour in the milk and heavy cream, a little at a time, whisking vigorously to prevent lumps. Once all the liquid is added, continue to whisk and cook for 5-7 minutes. The sauce should thicken enough to coat the back of a spoon. This is your béchamel base. If it gets too thick, add a splash more milk. If too thin, cook a bit longer.
- Season the Base: Remove the pot from the heat. This is a crucial step. Stir in the Dijon mustard, garlic powder, smoked paprika, cayenne pepper, and half of your grated cheese. The residual heat will melt the cheese gently without breaking the emulsion. Taste the sauce. It should be flavorful on its own. Adjust salt and pepper as needed.
- Combine Pasta and Sauce: Add the drained macaroni to the cheese sauce. Stir gently but thoroughly until every noodle is coated. If you are serving immediately, you can stop here. For a richer texture, you can fold in the remaining cheese now, but be careful not to overheat it.
- Bake (Optional but Recommended): Preheat your oven to 375°F (190°C). Transfer the mac and cheese to a buttered 9×13 baking dish. If you want a crust, sprinkle panko breadcrumbs mixed with a little melted butter and paprika on top. Bake for 20-25 minutes until bubbly and golden brown on top. Let it rest for 10 minutes before serving. This resting time allows the sauce to set slightly, making it easier to scoop.
Cooking Tips & Techniques
There are a few professional tricks I’ve picked up along the way that make this recipe foolproof. The biggest mistake people make is adding cheese to boiling liquid. Cheese proteins tighten up when exposed to high heat, causing the sauce to separate into oil and clumps. That’s why we remove the pot from the heat before adding the majority of the cheese. The residual heat is gentle enough to melt it without breaking the emulsion.
Another tip is to use block cheese exclusively. I know it’s more work, but pre-shredded cheese is coated in starch to keep it from clumping in the bag. That starch prevents smooth melting. When you grate your own cheese, it melts instantly and creates that silky texture. It’s worth the ten minutes of grating time.
Also, don’t skip the Dijon mustard. It might seem odd in a cheesy dish, but the acidity cuts through the fat and brightens the flavor. It acts as a flavor enhancer, making the cheddar taste more like cheddar. It’s a chef’s secret that you’ll wonder how you lived without.
If your sauce looks a bit oily after adding the cheese, don’t panic. You can often fix it by adding a splash of cold milk and whisking vigorously. The cold temperature helps re-emulsify the fats. If that doesn’t work, a tiny bit more flour slurry (flour mixed with cold water) can help thicken and bind it back together.
Finally, resting time is non-negotiable if you are baking it. Hot mac and cheese is soupy. Letting it sit for 10-15 minutes after coming out of the oven allows the starches and proteins to relax and set. This gives you that perfect scoopable consistency rather than a liquid mess.
Variations & Adaptations
While this classic cheddar version is my go-to, this technique is incredibly versatile. You can adapt it to suit different dietary needs or flavor preferences.
Spicy Jalapeño Version: Add 1/2 cup of diced pickled jalapeños and a dash of cumin to the roux. This adds a Texas-style kick that pairs wonderfully with the cheddar. It’s great for game day.
Vegetable Packed: Stir in sautéed broccoli florets, caramelized onions, or roasted butternut squash cubes. The vegetables add texture and nutrition without compromising the creaminess. Just make sure to squeeze out excess moisture from cooked veggies before adding them.
Gluten-Free Option: Use gluten-free elbow pasta and substitute the all-purpose flour in the roux with a 1:1 gluten-free flour blend. Rice-based flours work well here. Just be sure to whisk thoroughly to avoid graininess.
Vegan Adaptation: This is trickier because dairy is central to the emulsion, but you can use high-quality vegan butter and a blend of nutritional yeast, cashew cream, and vegan cheddar shreds. The technique remains the same: make a roux with vegan butter, add plant milk, and stir in cheese off the heat.
Protein Boost: For a heartier meal, stir in cooked bacon bits, shredded chicken, or pulled pork. This turns the mac and cheese into a full main course. The smokiness of the bacon complements the paprika in the sauce beautifully.
Serving & Storage Suggestions
This mac and cheese is best served immediately while it’s hot and gooey. Pair it with a simple arugula salad with a lemon vinaigrette to cut through the richness. A glass of crisp white wine, like a Sauvignon Blanc, or a cold craft beer also works well. For presentation, garnish with fresh chives or parsley for a pop of color.
If you have leftovers (which I doubt), store them in an airtight container in the refrigerator for up to 3 days. The sauce may thicken in the fridge, so when reheating, add a splash of milk or water to loosen it up. Reheat gently on the stovetop over low heat, stirring frequently. Avoid the microwave if possible, as it can heat unevenly and cause the cheese to seize. If you must use the microwave, do it in short intervals and stir in between.
You can also freeze this dish, though the texture may change slightly upon thawing. Freeze it in portions for easy lunches. Thaw overnight in the fridge and reheat gently with added liquid. The flavors actually meld together nicely after a day or two in the fridge, making it even more delicious the next day.
Nutritional Information & Benefits
While this is definitely an indulgent dish, it provides substantial energy and satisfaction. Each serving contains a good amount of protein from the cheese and pasta, along with calcium and vitamin A from the dairy. The use of whole milk and butter provides satiety, helping you feel full longer than lighter alternatives. However, it is high in calories and saturated fat, so enjoy it in moderation. For a balanced meal, pair it with plenty of vegetables. This recipe is not a daily health food, but it’s a wonderful treat that brings joy and comfort, which is good for the soul.
Conclusion
Making restaurant queso mac & cheese at home is easier than you think, provided you respect the technique. It’s not about shortcuts; it’s about understanding how ingredients interact. The roux, the proper cheese, and the gentle heat are the keys to success. I hope this recipe brings you the same joy and satisfaction that it has brought me and my friends over the years. It’s a dish that celebrates comfort, community, and good food. Don’t be afraid to experiment with the seasonings and make it your own. I’d love to hear how it turns out for you. Leave a comment below with your variations or tips. Happy cooking!
Frequently Asked Questions
Can I use pre-shredded cheese for this recipe?
It is not recommended. Pre-shredded cheese contains anti-caking agents like cellulose that prevent smooth melting. This can result in a gritty or grainy sauce. For the best texture, always grate cheese from a block yourself.
Why did my cheese sauce break and become oily?
This usually happens when cheese is added to boiling liquid or heated too quickly. The proteins in the cheese tighten and squeeze out the fat. To prevent this, remove the pot from the heat before adding the cheese and use residual warmth to melt it gently. If it breaks, you can try whisking in a splash of cold milk to re-emulsify.
Can I make this recipe ahead of time?
Yes, you can prepare the sauce and cook the pasta ahead of time. Store them separately in the refrigerator. When ready to serve, reheat the sauce gently, add the pasta, and stir until combined. If baking, you can assemble it ahead of time and refrigerate, then bake when needed, adding a few extra minutes to the baking time.
What type of cheese is best for mac and cheese?
A blend of cheeses works best. Sharp cheddar provides the strong, classic flavor, while Gruyère or Fontina adds excellent meltability and a nutty depth. Avoid using only mild cheddar, as it can taste bland. Avoid pre-shredded varieties for the reasons mentioned above.
How do I store leftovers?
Store leftovers in an airtight container in the refrigerator for up to 3 days. Reheat gently on the stovetop with a splash of milk to restore the creamy consistency. Avoid high heat in the microwave, which can cause the sauce to separate.
Pin This Recipe!
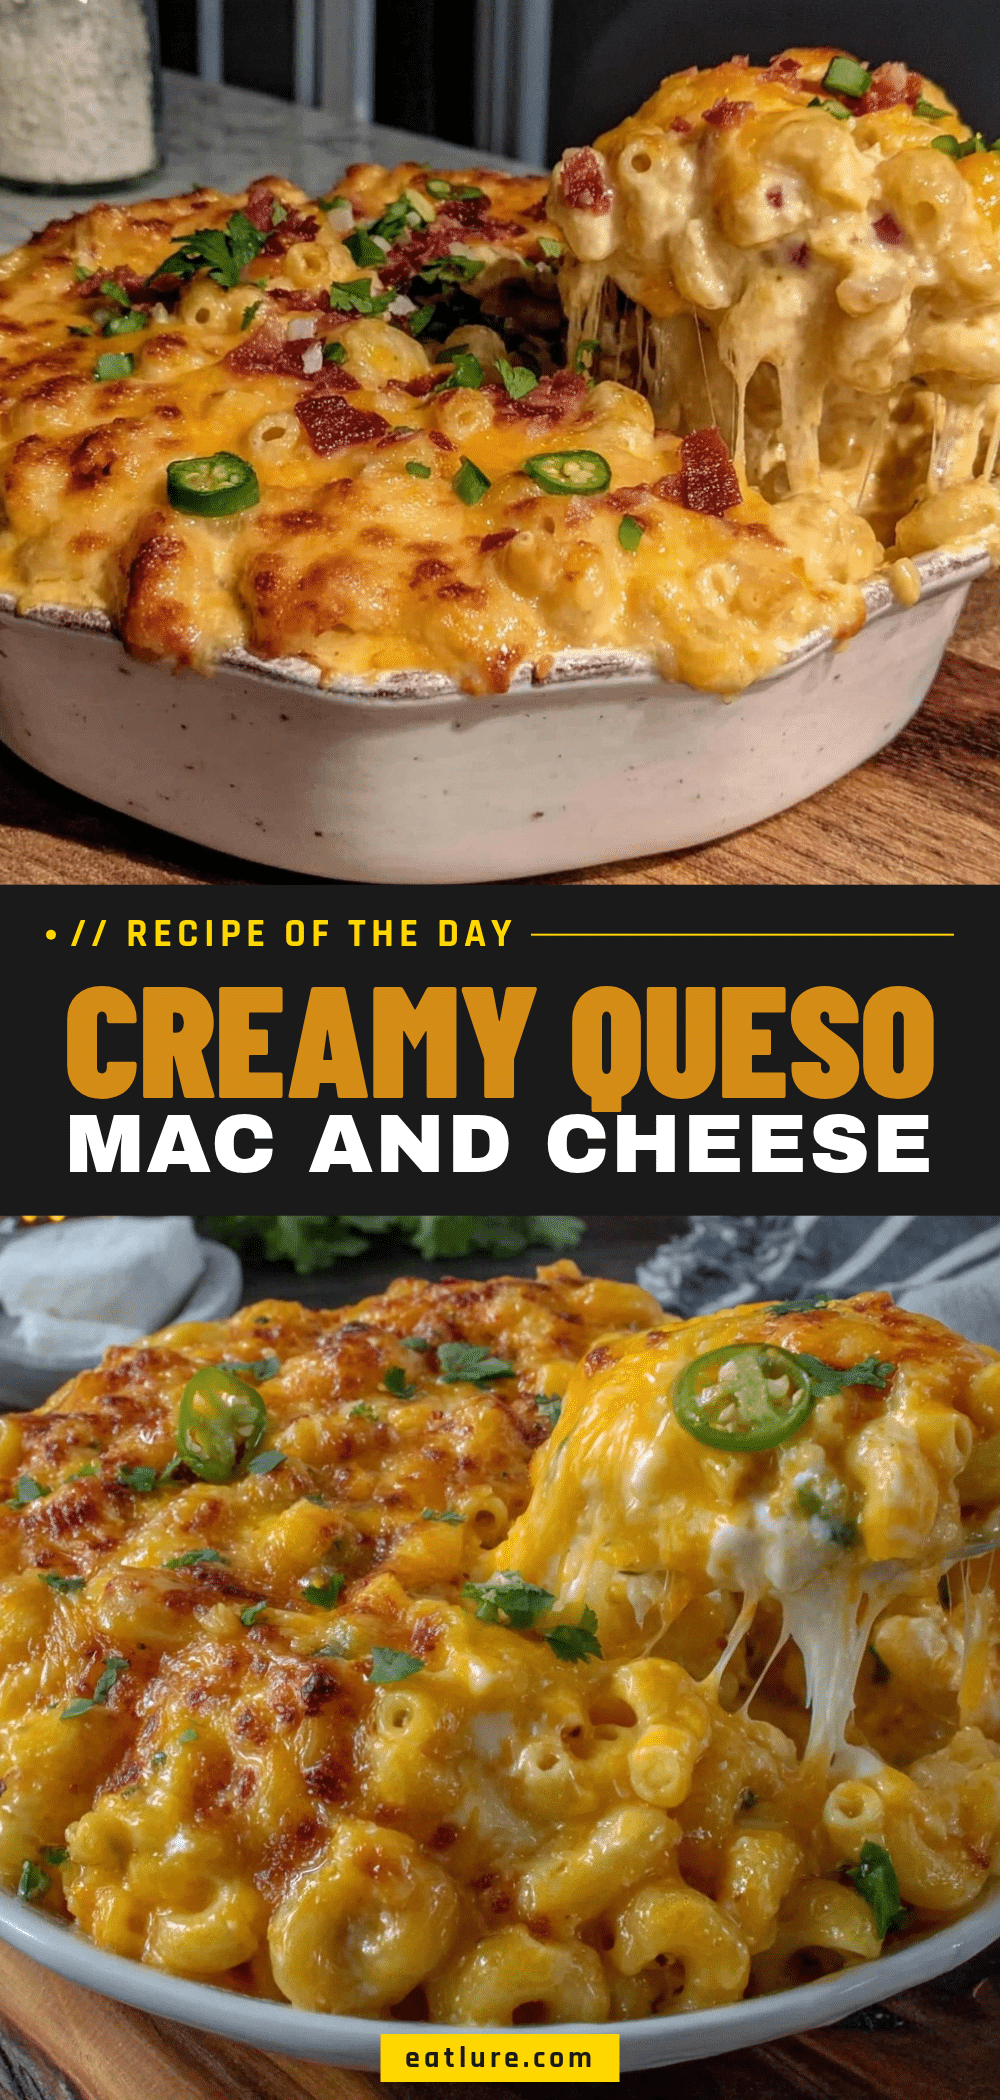

Restaurant Queso Mac & Cheese: The Pro Technique
- Total Time: 60 minutes
- Yield: 8 servings 1x
Description
A restaurant-quality mac and cheese recipe using a stabilized roux-based emulsion technique to create a silky, smooth, and rich cheese sauce that clings perfectly to pasta.
Ingredients
- 1 pound (450g) elbow macaroni
- 1 tablespoon salt (for pasta water)
- 1 cup (2 sticks / 226g) unsalted butter
- 1 cup (120g) all-purpose flour
- 4 cups (950ml) whole milk
- 1 cup (240ml) heavy cream
- 4 cups (approx. 400g) sharp cheddar cheese, freshly grated
- 2 cups (approx. 200g) Gruyère cheese, freshly grated
- 1 tablespoon Dijon mustard
- 1 teaspoon garlic powder
- 1 teaspoon smoked paprika
- 1/4 teaspoon cayenne pepper (optional)
- Salt and black pepper to taste
- Panko breadcrumbs (optional, for topping)
Instructions
- Bring a large pot of salted water to a rolling boil. Add elbow macaroni and cook until al dente, undercooking by one minute. Drain and set aside; do not rinse.
- In a heavy-bottomed saucepan or Dutch oven, melt butter over medium heat. Add flour and whisk constantly for 2-3 minutes until the mixture is light blonde and nutty.
- Slowly pour in milk and heavy cream, whisking vigorously to prevent lumps. Cook for 5-7 minutes until the sauce thickens enough to coat the back of a spoon.
- Remove the pot from the heat. Stir in Dijon mustard, garlic powder, smoked paprika, cayenne pepper, and half of the grated cheese. Taste and adjust salt and pepper.
- Add the drained macaroni to the cheese sauce and stir until every noodle is coated.
- Optional: Preheat oven to 375°F (190°C). Transfer mixture to a buttered 9×13 baking dish. Top with panko breadcrumbs mixed with melted butter and paprika if desired. Bake for 20-25 minutes until bubbly and golden.
- Let the mac and cheese rest for 10 minutes before serving to allow the sauce to set.
Notes
Do not use pre-shredded cheese as anti-caking agents can cause a gritty texture. Always grate cheese from a block. Remove the pot from heat before adding cheese to prevent breaking the emulsion. If the sauce becomes oily, whisk in a splash of cold milk to re-emulsify. Letting the dish rest after baking is crucial for the right consistency.
- Prep Time: 15 minutes
- Cook Time: 45 minutes
- Category: Main Course
- Cuisine: American
Nutrition
- Serving Size: 1 bowl
- Calories: 650
- Sugar: 6
- Sodium: 800
- Fat: 45
- Saturated Fat: 28
- Carbohydrates: 40
- Fiber: 2
- Protein: 22
Keywords: mac and cheese, queso, restaurant style, roux, comfort food, cheddar, Gruyère, baking, stovetop


