
The smell of golden, crackling batter hitting hot oil is the kind of comfort food noise that wakes up your entire neighborhood. Honestly, there is nothing quite like that initial crunch when you bite into perfectly fried food. It’s a texture that demands respect, and let’s face it, most home cooks get it wrong. They end up with soggy, greasy messes instead of the restaurant-quality crispiness we all crave.
I’ve spent years chasing that perfect shatter-crisp in my own kitchen. I’ve burned batches, wasted gallons of oil, and eaten my fair share of disappointments. The breakthrough came when I stopped treating batter like a one-size-fits-all solution. It turns out, the type of batter you choose completely changes the outcome. That’s why I’m sharing the three distinct batter types that guarantee success.
Whether you are frying chicken, vegetables, or seafood, understanding these three methods will transform your cooking. This isn’t just about dipping food in flour. It’s about chemistry, texture, and knowing exactly which batter suits your ingredient. Once you master these, you’ll never settle for limp fries or heavy breading again.
Why You’ll Love These Three Batter Types
After testing dozens of variations, I’ve found that sticking to just three core batter styles covers almost every craving you might have. Each one serves a specific purpose, and knowing when to use which one is the difference between a good meal and a great one. Here is why these methods are worth your time and oil.
- Quick & Versatile: These three batters come together in minutes. You don’t need fancy ingredients or hours of prep. Just mix, dip, and fry. It is perfect for those nights when you want something crispy but don’t want to spend hours in the kitchen.
- Pantry Staples: You likely already have the ingredients for all three types. Flour, baking powder, eggs, and beer are common household items. There is no need for a special grocery trip or obscure powders from a specialty store.
- Texture Control: Each batter offers a different mouthfeel. One gives you a light, airy cloud. Another creates a hard, crunchy shell. The third provides a tender, craggy crust. This variety keeps your meals interesting and prevents palate fatigue.
- Crowd-Pleaser Results: Kids love the crunch, and adults appreciate the depth of flavor. These batters mask the grease and highlight the food inside. They are reliable crowd-pleasers for game days, dinners, or weekend treats.
- Restaurant-Quality Finish: The secret is in the technique. By choosing the right batter for the ingredient, you mimic the results of professional fryers. It is the sauce built the way it’s supposed to be—crisp, golden, and not soggy.
What makes these recipes different is the focus on the science of crispiness. Most people think more flour equals crunchier. That is false. Too much flour creates a doughy layer. These three batters use precise ratios to ensure the crust stays light and adheres perfectly without becoming heavy. It is comfort food reimagined with precision.
What Ingredients You Will Need
This approach relies on simple, wholesome ingredients to deliver bold flavor and satisfying texture. The magic happens in how these basic items interact with heat and moisture. You don’t need expensive specialty flours or exotic spices. The key is quality and temperature.
For the All-Purpose Flour Batter
- All-Purpose Flour: The foundation of most batters. I recommend a high-protein brand like King Arthur for better structure. It provides the gluten network needed for a sturdy crust.
- Carbonated Water or Beer: The bubbles in carbonation create air pockets as they expand in the oil. This is the secret to lightness. Cold beer adds a subtle flavor and extra crispiness.
- Egg Yolk: Adds richness and helps the batter bind to the food. It creates a smoother, more cohesive coating that doesn’t fall off as easily.
- Seasonings: Salt, black pepper, and a pinch of paprika or garlic powder. These are essential for flavor, as the batter itself should be well-seasoned.
- Oil for Frying: Use a neutral oil with a high smoke point, like vegetable or canola oil. Peanut oil is excellent for its flavor and high heat tolerance.
For the Beer Batter

- Wheat Flour: Using a mix of all-purpose and wheat flour adds a nutty flavor and a slightly denser, chewier crunch. It holds up well to wet ingredients.
- Draft Beer: Use a cold lager or ale. The carbonation is key, so don’t use flat beer. The alcohol evaporates quickly, leaving behind a crisp structure.
- Baking Powder: A small amount helps the batter rise and become airy. It works in tandem with the carbonation for maximum lift.
- Cornstarch: Adding a tablespoon of cornstarch interferes with gluten formation, resulting in a lighter, more delicate crust that shatters when bitten.
For the Tempura-Style Batter
- Cold Water: Ice-cold water is non-negotiable. It shocks the gluten, preventing it from developing too much. This keeps the batter tender and lacy.
- Cake Flour or Low-Protein Flour: These flours have less gluten than all-purpose. This ensures the coating is fragile and crisp rather than tough and bread-like.
- Whole Egg: Beaten lightly, just enough to combine. Overmixing develops gluten, so keep it minimal. The egg adds color and helps the batter stick.
- Ice Cubes: Keep the batter bowl on ice while you work. Maintaining low temperature is the single most important factor for tempura success.
For seasonal ingredients, adjust your batter thickness slightly. Heavier vegetables like potatoes need a thicker coating, while delicate shrimp need a light dusting. Always taste your batter mixture before frying. It should taste slightly salty and savory on its own.
Equipment Needed
You don’t need a deep fryer to get great results, but having the right tools makes a huge difference. A heavy-bottomed pot or Dutch oven is ideal for maintaining steady heat. Cast iron is my personal favorite because it holds temperature well and distributes heat evenly.
A deep-fry thermometer is essential. Guessing the oil temperature leads to greasy food. You want the oil between 350°F and 375°F (175°C-190°C). If you don’t have one, a wooden chopstick test works—bubbles should form around the wood immediately.
Use a wire rack set over a baking sheet for draining. Paper towels can make the bottom soggy by trapping steam. A rack allows air to circulate, keeping the bottom crisp. A slotted spoon or spider strainer helps you lower food gently into the oil without splashing.
For budget-friendly options, a standard stainless steel saucepot works fine. Just be sure not to fill it more than one-third full with oil to prevent dangerous spills. Keep your tools clean and dry before starting. Water in hot oil is dangerous.
Preparation Method
Getting the batter right is only half the battle. The preparation of the food and the frying process are where the magic happens. Follow these steps carefully for the best results.
- Prep the Oil: Fill your pot with oil to a depth of 2-3 inches. Heat over medium-high heat until it reaches 375°F (190°C). This takes about 15-20 minutes. Patience here pays off. If the oil is too cool, the food absorbs it. If it’s too hot, the batter burns before the food cooks.
- Prepare the Food: Cut your protein or vegetables into uniform pieces. Pat them completely dry with paper towels. Moisture is the enemy of crispiness. If the food is wet, the batter will slide off or create steam pockets that make it soggy. Season the food generously before dipping.
- Mix the Batter: Whisk your dry ingredients in a large bowl. In a separate container, mix the wet ingredients. Pour the wet into the dry and stir gently until just combined. Lumps are okay. Overmixing makes the batter tough and chewy. Let it rest for 5 minutes while the oil finishes heating.
- Dip the Food: Using tongs or a fork, dip the food into the batter. Let excess drip off for a second. For a double-coat, dip, let it rest for 30 seconds, then dip again. This creates a thicker, crunchier shell. For a light coat, just one dip is enough.
- Fry in Batches: Carefully lower the food into the oil. Do not overcrowd the pot. Adding too much food drops the oil temperature drastically. Fry in small batches. The food should sizzle vigorously upon entry. If the sizzling stops, the oil is too cold.
- Monitor and Flip: Fry for 3-5 minutes, flipping halfway through, until golden brown. Use a thermometer to check the internal temperature of the food. Chicken should reach 165°F (74°C). Remove with a slotted spoon and place on the wire rack.
- Drain and Serve: Let the food rest on the rack for a minute. This allows the crust to set and become extra crisp. Serve immediately while hot. The crunchiest texture is lost after 10 minutes of sitting.
If your batter starts to separate or thicken too much, add a splash of cold water or beer. Adjust the consistency so it coats the back of a spoon but runs off easily. It should look like heavy cream.
Cooking Tips & Techniques
I learned the hard way that temperature control is everything. One time, I tried to fry a huge batch of onion rings at once. The oil temperature dropped from 375°F to 300°F in seconds. The result? A greasy, heavy mess that took forever to cook. Never rush this step.
Always keep your batter cold. If it sits out too long, it warms up, and the gluten activates. This leads to a tough, bread-like crust instead of a light, crispy one. Keep the bowl in the fridge or on ice until the moment you need it.
Use a splatter screen if you are worried about mess. Oil can pop and spit, especially if the food has any surface moisture. A screen keeps your stove clean without trapping too much steam, which can soften the crust.
Double frying is a pro technique for extra crispiness. Fry the food once at a lower temperature (325°F) to cook the inside. Remove and let it cool. Then, fry again at a higher temperature (375°F) to crisp the outside. This method is great for french fries and chicken wings.
If your batter is sliding off, your food might be too dry or too oily. Lightly dust dry food with flour before dipping. This creates a sticky base for the batter to adhere to. Make sure the oil is at the correct temperature before adding food.
Variations & Adaptations
These three batter types are flexible. You can adapt them to fit different dietary needs or flavor profiles. Here are some ideas to customize your fried foods.
Gluten-Free Option: Swap all-purpose flour for a 1:1 gluten-free flour blend. Add a teaspoon of xanthan gum if your blend doesn’t include it. This helps mimic the elasticity of gluten. Rice flour or cornstarch can also be used for a lighter, crispier texture.
Spicy Kick: Add cayenne pepper, chili powder, or crushed red pepper flakes to any of the batters. For a deeper heat, use gochujang paste in the tempura batter. This works beautifully with sweet potatoes or cauliflower.
Herb-Infused Crust: Mix dried herbs like thyme, rosemary, or parsley into the dry ingredients. Fresh herbs can burn in hot oil, so stick to dried varieties. This adds an earthy, aromatic flavor that complements chicken and fish.
Low-Fat Baking: While frying is the goal for crispiness, you can bake these batters. Spray the coated food with cooking oil and bake at 400°F (200°C) for 15-20 minutes. The result won’t be as crispy as frying, but it is still delicious and much lighter.
I once tried adding Parmesan cheese to the beer batter. It created a savory, nutty crust that paired perfectly with zucchini fries. Don’t be afraid to experiment with your favorite seasonings.
Serving & Storage Suggestions
Fried food is best served immediately. Pair it with a cooling dip like ranch, tartar sauce, or a spicy mayo. A side of coleslaw or pickles cuts through the richness of the oil. Fresh lemon wedges are essential for seafood.
If you have leftovers, store them in an airtight container in the refrigerator for up to two days. Reheat in an air fryer or oven at 400°F (200°C) for 5-7 minutes. Microwaving will make the crust soft and chewy, so avoid it if you want to preserve the crunch.
The flavors of the batter continue to meld after frying. Some batters taste better the next day, especially those with spices. However, the texture will always be best fresh from the oil. Plan your meals accordingly.
For parties, keep fried food warm in a low oven (200°F) on a wire rack. This prevents sogginess while you finish cooking the rest of the batch. Serve in small bowls to encourage sharing.
Nutritional Information & Benefits
Fried food is indulgent, but it can fit into a balanced diet. The batter adds carbohydrates and some fat, but the protein and fiber from the main ingredient remain intact. Using air frying or baking can reduce the fat content significantly.
Choose lean proteins like chicken breast or white fish to keep the meal lighter. Load up on vegetables like zucchini, eggplant, or broccoli to add nutrients. The batter acts as a vehicle for these healthy ingredients.
Be mindful of portion sizes. A small serving of crispy fried food is satisfying. Pair it with a large salad or steamed vegetables to balance the meal. It is about enjoying the treat without overindulging.
For those with allergies, always check your flour and beer labels. Many beers contain gluten. Use gluten-free beer or carbonated water for safe alternatives. Cornstarch is a great allergen-friendly thickener.
Conclusion
Mastering these three batter types changes everything. You no longer have to guess why your fried food is soggy. You have the tools to create perfect, crispy results every time. It is about respecting the ingredients and the process.
Try each batter with different foods. See how the beer batter works with mushrooms or how the tempura batter suits shrimp. Experimentation is part of the fun. Share your results with friends and family. They will notice the difference.
I love this recipe because it brings joy to simple meals. There is something satisfying about making something crispy from scratch. It feels like a small victory in the kitchen. So grab your pot, heat your oil, and get cooking.
Leave a comment below with your favorite frying ingredient. Have you tried any of these batters before? I’d love to hear your tips and tricks. Happy frying!
Frequently Asked Questions
Why is my fried food soggy?
Sogginess usually comes from overcrowding the pan or oil that is not hot enough. When you add too much food, the oil temperature drops, and the food absorbs oil instead of crisping. Always fry in small batches and keep the oil above 350°F.
Can I reuse the frying oil?
Yes, you can reuse oil if it looks clean and smells fresh. Strain it through a coffee filter or cheesecloth to remove food particles. Store it in a sealed container in a cool, dark place. Reuse it up to three times, but discard it if it becomes dark or smoky.
What is the best oil for frying?
Neutral oils with high smoke points are best. Vegetable, canola, peanut, and sunflower oils are all excellent choices. Peanut oil adds a nice nutty flavor, while canola is more budget-friendly. Avoid olive oil as it has a low smoke point and can burn.
How do I know when the batter is done?
The batter is done when it is golden brown and floating in the oil. It should sound crisp when tapped with a spoon. Use a meat thermometer to check the internal temperature of the food. Chicken should reach 165°F, and fish should reach 145°F.
Can I make the batter ahead of time?
It is best to make the batter right before frying. Batter loses its carbonation and becomes heavy if it sits too long. If you must prepare ahead, mix the dry and wet ingredients separately and combine them just before cooking. Keep the wet ingredients cold.
Pin This Recipe!
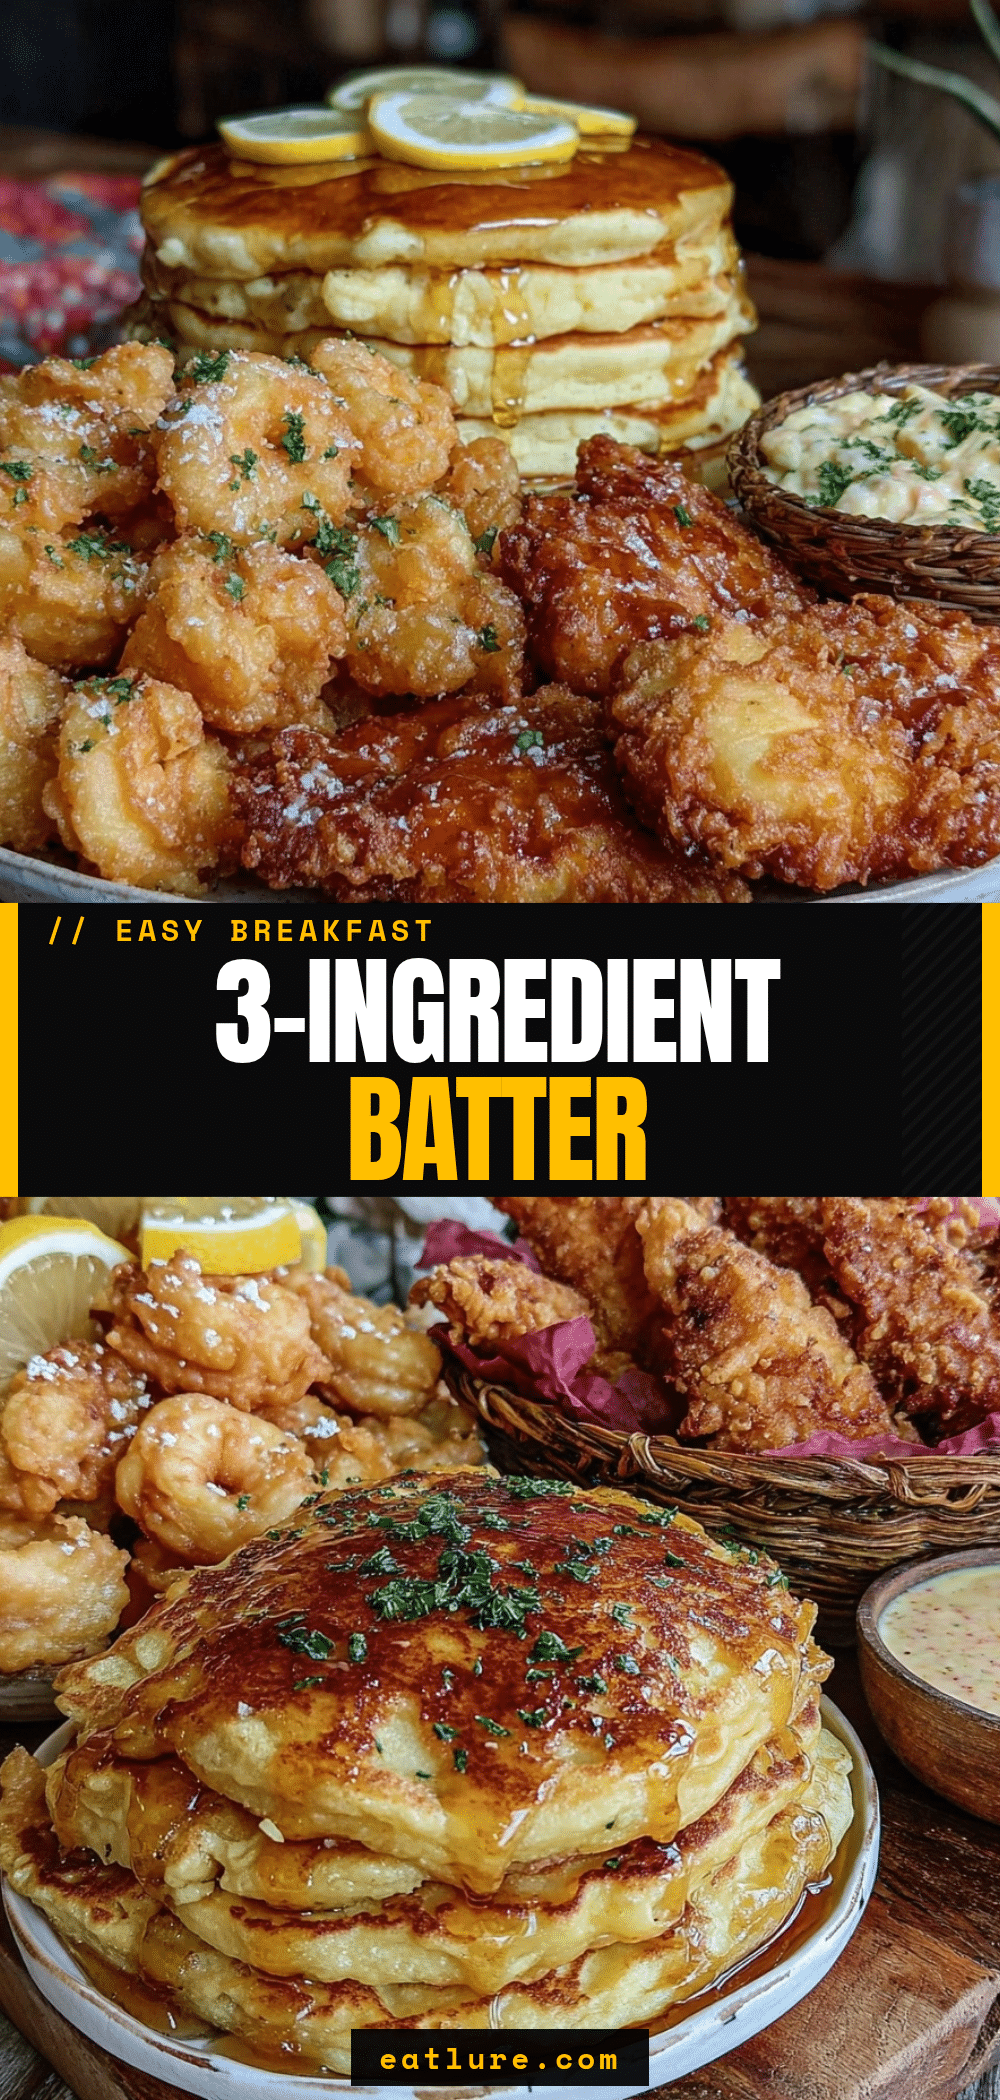

Perfect Fried Batter: 3 Types for Crispy Results
- Total Time: 35 minutes
- Yield: 4 servings
Description
Master the art of crispy fried food with three distinct batter types: All-Purpose, Beer, and Tempura-Style. Learn the science behind the crunch and how to achieve restaurant-quality results at home.
Ingredients
- All-Purpose Flour (high-protein recommended)
- Carbonated Water or Cold Beer
- Egg Yolk
- Salt, Black Pepper, Paprika, or Garlic Powder
- Neutral Oil (Vegetable, Canola, or Peanut) for frying
- Wheat Flour (optional for Beer Batter)
- Baking Powder
- Cornstarch
- Ice-Cold Water
- Cake Flour or Low-Protein Flour (for Tempura)
- Whole Egg (for Tempura)
Instructions
- Fill a heavy-bottomed pot or Dutch oven with oil to a depth of 2-3 inches. Heat over medium-high heat until it reaches 375°F (190°C).
- Cut protein or vegetables into uniform pieces and pat them completely dry with paper towels. Season generously.
- Whisk dry ingredients in a large bowl. In a separate container, mix wet ingredients. Pour wet into dry and stir gently until just combined (lumps are okay). Let rest for 5 minutes.
- Dip food into the batter, letting excess drip off. For a thicker crust, dip, rest for 30 seconds, and dip again.
- Carefully lower food into the hot oil in small batches to avoid dropping the temperature. Fry for 3-5 minutes, flipping halfway, until golden brown.
- Remove food with a slotted spoon and place on a wire rack set over a baking sheet to drain and keep crisp.
- Serve immediately while hot for the best texture.
Notes
Keep batter cold to prevent gluten development. Do not overcrowd the pot. Reheat leftovers in an air fryer or oven at 400°F to maintain crispiness; avoid microwaving. For gluten-free options, use a 1:1 gluten-free flour blend.
- Prep Time: 15 minutes
- Cook Time: 20 minutes
- Category: Main Course
- Cuisine: American
Nutrition
- Serving Size: Varies by ingredient
- Calories: 450
- Sugar: 1
- Sodium: 600
- Fat: 25
- Saturated Fat: 5
- Carbohydrates: 35
- Fiber: 2
- Protein: 15
Keywords: fried batter, crispy food, beer batter, tempura batter, deep frying tips, homemade fried chicken, crispy vegetables


