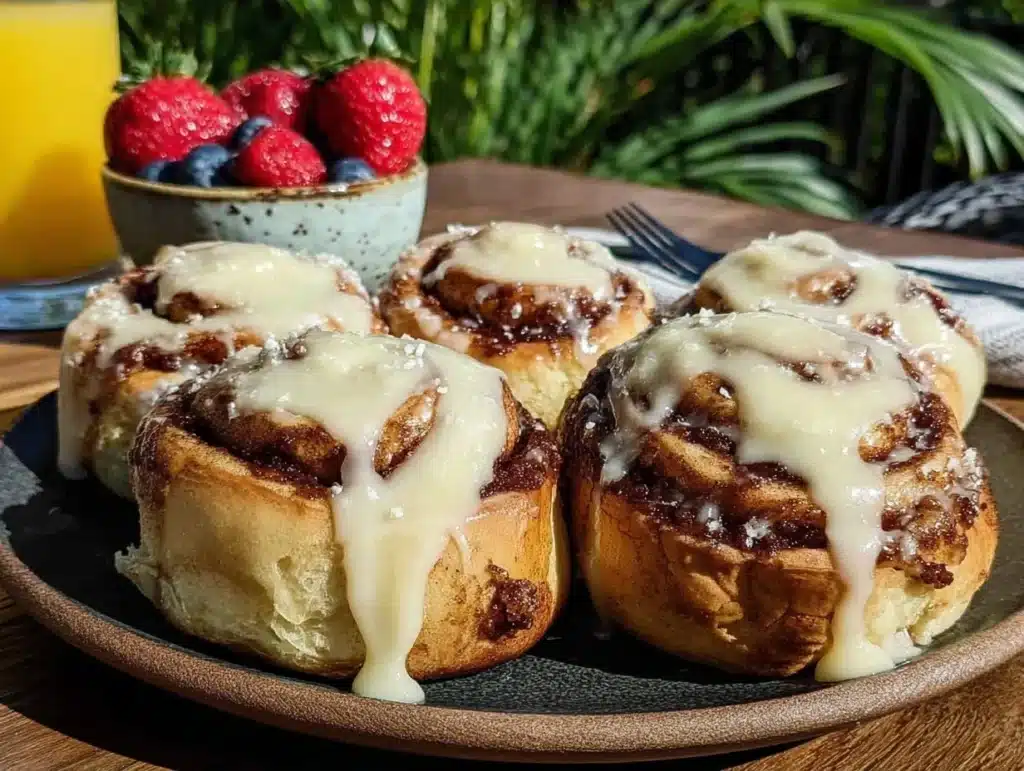
There is nothing quite like the smell of cinnamon wafting through crisp morning air to signal that a perfect day has begun. I remember my first attempt at making cinnamon rolls in a campsite, standing in my pajamas with chattering teeth, trying to manage a flimsy camping stove while the sun struggled to peek through the trees. It was messy, slightly burnt, and absolutely delicious in a way that defined early morning camping for me. Since then, I have refined the process until these Perfect Outdoor Brunch Cinnamon Rolls became the holy grail of our weekend getaways. You know how some recipes feel like a chore? This one feels like a reward before you’ve even had your first sip of coffee.
I’ve tested dozens of dough recipes in varying weather conditions, from humid summer nights to chilly autumn mornings. The secret isn’t just in the yeast; it’s in the timing and the heat management. These rolls are soft, pillowy, and packed with that gooey, brown sugar center that makes you close your eyes and sigh. Honestly, they are worth the extra ten minutes of effort it takes to prepare them on a portable burner. Whether you are feeding a family of four or just yourself in a tent, this method ensures you get bakery-quality results without the bakery price tag or the drive home.
What I love most is how these rolls bring everyone together. You’ll find kids and adults alike gathering around the camp stove, waiting for that first warm bite. It turns a simple breakfast into a memorable event. The dough is forgiving, the filling is indulgent, and the whole process feels like a ritual. If you’ve ever struggled with dense, undercooked buns in the past, trust me, this technique changes everything. You’ll be the hero of the campsite, serving up warm, fresh pastries while everyone else is still rubbing sleep from their eyes. It’s comfort food, reimagined for the great outdoors.
Why You’ll Love This Recipe
Let’s be honest for a moment. Camping breakfasts often consist of cold cereal, granola bars, or that sad, stale bread from the gas station. But you deserve better. You deserve something that tastes like home, even if you are miles away from your kitchen. I’ve spent years perfecting this dough because I refused to accept subpar morning treats in the wild. After testing this recipe over a dozen times, I can confidently say these are the best camping cinnamon rolls you will ever make. They are not just good; they are the kind that make you want to skip the hike and stay in bed a little longer.
- Quick & Easy Prep: While the dough needs time to rise, the active prep time is minimal. You can have everything mixed and ready to cook in under twenty minutes, which is perfect for those early starts when you’re eager to hit the trail.
- Simple Ingredients: You likely have most of these items in your pantry already. Flour, sugar, yeast, butter, and cinnamon. No fancy, hard-to-find ingredients that require a special trip to the store before you leave.
- Perfect for Campfire Cooking: This recipe is specifically designed for outdoor heat sources. Whether you use a camp stove, a Dutch oven, or even a fire grate, these rolls adapt beautifully. They are great for cozy mornings or festive holiday camping trips.
- Crowd-Pleaser: I have served these to picky eaters, adventurous foodies, and tired hikers. Every single person loves them. The texture is light, and the sweetness is balanced perfectly so it isn’t cloying.
- Unbelievably Delicious: The combination of the fluffy dough and the sticky, warm filling is next-level comfort food. It’s soul-soothing satisfaction in a bite.
What makes this recipe different from the rest is the technique. Most camping recipes rely on pre-made dough or canned biscuits. We are making this from scratch, but we are using a shortcut that doesn’t sacrifice quality. By using a slightly wetter dough and a controlled cooking environment, we achieve that bakery-soft texture. It’s not just about feeding people; it’s about creating a moment. These rolls are the kind that make you feel like you’ve accomplished something special, even if all you did was bake some bread outside. It’s a small victory that tastes amazing.
What Ingredients You Will Need
This recipe uses simple, wholesome ingredients to deliver bold flavor and satisfying texture without the fuss. The key is to use good quality basics. Since you are cooking outdoors, you want ingredients that are stable and easy to transport. I recommend using a reliable brand of active dry yeast, as inconsistent yeast is the number one reason camping dough fails. Look for a firm, small-curd cottage cheese if you choose to use it for moisture, but standard milk works well too. For the filling, use brown sugar that is packed firmly to ensure that gooey center.
For the Dough
- All-purpose flour: 3 to 3 1/2 cups (375g to 440g). I recommend King Arthur Flour for its consistent protein content, which helps with structure.
- Active dry yeast: 2 1/4 teaspoons (one standard packet). Make sure it is fresh; old yeast won’t rise properly.
- Granulated sugar: 1/4 cup (50g). This feeds the yeast and adds a touch of sweetness to the dough.
- Salt: 1 teaspoon. Essential for flavor balance.
- Warm milk: 1 cup (240ml). Should be about 110°F (43°C). Too hot will kill the yeast; too cold will slow it down.
- Unsalted butter: 4 tablespoons (60g), melted. Adds richness and tenderness.
- Large egg: 1 large egg, room temperature. Helps bind the dough and add structure.
For the Filling

- Unsalted butter: 1/2 cup (115g), softened. This creates the barrier between the dough and the sugar.
- Dark brown sugar: 1 cup (200g). Packed firmly. Dark brown sugar has more molasses, which gives a deeper, caramel-like flavor.
- Ground cinnamon: 2 tablespoons. Don’t skimp on this; you want that strong cinnamon aroma.
For the Glaze
- Powdered sugar: 1 cup (120g). Sifted to remove lumps.
- Milk: 2 to 3 tablespoons (30ml to 45ml). Adjust for desired consistency.
- Vanilla extract: 1/2 teaspoon. Adds a nice aromatic depth.
If you need substitutions, you can use almond flour for a gluten-free option, though the texture will be denser. For a dairy-free version, swap the butter for coconut oil and the milk for oat milk. I personally prefer using a cast-iron skillet for even heat distribution, but a heavy-bottomed pot works too. When sourcing ingredients, stick to what you trust. I’ve had bad experiences with generic yeast brands in the past, so I always double-check the expiration date before heading out.
Equipment Needed
You don’t need a full kitchen to make these, but having the right tools makes a huge difference. A cast-iron skillet is my top recommendation because it retains heat incredibly well and distributes it evenly. If you don’t have one, a heavy-bottomed stainless steel pot with a tight-fitting lid works as a good alternative. Avoid thin aluminum pans, as they can burn the bottom of the rolls before the inside is cooked.
You’ll also need a digital thermometer. This is non-negotiable for checking milk temperature. Guessing can lead to dead yeast or cooked eggs in your dough. A small whisk or fork for mixing, and a pastry brush for applying butter if you want even coverage. A sharp knife or pizza cutter is useful for slicing the rolls before cooking. Finally, bring a heat diffuser or a trivet. This is a game-changer for camp stoves, as it prevents the direct flame from scorching the bottom of your pan. It’s a small investment that saves your breakfast every time.
Preparation Method
Step 1: Activate the Yeast (10 minutes)
In a small bowl, combine the warm milk (110°F/43°C) and 1 teaspoon of the granulated sugar. Sprinkle the active dry yeast over the top and stir gently. Let it sit for about 5 to 10 minutes until it becomes foamy and bubbly. If it doesn’t foam, your yeast is likely dead, and you should start over. This step ensures your dough will rise properly in the outdoors where temperatures can fluctuate.
Step 2: Mix the Dough (5 minutes)
In a large mixing bowl, combine the remaining 3/4 cup of sugar and the salt. Add the melted butter and the egg. Whisk these wet ingredients together until smooth. Pour in the activated yeast mixture. Gradually add the flour, one cup at a time, stirring with a wooden spoon or dough hook. Start with 3 cups. The dough should be soft and slightly sticky but not adhere heavily to your hands. If it’s too wet, add more flour, a tablespoon at a time. Knead the dough on a floured surface for about 5 minutes until it is smooth and elastic. This develops the gluten, which gives the rolls their chewy texture.
Step 3: First Rise (45-60 minutes)
Place the dough in a lightly oiled bowl and cover it with a damp cloth or plastic wrap. Let it rise in a warm, draft-free spot. In a car or a tent, it might take longer if it’s cold. You want the dough to double in size. You can speed this up by placing the bowl near a warm water bottle or in a sunny spot. Do not rush this step, as under-risen dough will be dense.
Step 4: Shape the Rolls (10 minutes)
Punch down the risen dough to release air bubbles. Roll it out on a floured surface into a large rectangle, approximately 12×18 inches. In a small bowl, mix the softened butter, brown sugar, and cinnamon until it forms a paste. Spread this mixture evenly over the entire surface of the dough, leaving a small border at the edges. Starting from the long side, roll the dough up tightly into a log. Use a sharp knife or dental floss to cut the log into 9 to 12 equal rolls. Place them seam-side down in your greased cast-iron skillet or pot.
Step 5: Second Rise (20-30 minutes)
Cover the pan again and let the rolls rise for another 20 to 30 minutes. They should look puffy and jiggly. This second rise is crucial for lightness. While they rise, preheat your camp stove or prepare your fire. You want a medium-low heat. If using a fire, build a bed of coals rather than an open flame.
Step 6: Cook the Rolls (20-25 minutes)
Place the pan on the heat source. If using a camp stove, set it to medium-low. Cover with a tight-fitting lid. Cook for about 15 to 20 minutes. Do not peek too often, as releasing the steam can affect the rise. To check for doneness, insert a toothpick into the center of a roll. It should come out clean or with just a few moist crumbs. If the tops are browning too quickly, cover the pan with aluminum foil. The internal temperature should reach about 190°F (88°C).
Step 7: Glaze and Serve (5 minutes)
While the rolls are cooking, whisk together the powdered sugar, milk, and vanilla to make the glaze. Once the rolls are done, remove the pan from the heat. Let them cool for 2-3 minutes, then drizzle the glaze over the top. Serve immediately while they are warm and gooey.
Cooking Tips & Techniques
Cooking outdoors is different from cooking at home. The wind, the altitude, and the heat source all play a role. One common mistake is using too high heat. Camp stoves can be powerful, so always start low. If you see smoke coming from under the pan, your heat is too high. Use a heat diffuser to spread the heat evenly. Another tip is to keep the lid on as much as possible. The rolls steam as they bake, which helps them cook through without drying out. If you lift the lid too often, you lose that essential moisture.
I once tried making these rolls over an open fire without a diffuser. The bottoms were charcoal, and the tops were raw. Lesson learned. Always use indirect heat. Also, pay attention to your dough consistency. In humid weather, flour might absorb more moisture, so you might need a bit more flour. In dry weather, the dough might be stickier, so add a little less. Trust your hands. The dough should feel like a soft earlobe. If it sticks to your fingers, add more flour. If it cracks, add more water or milk.
Another pro tip is to pre-warm your skillet. A cold pan can shock the dough and affect the rise. Just let the pan warm up for a minute before adding the rolls. And never skip the second rise. It is tempting to rush, but that extra 20 minutes makes the difference between a dense brick and a fluffy cloud. Take your time, and your taste buds will thank you.
Variations & Adaptations
One of the best things about this recipe is how adaptable it is. You can customize the filling to suit your taste or what you have on hand. For a classic twist, add chopped pecans or walnuts to the filling for extra crunch. If you prefer a cream cheese glaze, mix 2 ounces of softened cream cheese with the powdered sugar and a splash of milk. This adds a tangy richness that pairs beautifully with the sweet dough.
For a fruity variation, add sliced strawberries or blueberries between the layers of dough before rolling. The juices will caramelize slightly during cooking, creating a delicious fruit syrup. If you are watching your sugar intake, you can reduce the brown sugar in the filling by half and use a sugar substitute, though the texture may be slightly different. For a dairy-free version, use coconut oil instead of butter and oat milk instead of dairy milk. The flavor will be subtly different but still delicious.
I also like to add a pinch of nutmeg or cardamom to the filling for a warmer, spicier flavor profile. This works especially well in the fall. You can also experiment with different types of sugar. Maple sugar adds a distinct autumnal flavor that is perfect for camping. Don’t be afraid to tweak the recipe to match your mood or the season. The base dough is forgiving and accepts these changes well.
Serving & Storage Suggestions
These rolls are best served warm, straight from the pan. Pair them with a hot cup of coffee or tea to balance the sweetness. If you are feeding a crowd, serve them with fresh fruit or bacon on the side. For storage, allow any leftovers to cool completely. Place them in an airtight container or wrap them tightly in plastic wrap. They can be kept at room temperature for up to two days, or in the refrigerator for up to five days.
To reheat, wrap the rolls in foil and warm them in a low oven or on the camp stove for a few minutes. You can also microwave them for 20-30 seconds, though the texture may become slightly softer. The flavors actually develop over time, making them great for next-day breakfasts. If you want to prep ahead, you can mix the dough the night before and refrigerate it. Let it come to room temperature before rising and cooking. This saves valuable morning time. Just remember that the second rise might take a bit longer if the dough is cold.
Nutritional Information & Benefits
While these are definitely a treat, they can be part of a balanced outdoor breakfast. Each roll contains approximately 250-300 calories, depending on the size and glaze. The dough provides carbohydrates for energy, which is essential for a day of hiking or outdoor activities. The butter and egg add protein and healthy fats, helping you feel satiated. You can adjust the nutritional profile by using whole wheat flour for added fiber or reducing the amount of sugar in the glaze. Always consider your dietary needs and portion sizes. These are meant to be enjoyed in moderation as a special outdoor indulgence.
Conclusion
Making Perfect Outdoor Brunch Cinnamon Rolls is more than just cooking; it’s about creating a memory. It’s about the smell, the warmth, and the shared joy of a beautiful morning in nature. I hope you try this recipe and find it to be as much of a hit for you as it has been for me. Don’t be afraid to experiment with fillings and glazes to make it your own. The process is simple, but the result is extraordinary. So grab your cast-iron skillet, pack your ingredients, and head out into the wild. You won’t regret it.
I’d love to hear how your camping breakfast turns out. Share your photos and stories in the comments below. Did you add any unique twists? Did you use a Dutch oven or a camp stove? Let’s share our tips and tricks to make outdoor cooking even better. Happy baking, and enjoy every sticky, sweet bite!
Frequently Asked Questions
Can I make the dough ahead of time?
Yes, you can mix the dough the night before and refrigerate it. Let it sit in the fridge overnight. The next morning, take it out and let it come to room temperature before proceeding with the first rise. This saves time in the morning.
What if I don’t have a cast-iron skillet?
You can use a heavy-bottomed pot with a tight-fitting lid, like a Dutch oven or a stainless steel saucepan. Avoid thin aluminum pans as they can burn the rolls. Just make sure the pot is large enough to hold the rolls without crowding.
How do I keep the rolls warm during the hike?
Wrap the skillet in a towel or place it in a cooler (without ice) to retain heat. You can also serve them immediately after cooking. If you need to transport them, use a insulated food carrier.
Can I freeze the cooked rolls?
Yes, you can freeze the cooked rolls. Let them cool completely, then wrap them tightly in plastic wrap and foil. They can be frozen for up to three months. Thaw and reheat before eating.
Why are my rolls dense?
Dense rolls are usually caused by under-rising or using old yeast. Make sure your yeast is fresh and active. Also, allow enough time for the dough to rise until it doubles in size. Don’t rush the process.
Pin This Recipe!


Perfect Outdoor Brunch Cinnamon Rolls: Easy Camping Breakfast
- Total Time: 1 hour 45 minutes
- Yield: 9-12 servings 1x
Description
Soft, pillowy cinnamon rolls made from scratch specifically for outdoor cooking. These bakery-quality treats are perfect for campsite breakfasts, featuring a gooey brown sugar center and a sweet vanilla glaze.
Ingredients
- 3 to 3 1/2 cups all-purpose flour
- 2 1/4 teaspoons active dry yeast
- 1/4 cup granulated sugar
- 1 teaspoon salt
- 1 cup warm milk (110°F/43°C)
- 4 tablespoons unsalted butter, melted
- 1 large egg, room temperature
- 1/2 cup unsalted butter, softened (for filling)
- 1 cup dark brown sugar, packed (for filling)
- 2 tablespoons ground cinnamon (for filling)
- 1 cup powdered sugar, sifted (for glaze)
- 2 to 3 tablespoons milk (for glaze)
- 1/2 teaspoon vanilla extract (for glaze)
Instructions
- Activate the yeast: Combine warm milk and 1 teaspoon of granulated sugar in a small bowl. Sprinkle yeast over the top and let sit for 5-10 minutes until foamy.
- Mix the dough: In a large bowl, combine remaining sugar and salt. Add melted butter and egg, whisking until smooth. Pour in yeast mixture and gradually add flour, stirring until a soft, slightly sticky dough forms.
- Knead the dough: Knead on a floured surface for about 5 minutes until smooth and elastic.
- First rise: Place dough in a lightly oiled bowl, cover, and let rise in a warm spot for 45-60 minutes until doubled in size.
- Shape the rolls: Punch down dough and roll into a 12×18 inch rectangle. Mix softened butter, brown sugar, and cinnamon to form a paste. Spread over dough, leaving a border. Roll tightly into a log and cut into 9-12 rolls.
- Second rise: Place rolls seam-side down in a greased cast-iron skillet or pot. Cover and let rise for 20-30 minutes until puffy.
- Cook the rolls: Preheat camp stove to medium-low or prepare a bed of coals. Place pan on heat with a tight-fitting lid. Cook for 15-20 minutes until a toothpick comes out clean. Cover with foil if tops brown too quickly.
- Make the glaze: Whisk powdered sugar, milk, and vanilla extract until smooth.
- Serve: Let rolls cool for 2-3 minutes, then drizzle with glaze. Serve warm.
Notes
Ensure yeast is fresh and active for proper rising. Use a heat diffuser on camp stoves to prevent burning. Keep the lid on during cooking to retain steam. Dough consistency may need adjustment based on humidity. For dairy-free, use coconut oil and oat milk. For gluten-free, use almond flour (note: texture will be denser).
- Prep Time: 20 minutes
- Cook Time: 20-25 minutes
- Category: Breakfast
- Cuisine: American
Nutrition
- Serving Size: 1 roll
- Calories: 275
- Sugar: 22
- Sodium: 250
- Fat: 12
- Saturated Fat: 7
- Carbohydrates: 38
- Fiber: 1
- Protein: 4
Keywords: camping breakfast, cinnamon rolls, outdoor cooking, camp stove recipes, camping food, easy camping recipes, homemade cinnamon rolls


