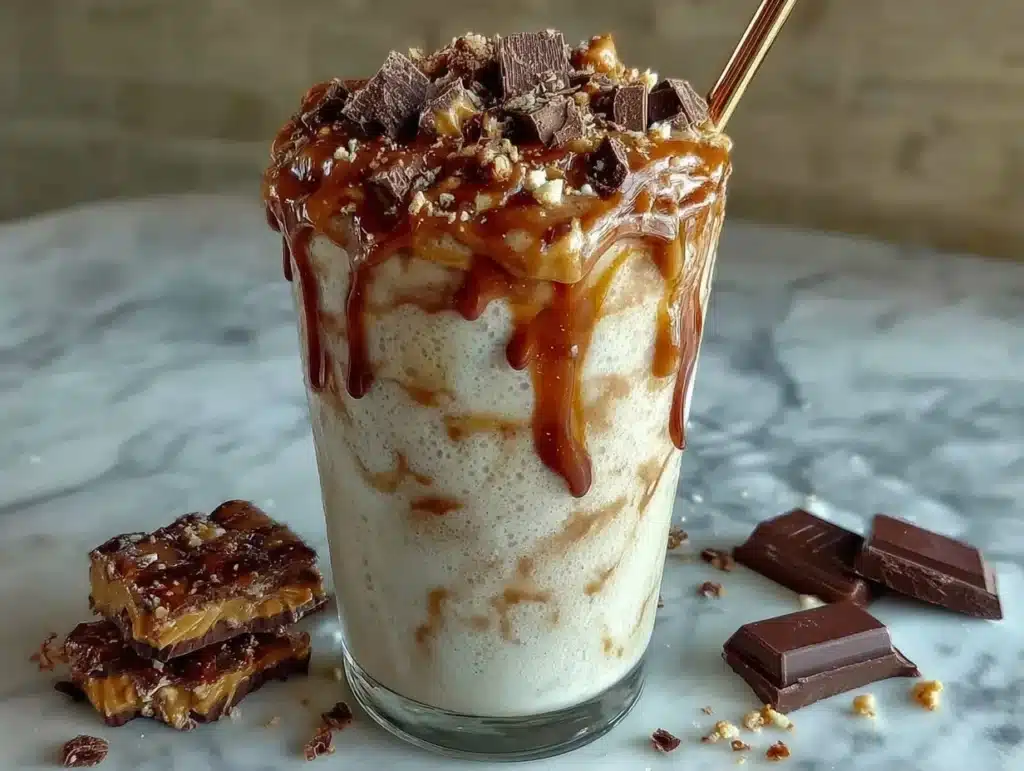
Let’s be honest for a second. I used to think ice cream was the enemy of my fitness goals. You know the type, the heavy, sugary, guilt-inducing dessert that sits at the bottom of the freezer door, judging your life choices. But then I bought the Ninja Creami. Honestly, it felt like cheating. Like, “how is this even legal” cheating.
I remember the first time I made a creamy Ninja Creami protein shake turned ice cream. It was 6 AM. My alarm had gone off three times. I was groggy, my hair was doing its usual rebel act, and I needed fuel. But I didn’t want a chalky shake. I wanted something that felt like a treat but hit my macros like a truck. So, I dumped some Greek yogurt, a scoop of vanilla protein, and a splash of almond milk into the pint. I hit the “Ice Cream” button and waited.
When the machine beeped, I scraped that spoon in. It was smooth. Creamy. Almost like soft-serve from that one place downtown that always has a line. I took a bite and nearly cried. It wasn’t just good; it was the kind of texture that makes you close your eyes and forget about your to-do list for exactly thirty seconds. That moment sparked an obsession. I’ve tested this recipe over a dozen times now, tweaking the ratios until I found the sweet spot between “drinkable” and “spoonable.”
This isn’t just another frozen dessert. It’s a high-protein breakfast, a post-workout recovery snack, and a late-night treat all rolled into one. If you’re tired of dry protein bars or watery shakes, this is your answer. It’s the copycat that outdoes the original dairy shop experience, without the dairy or the sugar crash. And the best part? You probably have half the ingredients in your fridge right now.
Why You’ll Love This Recipe
Look, I’ve tried a lot of protein ice creams. Some are icy. Some are grainy. Some taste like they were made with old, stale protein powder. This recipe is different. It’s the result of trial, error, and a lot of freezer burns on my fingertips. Here is why this creamy Ninja Creami protein shake version is the one you’ll come back to, week after week.
- It’s Actually Creamy: Most protein shakes turn into ice blocks in the freezer. Not this one. By using a specific blend of full-fat Greek yogurt and a touch of heavy cream (or a dairy-free alternative), you get a mouthfeel that rivals any premium ice cream. It’s rich, velvety, and satisfying.
- Protein Without the Chalk: We’re talking 25-30 grams of protein per serving. But here’s the secret: we use a mix of whey isolate and a little bit of cottage cheese or yogurt. This masks the protein powder taste completely. You get the muscle repair benefits without the texture you hate.
- Under 5 Minutes of Active Prep: I know, I know, you’re busy. You have a job, a family, a life. This recipe takes about five minutes to mix up and dump in the freezer. The machine does the heavy lifting. It’s perfect for busy weeknights when you want something better than cereal but don’t have time to cook.
- Customizable to Hell: Want chocolate? Add cocoa powder. Want peanut butter? Swirl it in. Want berries? Blend them fresh. This base recipe is your canvas. I’ve made this with coffee grounds for a mocha vibe, and it was life-changing.
- It’s a Crowd-Pleaser: My kids, who usually turn their noses up at “healthy” food, fight over this. I’ve served it at dinner parties as a dessert, and guests have asked for the recipe, thinking it’s a fancy gelato. It’s that good. It’s comfort food reimagined for the fitness crowd.
What makes this truly special is the balance. It’s not too sweet, but it’s not bland. It’s the kind of dessert that makes you feel like you’re winning at life. It’s healthy, sure, but it doesn’t taste like it. It tastes like indulgence. And honestly, that’s the key to sticking with a healthy lifestyle. You need to enjoy what you eat.
What Ingredients You Will Need
Before we get to the freezing part, let’s talk about what goes into the pint. The beauty of the Ninja Creami is that it uses a “base” rather than a traditional ice cream mix with eggs and cream. This means we need to be strategic about our liquids and fats to ensure that creamy texture. If you get the ratio wrong, you’ll end up with a block of protein ice. So, pay attention here.
- Vanilla Protein Powder (1 scoop, approx. 30g): This is your foundation. I recommend a high-quality whey isolate or a plant-based blend like pea and rice. Avoid cheap blends with fillers, as they can make the texture gritty. I personally stick with brands that have minimal ingredients. If you prefer chocolate, go for it, but adjust the sweetener accordingly.
- Full-Fat Greek Yogurt (1/2 cup): This is the secret weapon. The fat content in full-fat yogurt creates that luxurious mouthfeel. Skim yogurt will result in a icier texture. Use plain, unsweetened yogurt so you control the sugar levels. Brands like Fage or Chobani work well, but any thick, Greek-style yogurt will do the job.
- Unsweetened Almond Milk (1/4 to 1/2 cup): You need liquid to help the blades spin. Start with a quarter cup and add more if the mixture looks too thick. The liquid helps create the “nice cream” consistency. If you’re dairy-free, oat milk is a great alternative because it’s naturally creamier than almond milk.
- Heavy Cream or Coconut Cream (1-2 tablespoons): This is optional but highly recommended for maximum creaminess. A splash of heavy cream adds fat and richness. If you’re vegan, a spoonful of thick coconut cream works beautifully. Don’t skip this if you want that restaurant-quality texture.
- Sweetener (Optional, 1-2 teaspoons): Most protein powders are sweet enough. However, if you’re using an unflavored or lightly flavored protein, you might want a touch of honey, maple syrup, or stevia. Taste your mix before freezing. It should taste slightly sweeter than you like, as freezing dulls sweetness.
- Flavor Boosters (Optional): A dash of vanilla extract enhances the vanilla flavor. A teaspoon of cocoa powder for chocolate. Or a tablespoon of peanut butter for a nutty twist. These additions change the game entirely.
Keep it simple. You don’t need fancy superfoods. You need the right balance of protein, fat, and liquid. If you have these basics, you’re ready to blend.
Equipment Needed
You don’t need a professional kitchen to make this. Just a few key tools. First and foremost, the Ninja Creami itself. Obviously. Make sure you have the pint containers. I recommend getting a multi-pack so you can make multiple flavors at once. If you don’t have the Creami, you can use a standard blender and freeze the mixture in ice cube trays, then blend again, but the texture won’t be the same. It’s less creamy and more slushy.
You’ll also need a small mixing bowl and a whisk or spoon. A measuring cup set is helpful for precision. If you’re adding mix-ins like chocolate chips or nuts, have a small spoon ready. That’s pretty much it. Nothing fancy. Nothing expensive. Just the basics to get the job done. If you’re new to the machine, just make sure the pint is frozen solid before you try to spin it. That’s the most common mistake people make.
Preparation Method
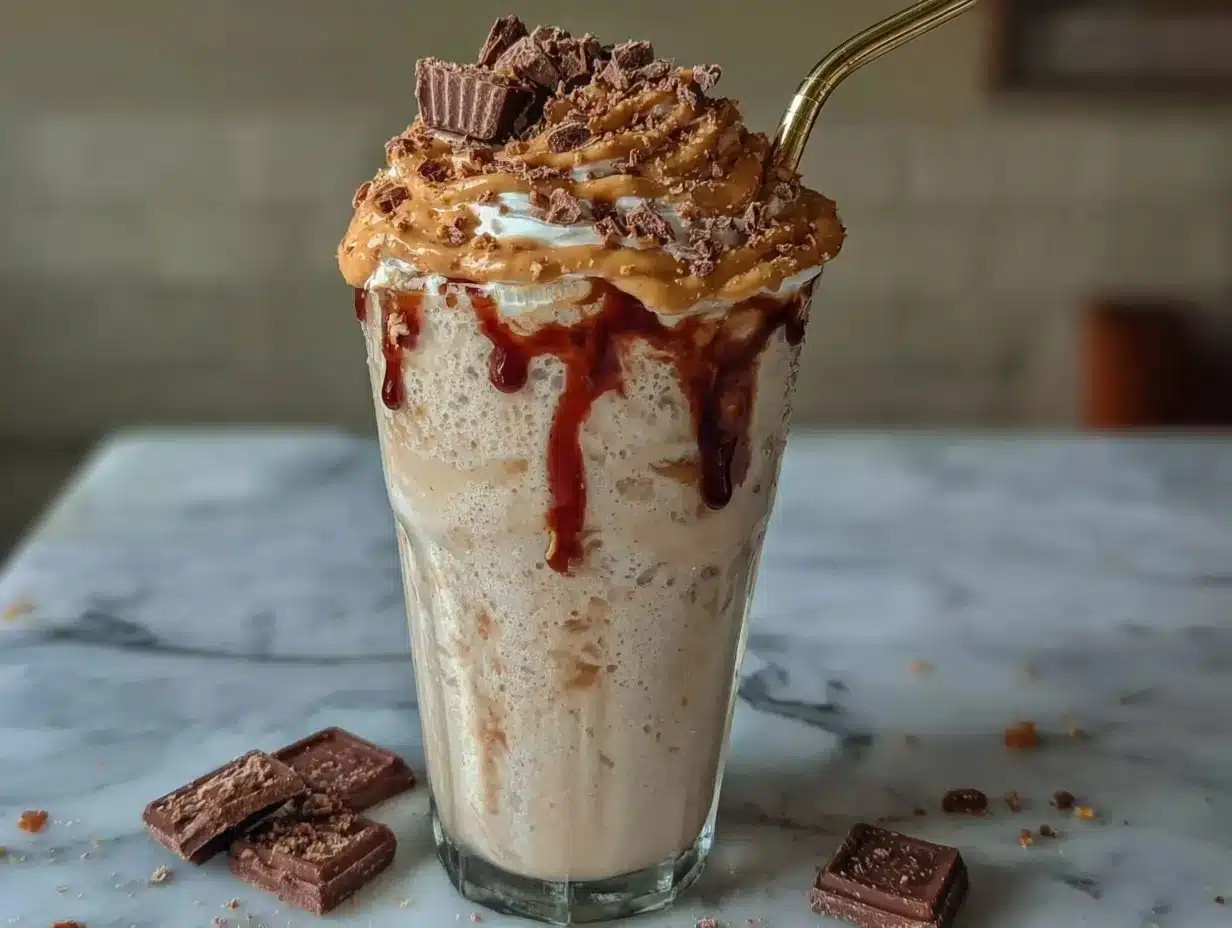
Okay, let’s get into the nitty-gritty. This part is easier than making a smoothie, but there are a few tricks to getting that perfect texture. Follow these steps closely, and you’ll be rewarded with a creamy, dreamy treat.
- Mix the Base (2 minutes): In your mixing bowl, combine your protein powder, Greek yogurt, almond milk, heavy cream, and any sweeteners or flavorings. Whisk this together vigorously. You want to make sure there are no clumps of protein powder left. If you can see white specks, keep whisking. This step is crucial for a smooth final product. The mixture should look like a thick, pourable batter. If it’s too thick to stir, add a splash more milk. If it’s too runny, add a bit more yogurt.
- Fill the Pint (1 minute): Pour the mixture into your Ninja Creami pint container. Leave about half an inch of space at the top. This is called the “headspace,” and it’s important for the expansion during freezing. If you overfill it, the mixture might spill out when you spin it. Screw the lid on tightly.
- Freeze Solid (24 hours): Place the pint in the freezer. This is the waiting game. You need to freeze it for a full 24 hours. I know, it’s tempting to try it after 12 hours, but don’t. If it’s not frozen solid, the machine will just mash it into a soup. Set a timer. Go to work. Come home. Forget about it.
- The First Spin (5 minutes): After 24 hours, take the pint out. Make sure the lid is off. Place it in the machine. Select the “Ice Cream” setting. Press start. The machine will spin the frozen block into ice cream. It might look a bit dry or crumbly at first. This is normal. It’s called “nice cream,” and it’s supposed to look like soft serve.
- Add Mix-Ins (Optional): If you want chocolate chips, nuts, or fruit swirls, use the “Mix-In” setting. If you don’t have the Mix-In function, just stir them in manually after the first spin. Be gentle so you don’t break up the ice cream too much.
- The Second Spin (If Needed): If after the first spin, the ice cream still looks too dry or crumbly, add a splash of milk (about 1-2 tablespoons) directly into the pint. Put the lid back on and spin it again using the “Lite Ice Cream” or “Ice Cream” setting. This rehydrates the mix and brings it together into a smooth, creamy consistency. This is the pro tip most people miss. Don’t skip this if it looks dry.
- Serve Immediately: The Creami ice cream is best served immediately. It’s soft-serve consistency. If you want it harder, put it back in the freezer for 30 minutes. But honestly, eating it right out of the machine is the best experience.
Cooking Tips & Techniques
I’ve learned a few things the hard way, mostly through frozen accidents and wasted ingredients. Here are some tips to ensure your creamy Ninja Creami protein shake turns out perfectly every time.
Temperature Matters: Make sure your liquid ingredients are cold before you mix them. If your milk and yogurt are warm, it takes longer to freeze, and the texture can suffer. I usually keep my yogurt in the freezer for an hour before mixing to help it chill down.
Don’t Skimp on Fat: I know, we’re trying to be healthy. But fat carries flavor and creates texture. If you use 0% fat yogurt, your ice cream will be icy. Use full-fat. It’s worth it. Your taste buds will thank you, and your macros will still be solid.
Watch the Protein Powder: Some protein powders absorb more liquid than others. Whey isolate is thinner, while casein or plant-based blends can be thicker. If your mix looks like dough, add more liquid. If it looks like water, add more yogurt or protein. Adjust as you go.
Avoid Air Pockets: When you fill the pint, tap it gently on the counter to remove any air bubbles. Air bubbles can cause uneven spinning. You want a dense, even mix.
Be Patient with the Second Spin: If you have to add milk for the second spin, don’t add too much at once. Add a tablespoon, spin, check, add another if needed. You want to achieve creaminess, not soup.
Variations & Adaptations
One of the best things about this recipe is how easy it is to tweak. Here are a few variations I love.
Chocolate Peanut Butter: Swap the vanilla protein for chocolate. Add a tablespoon of cocoa powder. Swirl in a teaspoon of peanut butter before spinning. It’s like a Reese’s cup in ice cream form.
Banana Nut: Add half a frozen banana to the mix before blending. It adds natural sweetness and creaminess. Add chopped walnuts after the first spin. It’s a classic combination for a reason.
Coffee Lover’s: Use cold brew coffee instead of almond milk. Add a tablespoon of instant coffee granules to the mix. It’s a perfect post-dinner pick-me-up that won’t keep you up all night if you have the caffeine tolerance for it.
Vegan Version: Use plant-based protein powder, coconut yogurt, and oat milk. The texture is surprisingly similar, especially if you use full-fat coconut milk.
Serving & Storage Suggestions
This ice cream is best enjoyed fresh. It doesn’t store well in the traditional sense. If you leave it in the freezer for more than a few hours, it will harden into a rock. If you want to store it, put it in an airtight container, but expect to let it sit on the counter for 10 minutes before eating. I usually make one pint for myself and eat it all in one sitting. It’s that good, and it’s high protein, so it keeps you full.
For serving, top it with fresh berries, a drizzle of honey, or a sprinkle of chia seeds. It looks beautiful in a bowl and makes for great Instagram photos. Pair it with a black coffee or a green tea for a balanced treat.
Nutritional Information & Benefits
Let’s talk numbers. One pint (serving size approx. 1/2 cup) contains roughly 25-30 grams of protein, depending on your powder. It has about 150-200 calories, mostly from the yogurt and cream. It’s low in sugar if you use unsweetened ingredients. It’s a great post-workout snack because it provides quick-digesting protein and carbs if you add fruit. It’s also gluten-free and can be made dairy-free. It’s a smart choice for anyone watching their weight or trying to build muscle.
Conclusion
Making a creamy Ninja Creami protein shake at home is a game-changer. It’s easy, it’s delicious, and it fits into almost any diet. I hope you try this recipe and find it as life-changing as I did. Don’t be afraid to experiment with flavors. Make it yours. And if you do, let me know in the comments what flavor you tried. I’m always looking for new ideas.
Happy blending! And remember, the freezer is your friend.
FAQs
Can I use frozen fruit in the mix?
Yes, you can. However, frozen fruit adds extra ice crystals, which can make the texture icier. If you use frozen fruit, you may need to add a little more liquid or do an extra spin to get it creamy.
Why is my ice cream still icy after the second spin?
This usually means there isn’t enough fat or sugar in the mix. Fat and sugar prevent ice crystals from forming. Try adding a tablespoon of heavy cream or a bit more sweetener and spin again.
Can I make this without a Ninja Creami?
You can, but the texture will be different. You would need to blend the ingredients, freeze them in a shallow pan, and scrape them with a fork every hour until fluffy. It’s more work and less creamy.
How long does it last in the freezer?
It’s best eaten within 24 hours. After that, it will harden and lose its soft-serve texture. You can store it for up to a week, but you’ll need to let it thaw before eating.
Is this recipe keto-friendly?
It can be. Use a keto-friendly protein powder, heavy cream instead of milk, and no added sugar. It fits well into a low-carb lifestyle.
Pin This Recipe!

Ninja Creami Protein Shake: The Copycat That Outdoes The Original
- Total Time: 24 hours 5 minutes
- Yield: 1 pint (approx. 4 servings) 1x
Description
A creamy, high-protein frozen dessert made in the Ninja Creami that serves as a healthy breakfast, post-workout snack, or late-night treat without the sugar crash or chalky texture of traditional protein shakes.
Ingredients
- 1 scoop (approx. 30g) Vanilla Protein Powder (whey isolate or plant-based blend)
- 1/2 cup Full-Fat Greek Yogurt (plain, unsweetened)
- 1/4 to 1/2 cup Unsweetened Almond Milk
- 1–2 tablespoons Heavy Cream or Coconut Cream
- 1–2 teaspoons Sweetener (optional: honey, maple syrup, or stevia)
- Optional Flavor Boosters: vanilla extract, cocoa powder, or peanut butter
Instructions
- In a mixing bowl, combine protein powder, Greek yogurt, almond milk, heavy cream, and sweeteners. Whisk vigorously until no clumps remain and the mixture resembles a thick, pourable batter.
- Pour the mixture into a Ninja Creami pint container, leaving about half an inch of headspace at the top. Screw the lid on tightly.
- Place the pint in the freezer for a full 24 hours until frozen solid.
- Remove the pint from the freezer, remove the lid, and place it in the Ninja Creami. Select the ‘Ice Cream’ setting and press start to spin the frozen block.
- If desired, add mix-ins (chocolate chips, nuts, fruit) using the ‘Mix-In’ setting or stir them in manually after the first spin.
- If the texture appears dry or crumbly after the first spin, add 1-2 tablespoons of milk, replace the lid, and spin again using the ‘Lite Ice Cream’ or ‘Ice Cream’ setting until smooth.
- Serve immediately for a soft-serve consistency, or freeze for 30 minutes if a harder texture is preferred.
Notes
[‘Ensure liquid ingredients are cold before mixing to help with freezing.’, ‘Do not skip the fat content (full-fat yogurt/cream) as it prevents icy texture.’, ‘Tap the pint gently on the counter to remove air bubbles before freezing.’, ‘If the mix is too thick to stir, add more milk; if too runny, add more yogurt.’, ‘Best eaten within 24 hours; will harden if stored longer.’]
- Prep Time: 5 minutes
- Cook Time: 24 hours (freezing)
- Category: Dessert
- Cuisine: American
Nutrition
- Serving Size: 1/2 cup
- Calories: 175
- Sugar: 8
- Sodium: 80
- Fat: 6
- Saturated Fat: 3
- Carbohydrates: 12
- Fiber: 1
- Protein: 25
Keywords: Ninja Creami, protein ice cream, high protein dessert, healthy ice cream, copycat recipe, post-workout snack, gluten-free dessert, keto friendly


