
There is nothing quite like the sound of a crisp, golden bite shattering under your teeth. It’s the kind of sound that makes you close your eyes and forget about the chaos in the kitchen. I remember the first time I made these ham and cheese sticks, it was during a Super Bowl party where I was supposed to be hosting but ended up hiding in the pantry to eat them before the guests arrived. Let’s face it, some recipes are just too good to share immediately.
These aren’t your average, soggy appetizers that sit in a slow cooker for three hours and turn into a greasy mess. These are Crispy Baked Ham Cheese Sticks. They are the perfect balance of salty, savory, and crunchy without the guilt of deep frying. I’ve tested this recipe over a dozen times, tweaking the breading and the bake time, to get that perfect shatter-crisp exterior while keeping the cheese gooey and warm inside. Honestly, it’s the kind of snack that disappears before you can even grab a napkin.
If you are looking for an easy appetizer recipe that impresses, look no further. This dish is perfect for busy weeknights, game days, or just when you need a little comfort food fix. The beauty of Crispy Baked Ham Cheese Sticks is how simple they are to make. You likely have most of the ingredients in your fridge right now. It’s not about fancy techniques; it’s about smart shortcuts and getting the texture just right. I promise you, once you try these, you won’t go back to store-bought versions.
As someone who has spent years developing recipes for different dietary needs, I know how hard it is to find snacks that everyone agrees on. Kids want crunch, adults want flavor, and everyone wants something that doesn’t take an hour to prep. These sticks hit all those marks. They are sturdy enough to hold up to a dip but light enough to eat while standing around chatting. Plus, baking them means less oil splatter on your stove, which is a huge win for cleanup day. So, let’s get cooking and make something truly special.
Why You’ll Love This Recipe
Let’s be real for a second. Not all appetizers are created equal. Some are just filler, but this recipe? This is the star of the show. I developed this specific method for Crispy Baked Ham Cheese Sticks after realizing that most baked versions lacked that essential crunch. I wanted something that felt indulgent but was actually healthier. Here is why this recipe stands out from the crowd.
- Quick & Easy: You can have these ready in under 30 minutes. That is perfect for those nights when you realize you need an appetizer ten minutes before guests arrive. No fancy prep, just assemble and bake.
- Simple Ingredients: You don’t need a trip to a specialty store. Ham, cheese, breadcrumbs, and spices. If you can make a sandwich, you can make these. It’s that straightforward.
- Perfect for Game Day: Whether it’s the Super Bowl, the World Cup, or just Sunday football, these are the ultimate finger food. They hold their shape well and don’t drip grease everywhere.
- Crowd-Pleaser: I’ve served these to picky eaters and foodies alike, and the result is always the same: empty plates. The combination of salty ham and melted cheese is a classic for a reason.
- Unbelievably Delicious: The texture is next-level. The outside is shatteringly crisp, while the inside is warm and gooey. It’s comfort food reimagined for the modern kitchen.
What makes this recipe different is the double-dredge technique. Most people just coat the sticks once, but I found that dipping them in flour, then egg, then breadcrumbs, and then back into the egg creates layers of crunch that actually stay crunchy. It’s a small step that makes a huge difference. Also, using smoked ham adds a depth of flavor that regular ham just doesn’t have. It’s subtle, but your taste buds will notice. This isn’t just another cheese stick recipe; it’s the best version of one. It’s the kind of snack that makes you feel like a pro chef, even if you’re just using ingredients from your local grocery store.
What Ingredients You Will Need
This recipe relies on a few key components to build that perfect structure. You want ingredients that offer both flavor and texture. The goal is to create a stick that doesn’t fall apart in the oven but also doesn’t taste like cardboard. Here is what you need to gather before you start.
- Smoked Ham Slices: You will need about 8 to 10 slices. Look for thick-cut ham if you can find it. Thin ham can get too salty and might burn. Smoked ham adds a nice savory depth that pairs perfectly with cheese. If you can’t find smoked, regular honey ham works, but the flavor profile will be milder.
- Sharp Cheddar Cheese: Use a block of sharp cheddar and grate it yourself. Pre-shredded cheese has anti-caking agents that prevent it from melting smoothly. You want that gooey, stringy pull. Grate it into thick shreds, not fine dust. You will need about one cup of shredded cheese.
- Flour: All-purpose flour is standard here. It helps the egg wash stick to the ham. You only need about half a cup. Make sure it is sifted if it looks lumpy.
- Eggs: Two large eggs are needed for the egg wash. Whisk them well with a splash of milk or water to make the coating smoother. Room temperature eggs work best for even coating.
- Panko Breadcrumbs: This is the secret weapon. Regular breadcrumbs are too dense. Panko creates those big, airy, crunchy flakes that look amazing and feel light. Use plain panko, or seasoned if you prefer a head start on flavor. You will need about one cup.
- Dijon Mustard: Just a tablespoon of Dijon adds a tangy kick that cuts through the richness of the cheese. It’s an optional but highly recommended ingredient for complexity.
- Garlic Powder and Onion Powder: These pantry staples add savory notes without adding moisture. Use about half a teaspoon of each. Avoid using fresh garlic, as it can burn in the oven.
- Cayenne Pepper: A pinch of cayenne adds a tiny bit of heat. It wakes up the palate. If you don’t like spice, skip it, but it adds a nice background warmth.
- Cooking Spray: You will need a non-stick cooking spray to coat the baking sheet. This ensures the bottoms get golden brown without sticking.
I personally recommend using a brand like Kikkoman for any sauces if you decide to add a dipping sauce later, but for the sticks themselves, keep it simple. Look for firm, small-curd cottage cheese if you decide to mix it into the cheese for extra protein, though for this classic version, straight cheddar is best. In the winter, sharp cheddar is more flavorful, so that is when these shine brightest.
Equipment Needed
You don’t need a fancy kitchen to make these Crispy Baked Ham Cheese Sticks. Here is what you’ll need to get the job done efficiently.
- Baking Sheets: Two standard half-sheet pans are ideal. If you only have one, you will need to bake in batches. Make sure they are heavy-duty so they don’t warp in the heat.
- Parchment Paper: Line your baking sheets with parchment paper. This is non-negotiable for easy cleanup. It also helps prevent sticking better than foil alone.
- Three Shallow Bowls: You need three separate bowls for the dredging station. One for flour, one for the egg wash, and one for the panko breadcrumbs. Glass or ceramic bowls work best because they are stable and don’t tip over easily.
- Whisk: A simple wire whisk is all you need for the eggs.
- Grater: A box grater is perfect for shredding the cheese block. A microplane might be too fine, so stick to the larger holes.
- Pastry Brush: Optional, but helpful for brushing extra oil on top for even browning.
If you don’t have a box grater, a food processor with a shredding attachment works wonders. Just be careful not to over-process the cheese. For budget-friendly options, any basic stainless steel baking sheet from a discount store will work fine. Just ensure it is flat and clean. Maintenance tip: Always let your baking sheets cool before washing them to keep them from warping over time.
Preparation Method
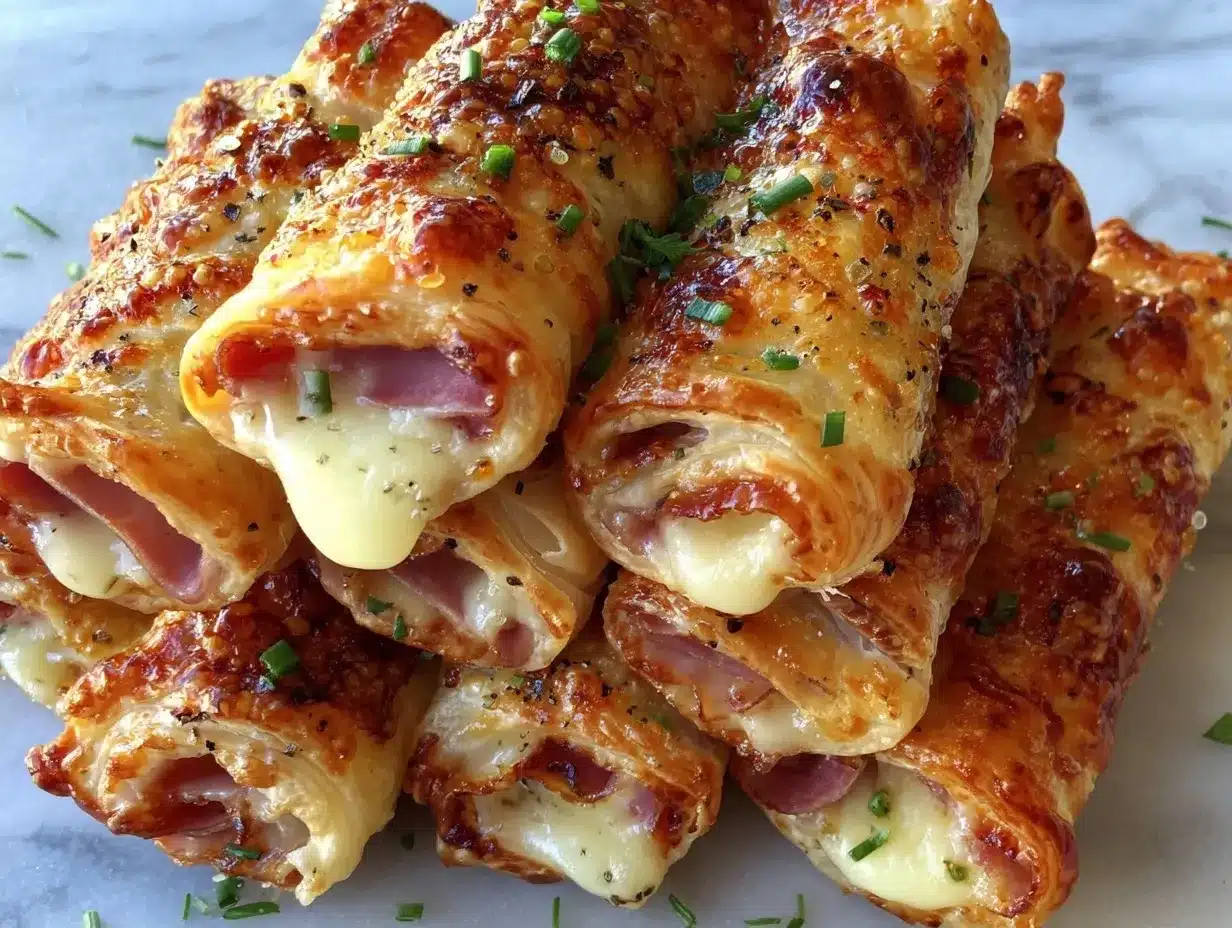
Getting the technique right is the difference between a soggy snack and a crispy masterpiece. Follow these steps carefully for the best results with your Crispy Baked Ham Cheese Sticks.
- Prep Your Station (5 Minutes): Preheat your oven to 400°F (200°C). Line two baking sheets with parchment paper. Set up your three bowls in a row: flour in the first, whisked eggs in the second, and panko breadcrumbs in the third. Add the garlic powder, onion powder, and cayenne to the panko and mix well. This ensures the seasoning is distributed evenly in the crust.
- Prepare the Cheese Filling (5 Minutes): Take your block of cheddar and grate it using the large holes of your box grater. Place the shreds in a bowl. If the cheese is too cold, it might be hard to grate, so let it sit out for five minutes. You want loose shreds, not a clump.
- Assemble the Sticks (10 Minutes): Lay out a slice of smoked ham on a clean cutting board. Place a generous amount of shredded cheese in the center of the ham, leaving about an inch of space on all sides. Roll the ham tightly around the cheese. You should end up with a log shape. If the ham tears, use a second slice to patch it. Repeat with all slices. You should have about 8 to 10 rolls.
- Cut the Rolls (5 Minutes): Using a sharp knife, cut each roll in half crosswise. You now have 16 to 20 individual sticks. If you prefer smaller appetizers, cut them into thirds. Place the cut sticks on a plate, cut side down, to keep the cheese from spilling out.
- Dredge the Sticks (10 Minutes): This is the most important step. Take one stick and dredge it in the flour, shaking off any excess. Next, dip it into the egg wash, making sure it is fully coated. Finally, press it firmly into the panko mixture. Use your fingers to press the crumbs onto the stick so they adhere. Place it on the baking sheet. Repeat with all sticks. Do not skip the flour step; it helps the egg stick to the ham.
- Bake (12-15 Minutes): Lightly spray the tops of the sticks with cooking spray. This helps them brown evenly. Bake for 12 to 15 minutes, or until the coating is golden brown and the cheese is melted. Rotate the pans halfway through baking for even color. The sticks are done when the panko is crispy to the touch.
- Cool and Serve (5 Minutes): Remove from the oven and let them cool on the pan for 2 minutes. This allows the cheese to set slightly so it doesn’t ooze out when you bite. Serve warm with your favorite dipping sauce.
Personal tip: If you find the cheese is leaking out during baking, your rolls might be too loose. Tuck the ends of the ham under tightly. Also, don’t overcrowd the pan. The sticks need space for air to circulate, or they will steam instead of crisp up.
Cooking Tips & Techniques
After making these hundreds of times, I’ve learned a few tricks to ensure success. The biggest mistake people make is using cold cheese. If the cheese is too cold, it won’t melt properly, and if it’s too warm, it might melt before it hits the oven. Room temperature cheese is ideal. Another tip is to press the panko crumbs firmly. If they are loose, they will fall off in the oven. Use your fingers to pat them down.
Timing is everything. Watch the oven closely after 10 minutes. Panko can go from golden to burnt in just a minute. If you notice them browning too fast, lower the temperature by 25 degrees. Multitasking helps here. While the sticks are baking, prepare your dipping sauce. This keeps you from being stuck in the kitchen alone.
For consistency, try to make all the sticks the same size. If one is thicker than the others, it will take longer to cook. Use a ruler if you are being precise, but eyeballing it usually works. Also, make sure your baking sheet is at room temperature when you place the sticks on it. A cold sheet can lower the oven temperature temporarily and affect the crispness.
Variations & Adaptations
While the classic ham and cheese version is my favorite, there are many ways to twist this recipe. You can swap the ham for turkey or prosciutto for a different flavor profile. Prosciutto is saltier, so you might want to reduce the amount of seasoning. For a spicy kick, add diced jalapeños to the cheese filling. This creates a “jalapeño popper” vibe.
If you are looking for a gluten-free option, use gluten-free panko breadcrumbs. They have improved greatly in texture and work well here. For a dairy-free version, use a vegan cheese block that melts well, like Daiya or Violife. However, note that vegan cheese doesn’t melt quite the same way, so the texture will be slightly different.
Seasoning variations are endless. Try adding dried herbs like thyme or rosemary to the panko for an earthy note. Or use smoked paprika instead of cayenne for a smoky heat. I once tried adding sun-dried tomatoes to the filling, and it was surprisingly delicious. The acidity cut through the richness of the cheese. Feel free to experiment with flavors you enjoy.
Serving & Storage Suggestions
These Crispy Baked Ham Cheese Sticks are best served immediately after baking. The crunch is at its peak when they are hot out of the oven. Serve them with a side of spicy mustard, ranch dressing, or a sweet chili sauce. The contrast of sweet and spicy with the savory ham is fantastic. For presentation, arrange them on a platter with the dipping sauces in small ramekins in the center.
If you have leftovers, store them in an airtight container in the refrigerator for up to three days. To reheat, place them in an air fryer or toaster oven at 350°F for 3-4 minutes. This restores the crunch better than a microwave, which will make them soggy. You can also freeze the unbaked sticks on a baking sheet, then transfer them to a freezer bag. Bake from frozen, adding 2-3 minutes to the cook time.
The flavors develop over time, becoming more savory as they sit. However, the texture will soften. If you are meal prepping, consider keeping the components separate and assembling just before baking. This ensures maximum crispiness. For parties, these can be made ahead and reheated, but they are always best fresh.
Nutritional Information & Benefits
While these are an indulgent treat, they offer some nutritional benefits. Ham is a good source of protein, and cheese provides calcium and vitamin B12. By baking instead of frying, you significantly reduce the fat content. Each stick contains approximately 80-100 calories, depending on the size and cheese used. This makes them a manageable snack for most diets.
They are not gluten-free or dairy-free by default, so be mindful if you have allergies. The panko breadcrumbs contain wheat, and the cheese is dairy. However, the protein content helps keep you full longer than plain crackers or chips. I often enjoy these as a high-protein snack before a workout, though I save the heavier versions for game day. Moderation is key, but there is no shame in enjoying a crispy, cheesy treat.
Conclusion
Making Crispy Baked Ham Cheese Sticks is easier than you think and tastes even better than you imagine. It’s a recipe that brings people together, whether it’s for a big party or a quiet night in. I hope you try this recipe and find it to be a new favorite in your kitchen. Don’t be afraid to adjust the seasoning to your liking. Cooking is about making it your own.
Share your creations with me! I love seeing how you adapt recipes. Leave a comment below with your thoughts or tag me on social media. Let’s keep the conversation going about all things food. Happy cooking!
Frequently Asked Questions
Can I use pre-shredded cheese?
It is not recommended. Pre-shredded cheese contains cellulose, which prevents it from melting smoothly. You will end up with clumps of cheese rather than a gooey center. Grating your own cheese ensures the best texture.
How do I keep the cheese from leaking out?
Make sure to roll the ham tightly around the cheese. Tuck the ends of the ham under securely. Also, ensure the cheese is not packed too tightly, as it expands when melted. Leave a little room for the cheese to melt without bursting out.
Can I freeze these sticks?
Yes, you can freeze them before or after baking. To freeze unbaked, place them on a tray, freeze until solid, then transfer to a bag. Bake from frozen, adding a few minutes to the cook time. Baked sticks can be frozen and reheated in an air fryer.
What dipping sauces go best with ham and cheese?
Spicy mustard, honey mustard, ranch dressing, and sweet chili sauce are all excellent choices. The tanginess of mustard complements the saltiness of the ham perfectly.
Can I use turkey ham instead of smoked ham?
Yes, turkey ham works well, but it is milder in flavor. You might want to add a bit more seasoning to the panko or use a sharper cheese to balance the flavor. Smoked ham provides a deeper savory taste that is harder to replicate.
Pin This Recipe!
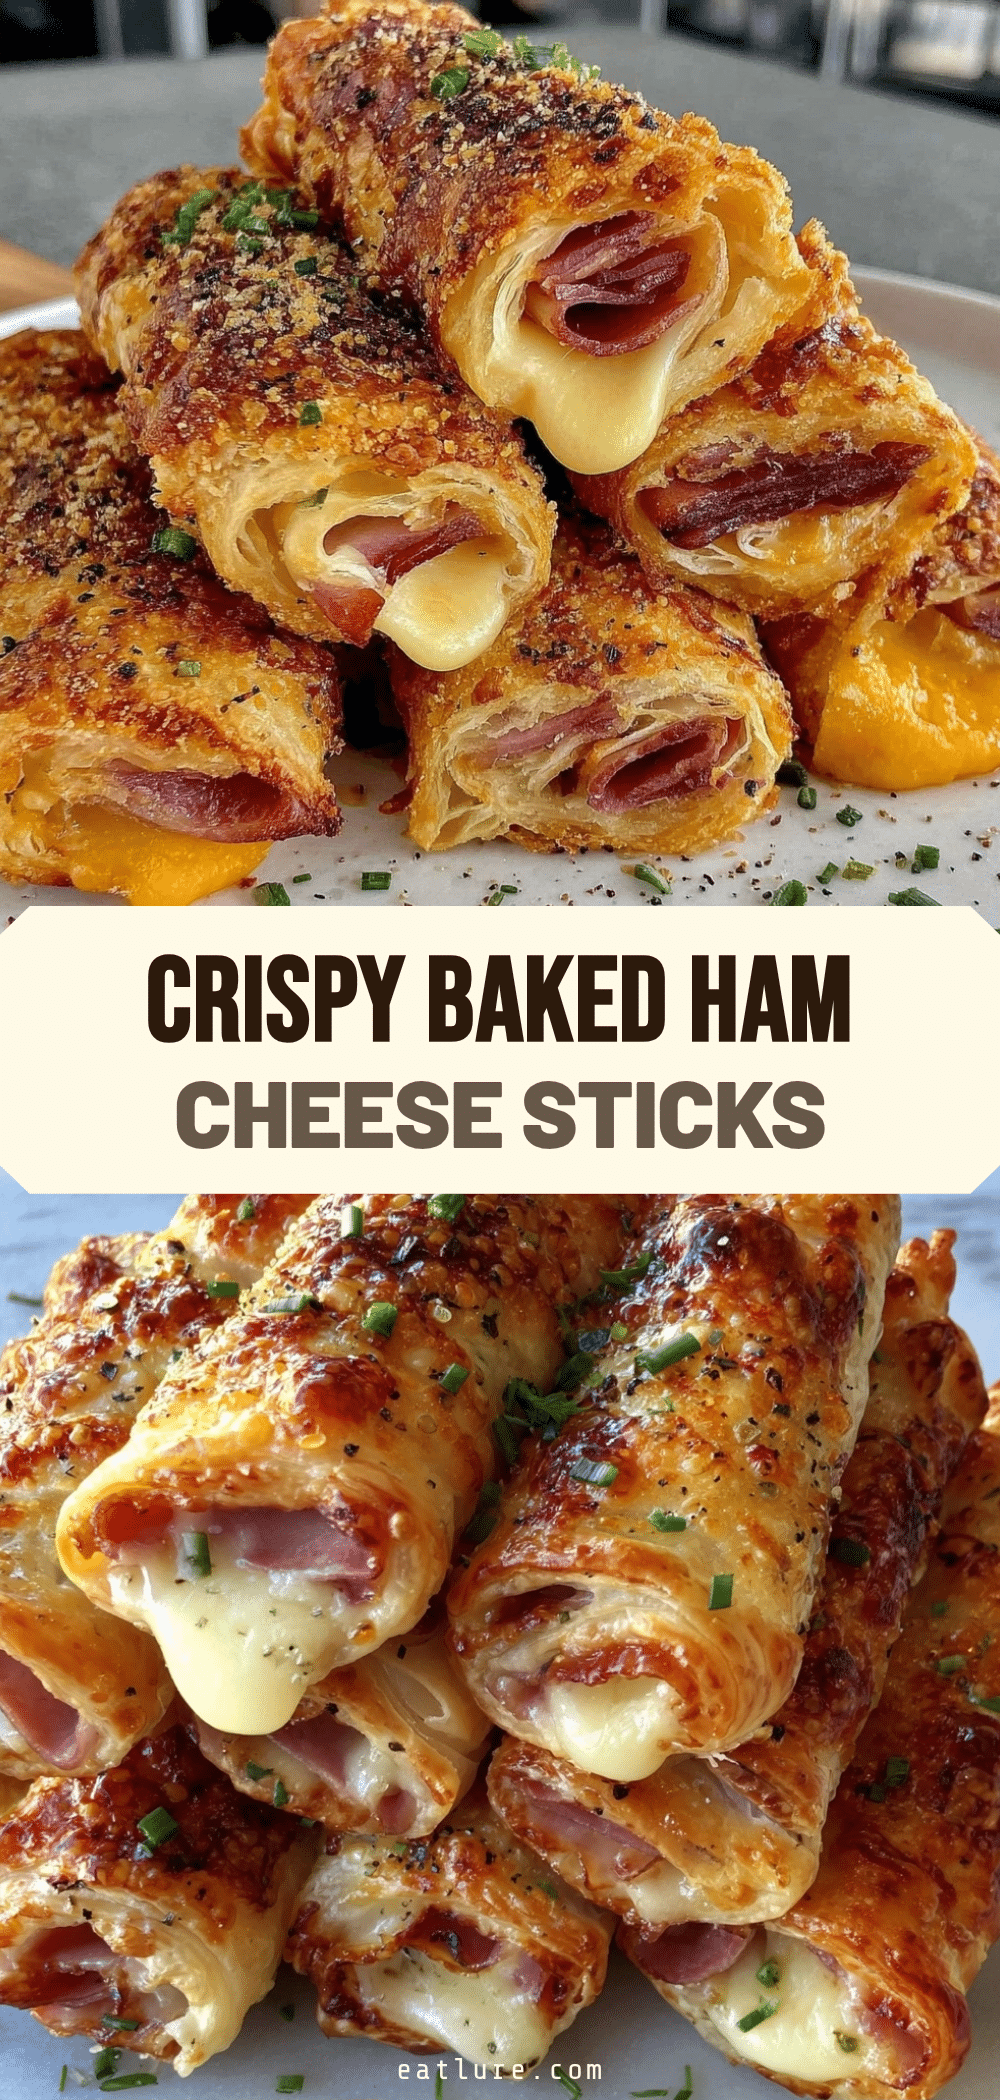

Crispy Baked Ham Cheese Sticks: Easy Appetizer Recipe
- Total Time: 45 minutes
- Yield: 16-20 servings 1x
Description
These Crispy Baked Ham Cheese Sticks offer a perfect balance of salty, savory, and crunchy flavors without the guilt of deep frying. Using a double-dredge technique with smoked ham and sharp cheddar, they bake up golden and shatter-crisp in under 30 minutes.
Ingredients
- 8–10 slices smoked ham (thick-cut preferred)
- 1 cup sharp cheddar cheese, grated into thick shreds
- 1/2 cup all-purpose flour
- 2 large eggs, whisked with a splash of milk or water
- 1 cup plain panko breadcrumbs
- 1 tablespoon Dijon mustard
- 1/2 teaspoon garlic powder
- 1/2 teaspoon onion powder
- Pinch of cayenne pepper
- Non-stick cooking spray
Instructions
- Preheat oven to 400°F (200°C). Line two baking sheets with parchment paper.
- Set up a dredging station with three shallow bowls: one with flour, one with whisked eggs, and one with panko breadcrumbs mixed with garlic powder, onion powder, and cayenne.
- Grate the cheddar cheese using the large holes of a box grater.
- Lay a slice of ham on a cutting board and place a generous amount of shredded cheese in the center, leaving an inch of space on all sides.
- Roll the ham tightly around the cheese to form a log. Repeat with remaining slices.
- Cut each roll in half crosswise to create 16-20 individual sticks. Place them cut-side down on a plate.
- Dredge each stick in flour, shaking off excess. Dip into the egg wash, then press firmly into the panko mixture to coat.
- Place sticks on the prepared baking sheets, ensuring they are not overcrowded.
- Lightly spray the tops of the sticks with cooking spray.
- Bake for 12-15 minutes, rotating pans halfway through, until the coating is golden brown and the cheese is melted.
- Remove from oven and let cool for 2 minutes before serving to allow the cheese to set.
Notes
Use a double-dredge technique (flour, egg, panko, egg, panko) for extra crunch if desired, though the single dredge described is sufficient. Ensure cheese is grated into thick shreds, not fine dust, to prevent clumping. Do not overcrowd the pan to ensure proper air circulation and crispiness. For best results, serve immediately. Leftovers can be reheated in an air fryer or toaster oven to restore crunch.
- Prep Time: 30 minutes
- Cook Time: 15 minutes
- Category: Appetizer
- Cuisine: American
Nutrition
- Serving Size: 1-2 sticks per servi
- Calories: 90
- Sugar: 1
- Sodium: 350
- Fat: 5
- Saturated Fat: 3
- Carbohydrates: 6
- Fiber: 0.5
- Protein: 5
Keywords: crispy baked ham cheese sticks, easy appetizer, game day food, baked cheese sticks, smoked ham recipe, panko breadcrumbs, party snacks


